follow us @
elainelaine
  • Home
  • Store
  • Blog
  • Contact Us
  • FAQ

Hexagon Sending Hugs card #2

11/9/2020

0 Comments

 
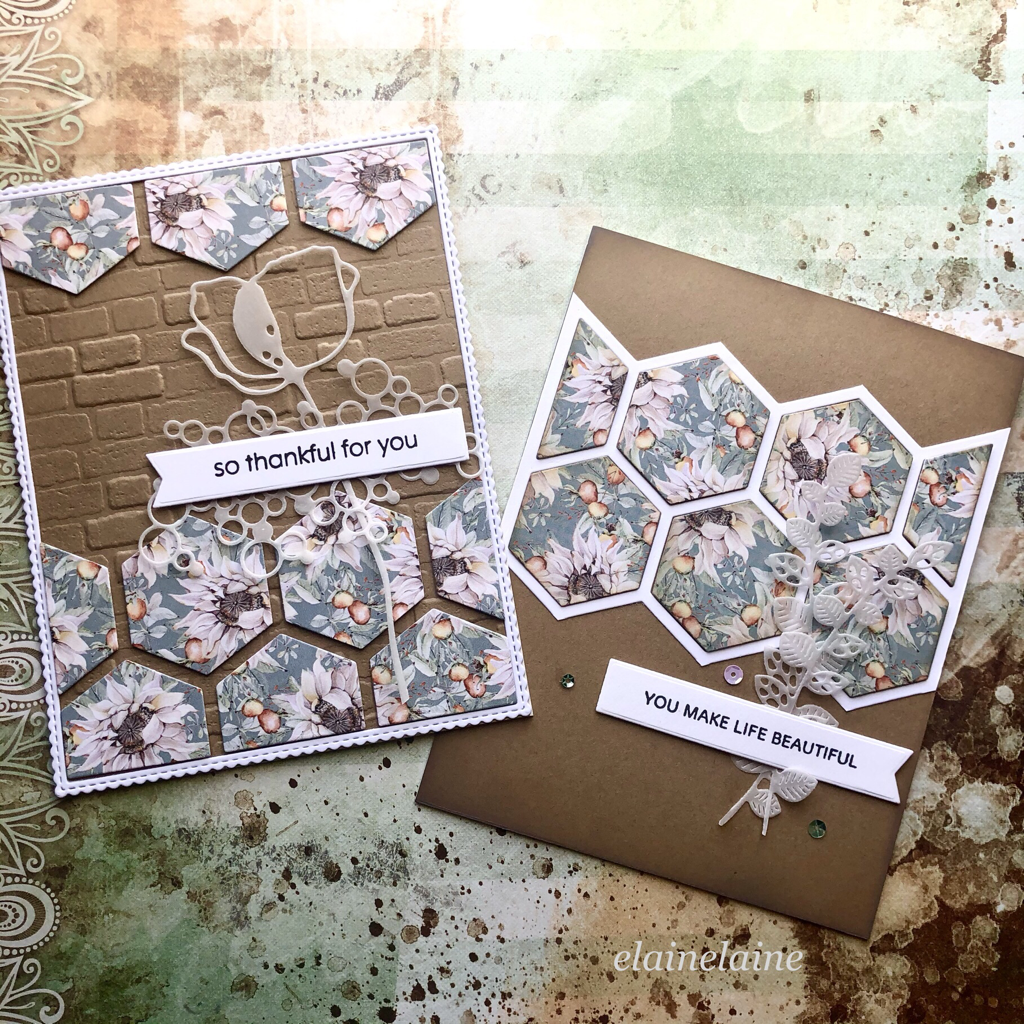
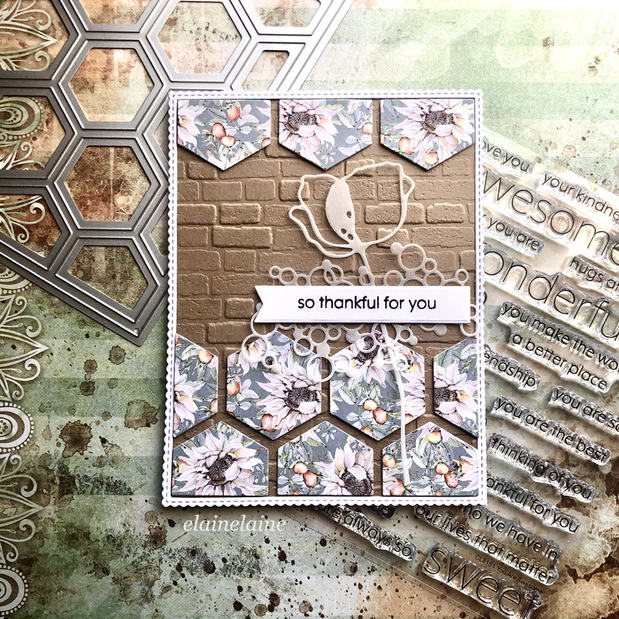
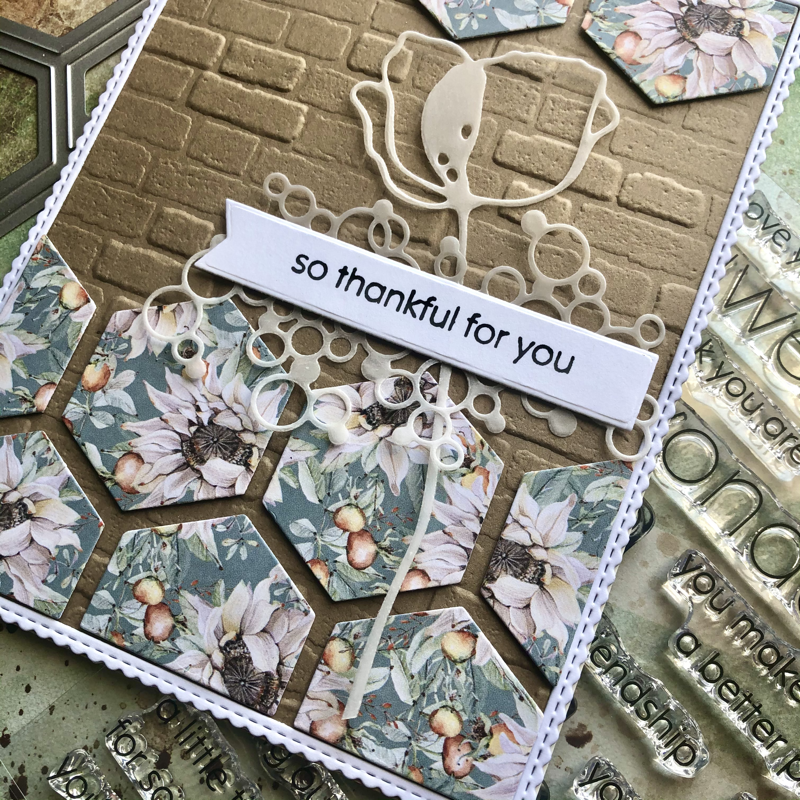
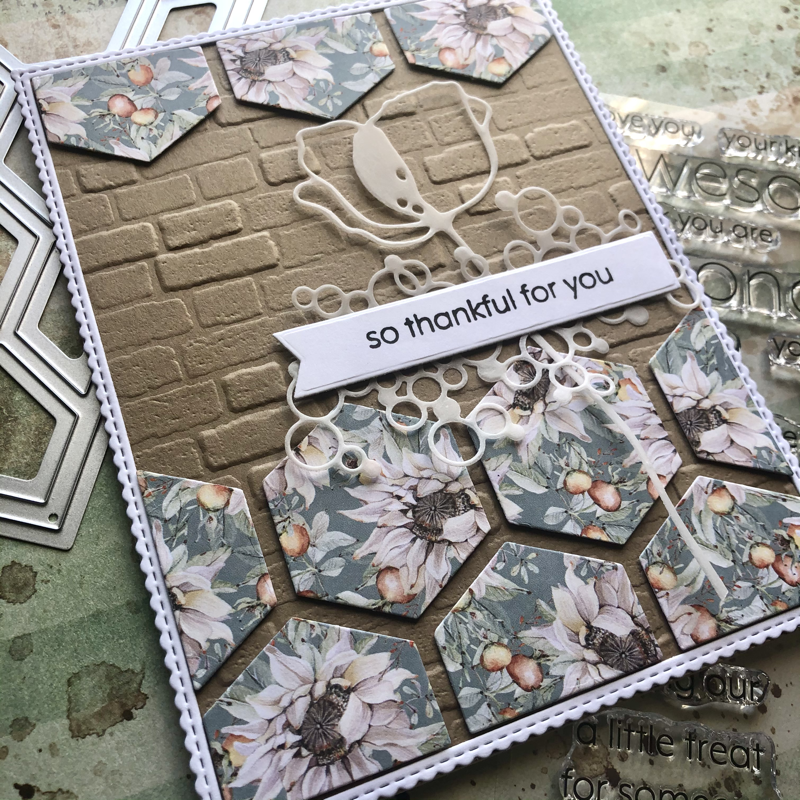
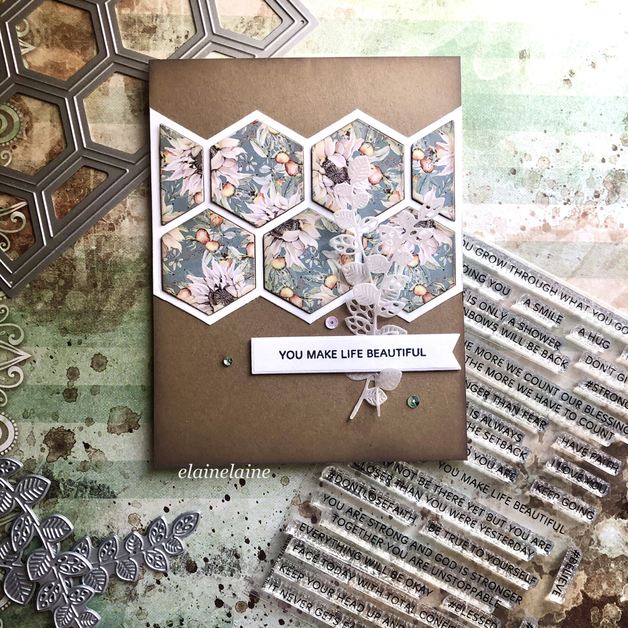
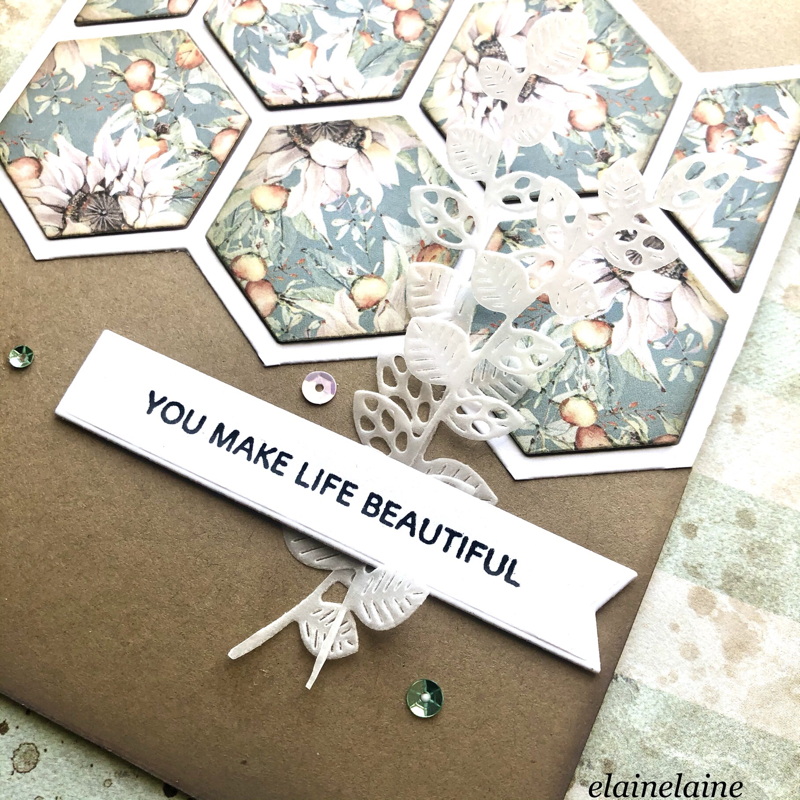
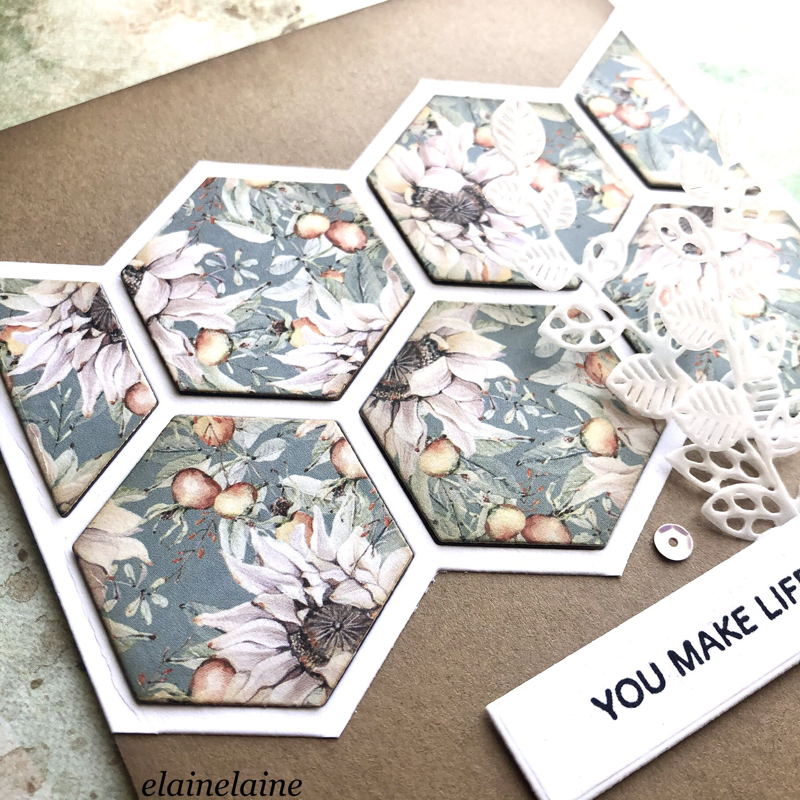
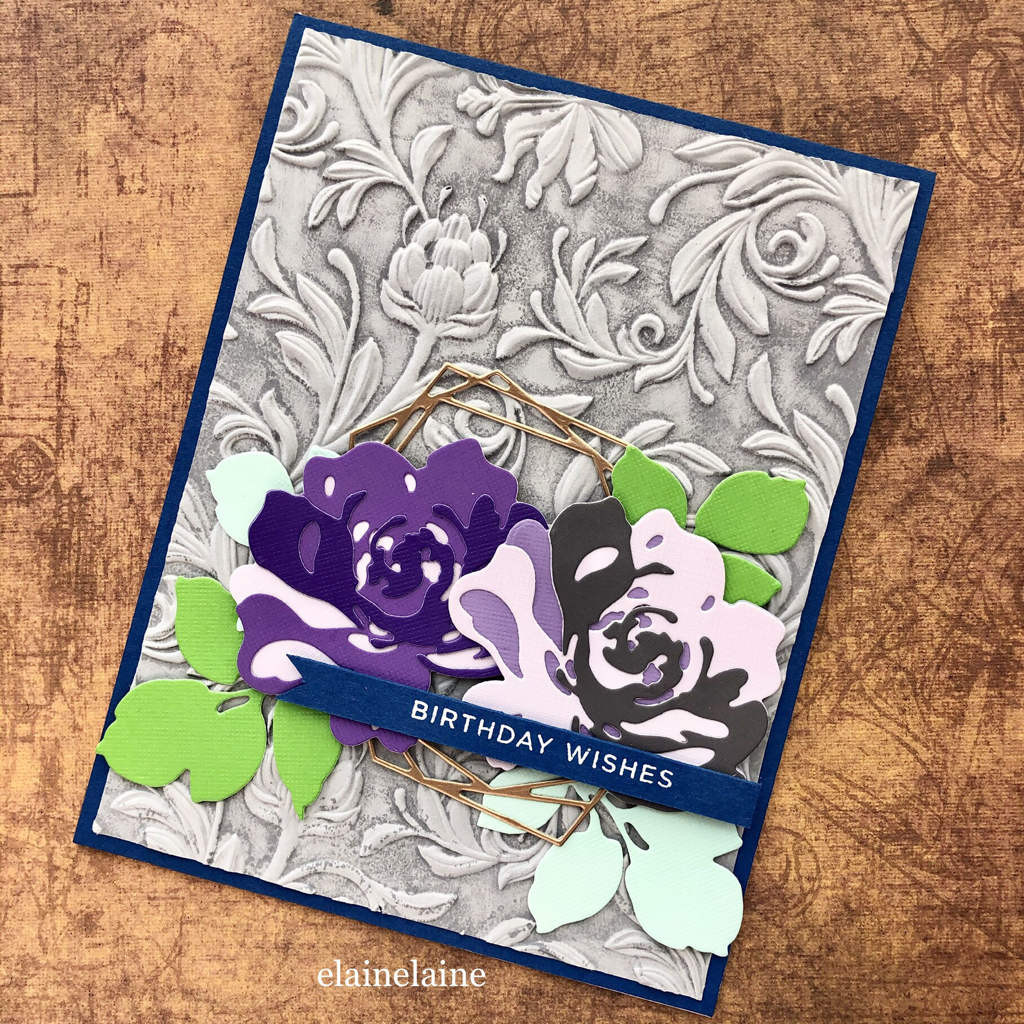
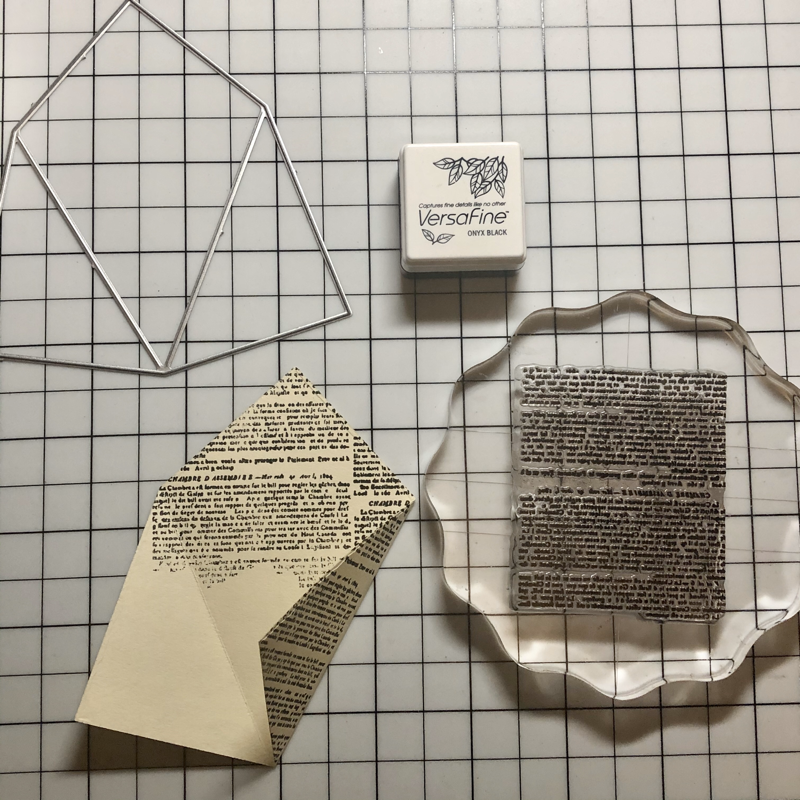
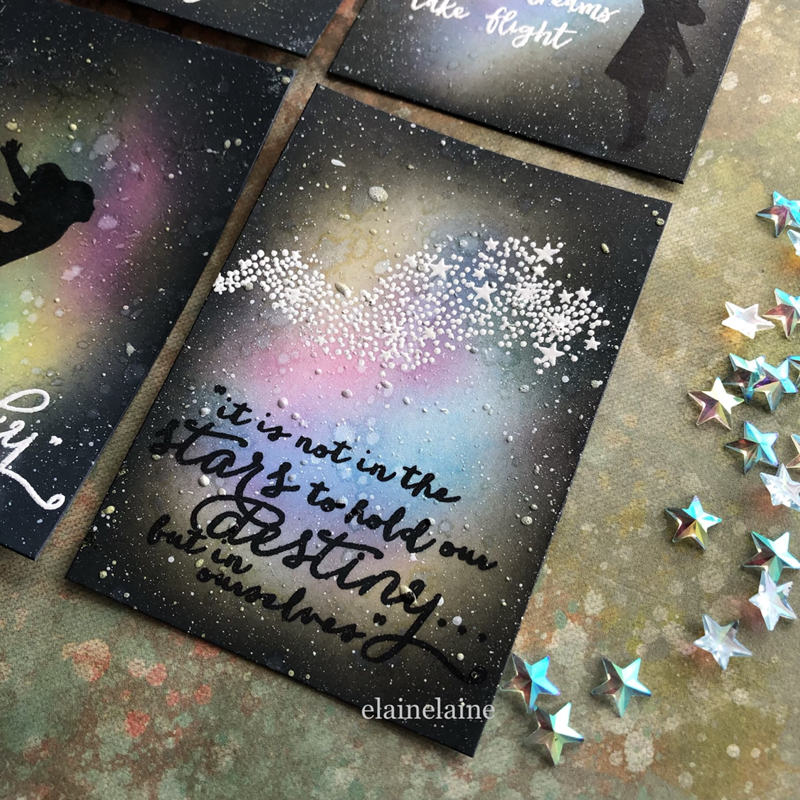
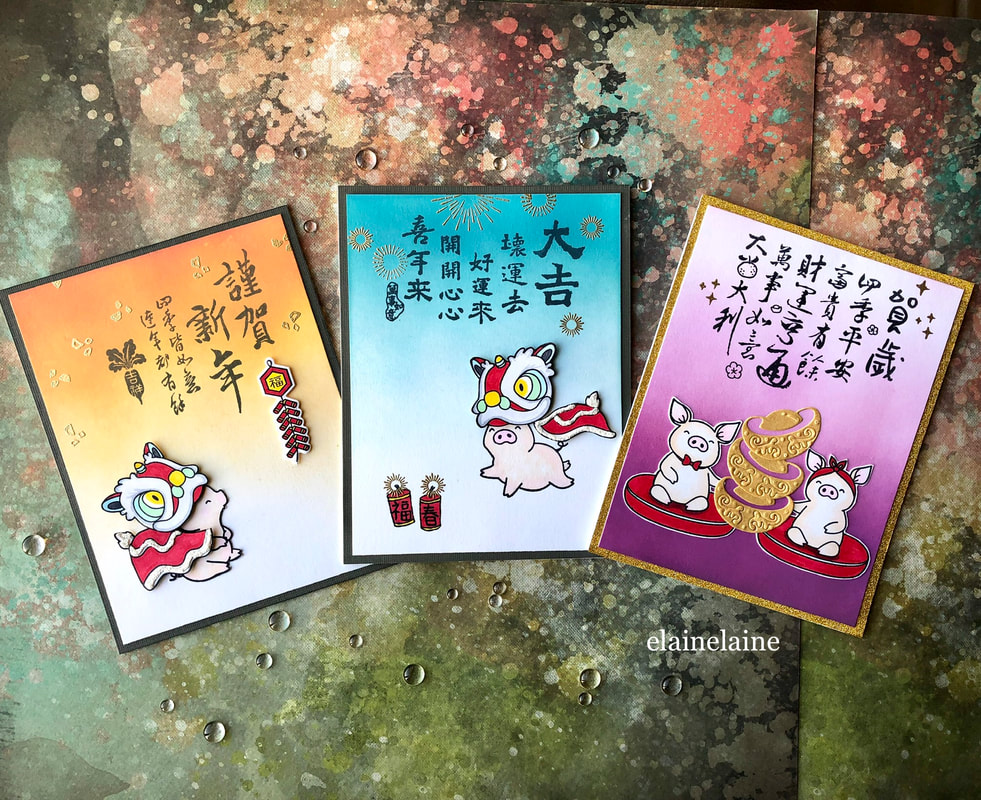
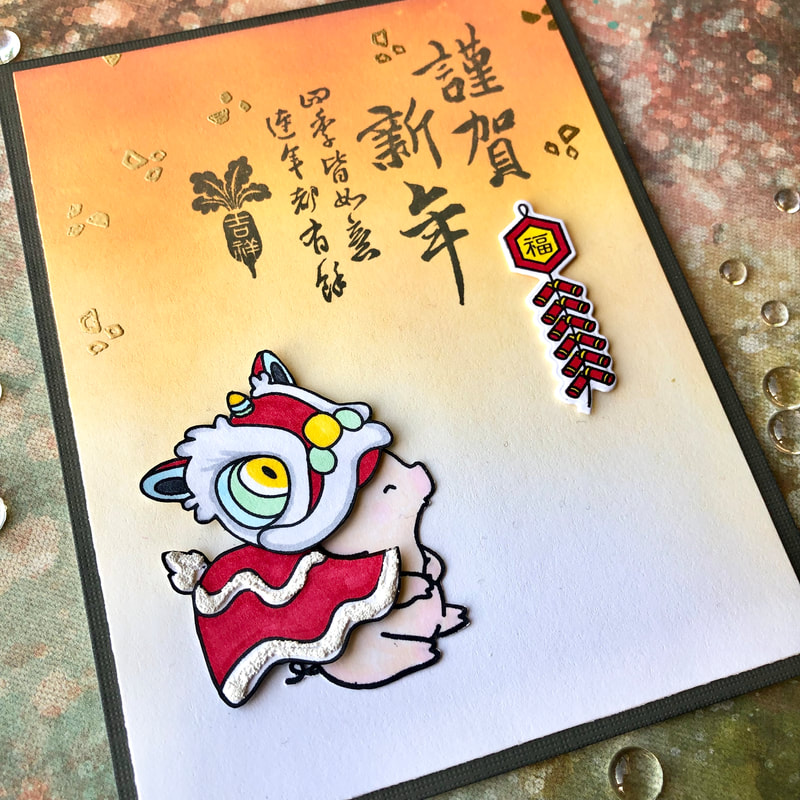
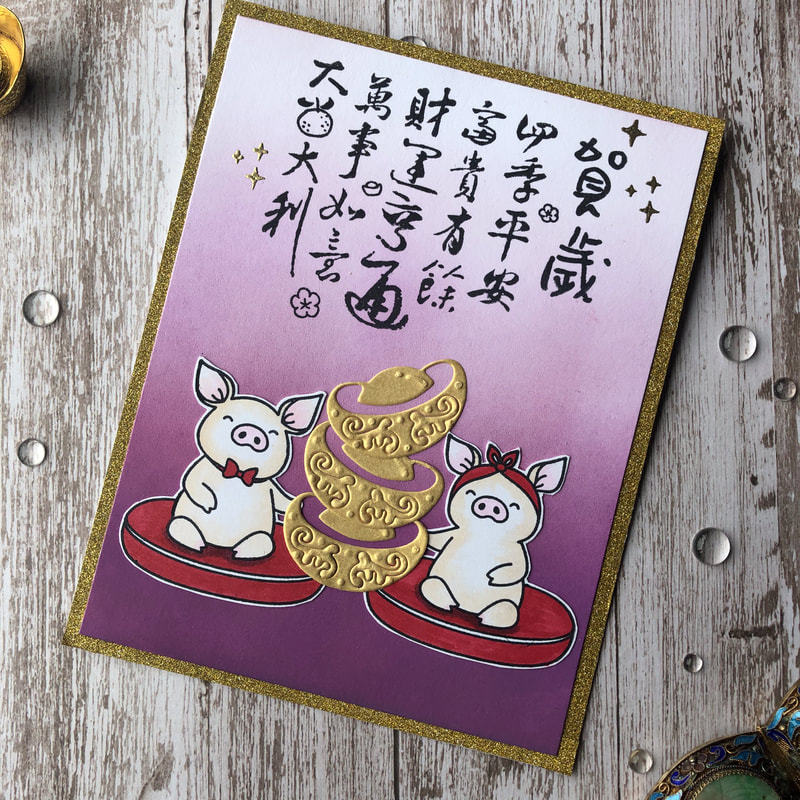
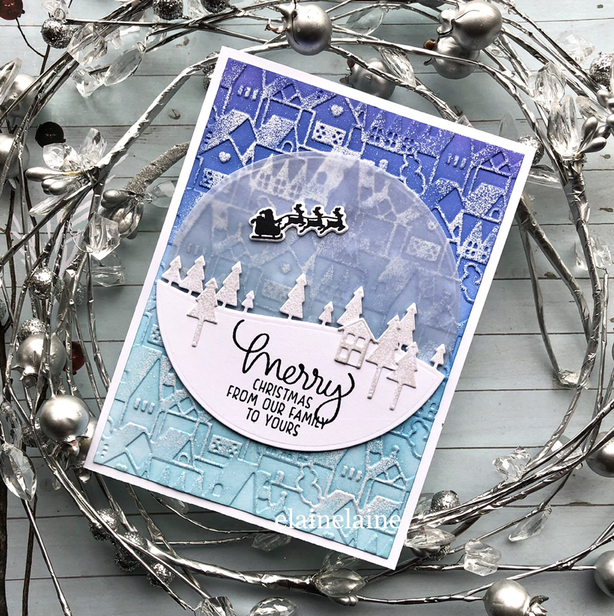
I did something very different for this card. All the hexagon pieces are from the advertisement that I collected over the year. Some of the hexagons were pieces that I stamped imperfectly and was going to go to the trash bin. But since it is small enough, I was able to repurpose it. I am glad it turned out to be great.
Picture
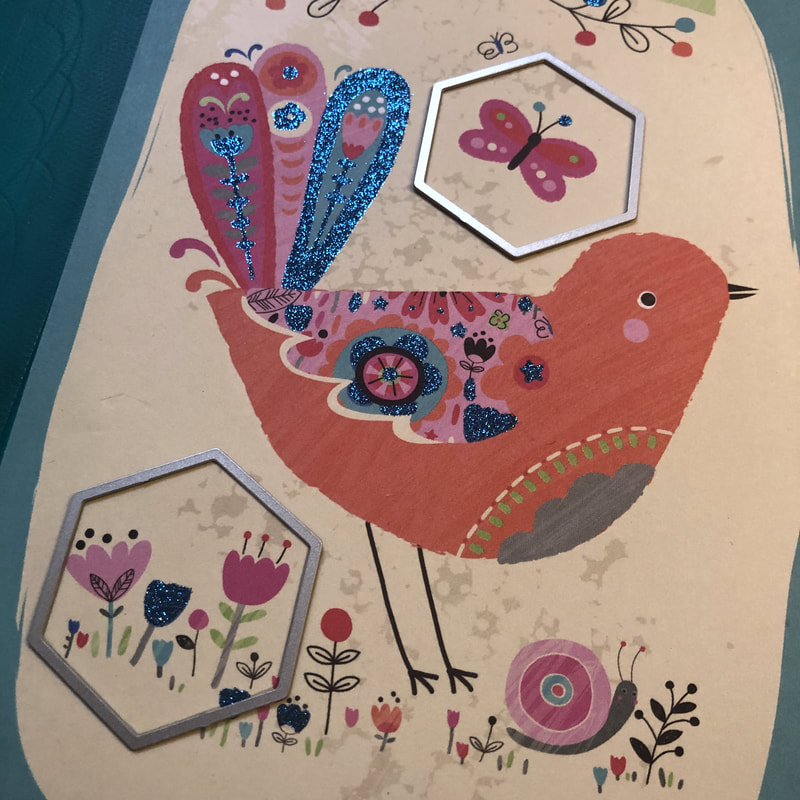
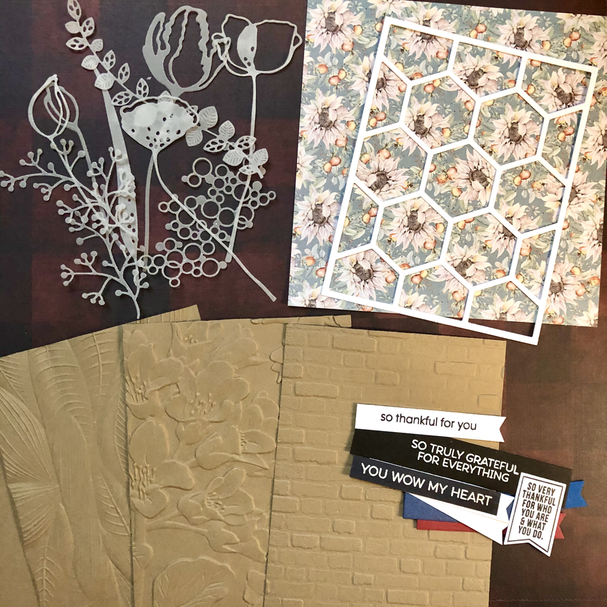
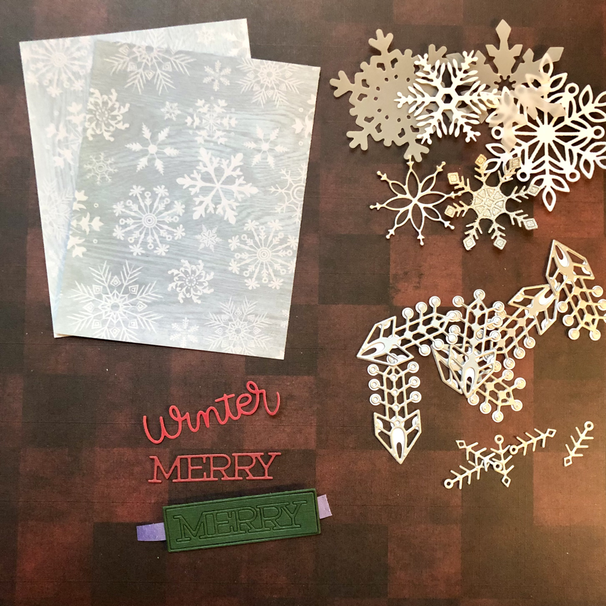
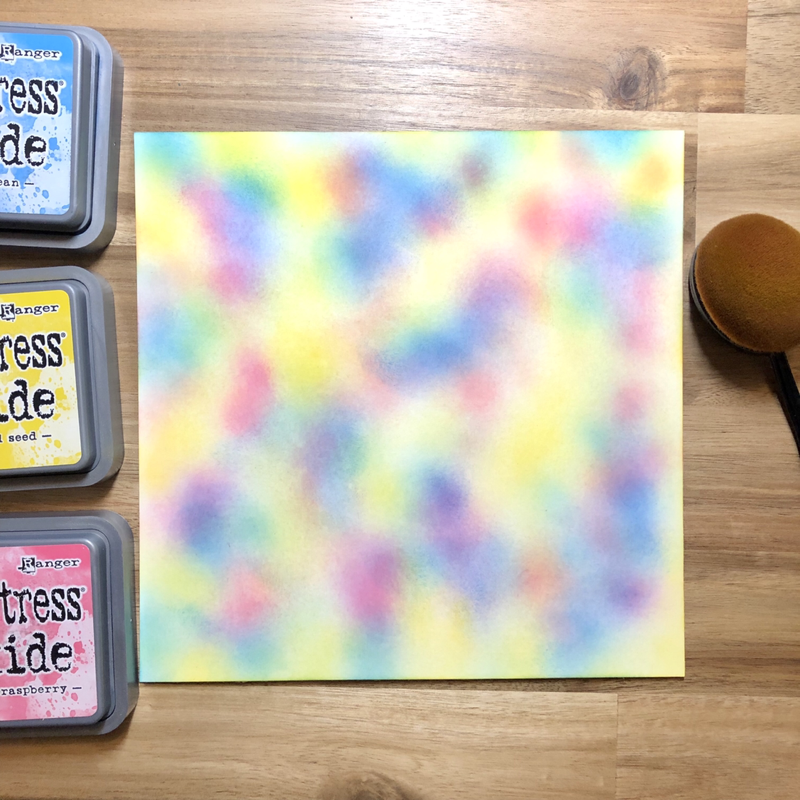
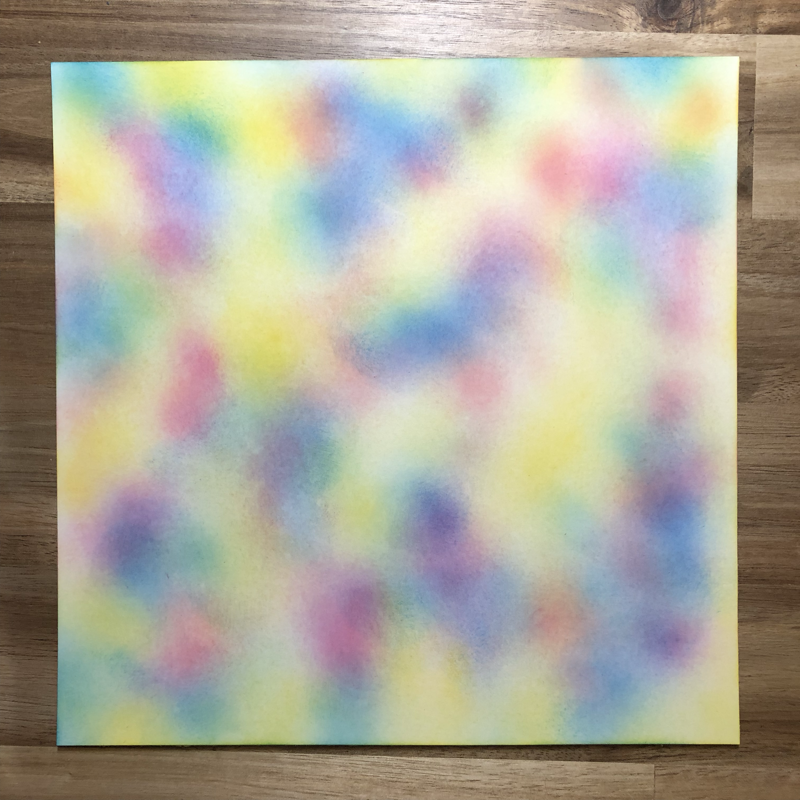
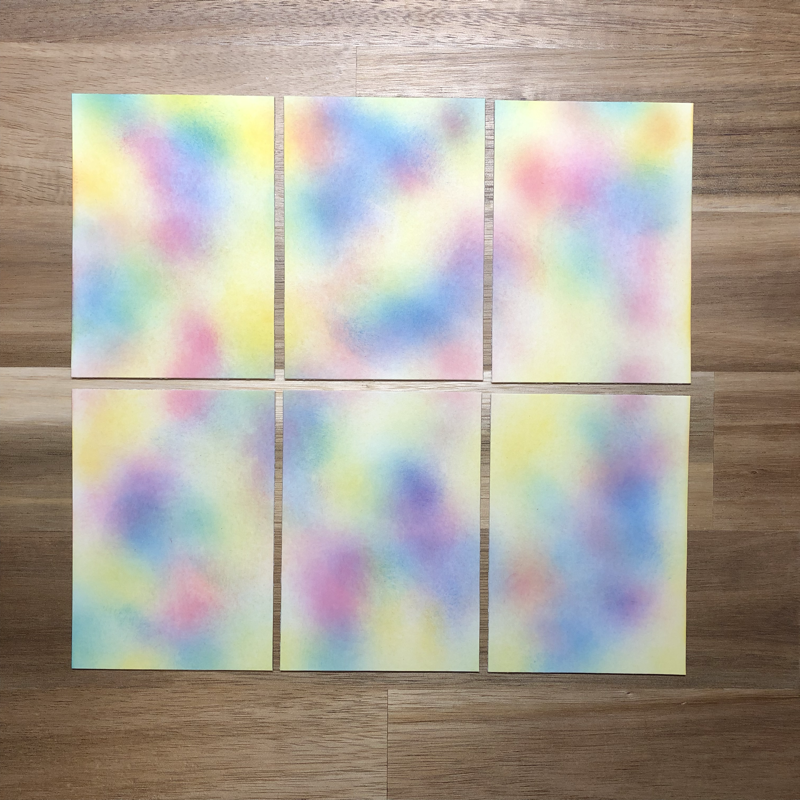
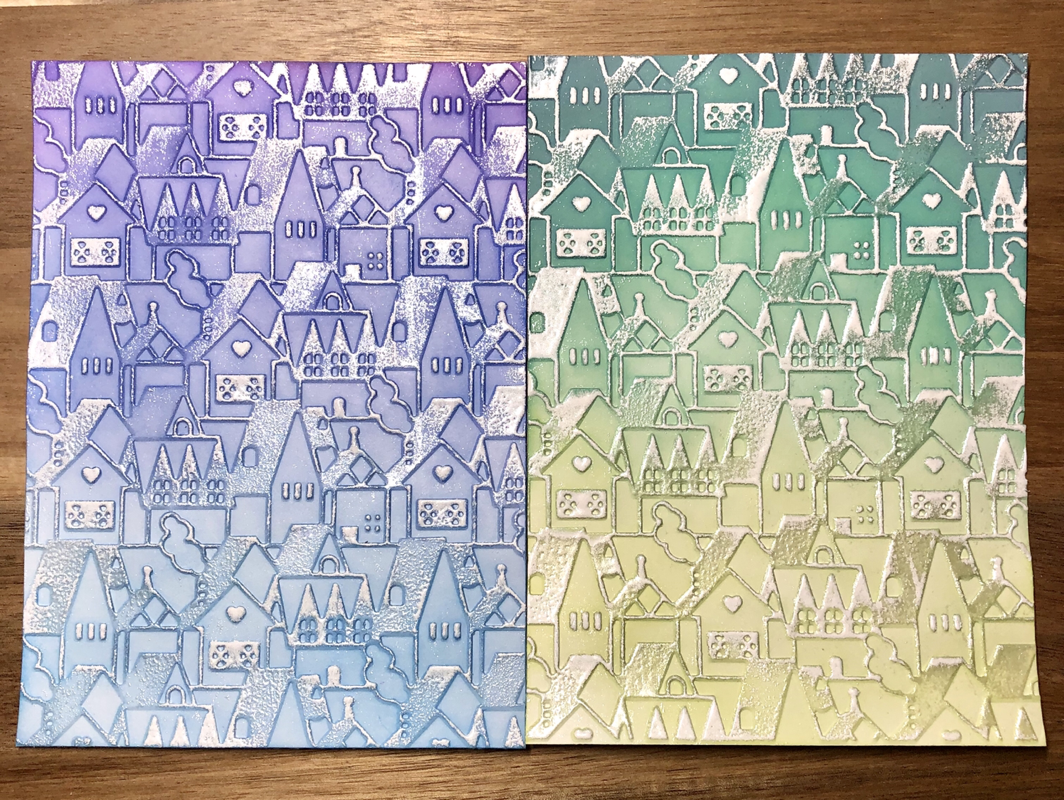
These are the papers that are ready for upcycle.
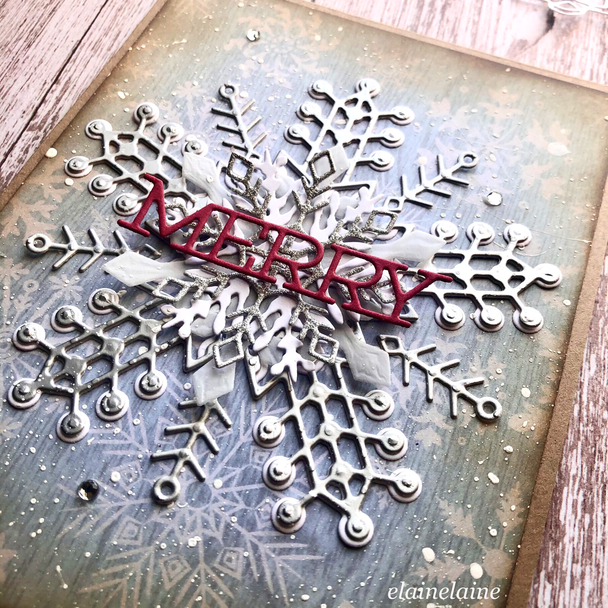
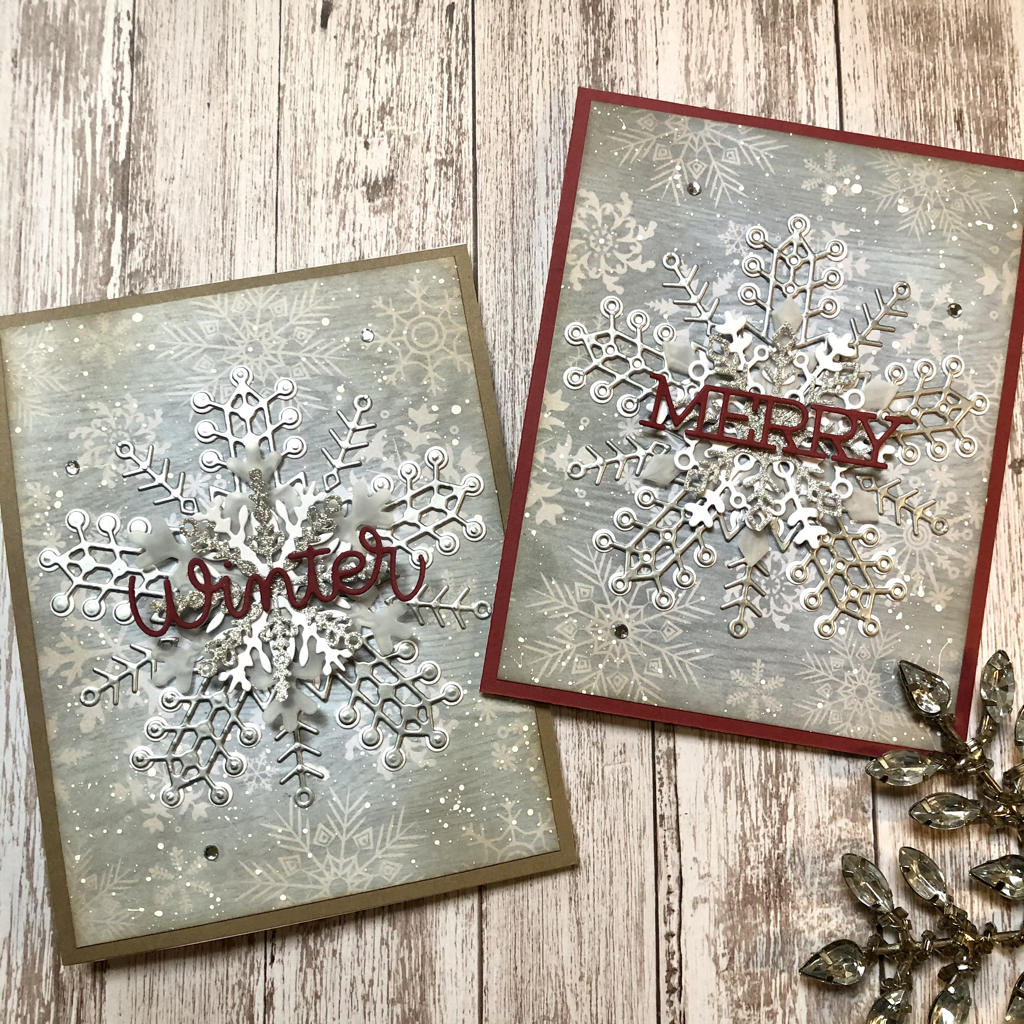
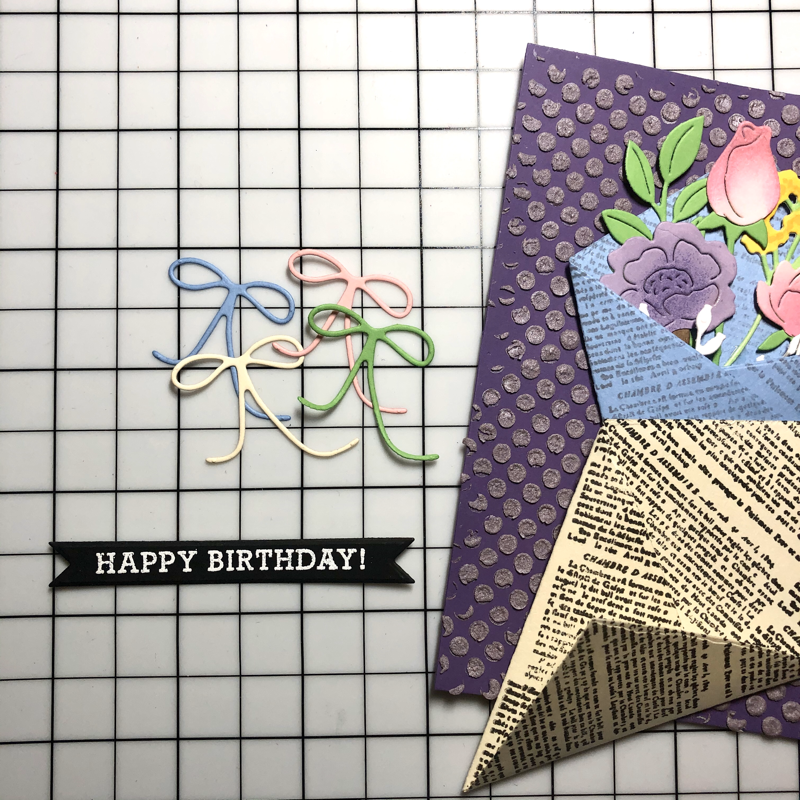
After cutting them out, I put all the pieces in place one layer at a time. Sandwich between the acrylic block. The benefit of doing a sandwich is that you're able to reduce the chance of pieces moving around. Moving one layer without moving everything else all together will be easier if you make a sandwich. Once I decided on the look, I started to adhesive from the bottom layer and stuck it on white cardstock. After that, move on to the middle layer, then upper layer with foam tape and heat embossed sentiment. In the last minute, I decided to add velum paper leaves to add more depth. Then the card is complete.
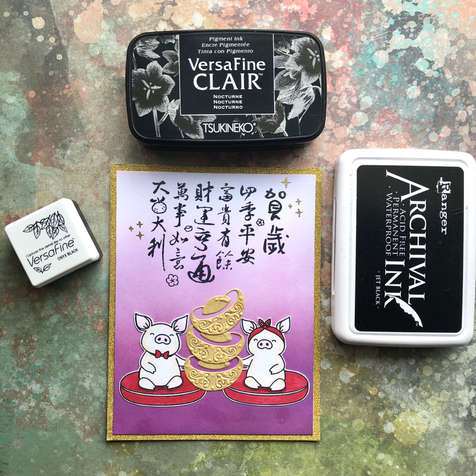
Supplies:
Pinkfresh Studio Simply hexagons die PFSA2320
Pinkfresh Studio Cling Rubber Background Stamp Set A2 Pop-Out Hexagons PFCR1320
Random ephemera
Thank you for visiting~
0 Comments

Dual Hexagon Thank You Card

11/6/2020

0 Comments

 
This is a pair of thank you cards that I made for charity. With so much going on in the world, we have so much to thank for. 
Picture
I always wanted to make cards using either hexagon stamp or die. Finally I got a stamp and die set from Pinkfresh Studio. For these two cards, I used just the hexagon die and saved the stamp set for some other time.  For the preparation, I have made some background choices using embossing folder and sentiment  stripe for the card. In addition, I have die-cut some flowers that I plan to use on the card. I have not decided to use which one yet. 
Picture
Once I have everything ready, all I need is to die cut the floral cardstock with hexagon die and start the assembly.  Here are the final look for the cards.
Picture
Picture
Supplies:
​Pinkfresh Studio Simply hexagons die PFSA2320
Alexandra Renke Blubber die
Alexandra Renke Poppy Flowers die ARFL002
Birch Press Design CL8151 You are awesome clear stamp set
Simon Says Stamp SSS101782 You got this clear stamp set
Thank you for visiting~
0 Comments

Merry and Bright Holiday card

11/3/2020

0 Comments

 
Snowflake is magical. It is always a joy to use snowflake dies on Christmas card.
Picture
This is quite a straight forward card making process. First choose a snowflake scene cardstock and blend the edges with blending tool using vintage photo, and walnut stain distress oxide ink. Then die cut the large snowflake with silver cardstock, and smaller snowflakes with silver glitter, white and velum paper. After that, die cut the word Merry with red cardstock. Last but not least, assemble all the elements then splash some acrylic white paint to complete the look.
Picture
Picture
Picture
Supplies:
Pinkfresh Studio Layered snowflakes dies
Spellbinders November 2019 small die of the month Kaleidoscope snowflake
Simon Says Stamp Merry frame dies
Thank you for visiting~
0 Comments

Fairy card for amazing you

10/5/2020

0 Comments

 
This card has very soft tone using bubble embossing folder and tiny bubble stencil to create the background. Then adding fairy and her friend ladybug to complete the card.
這次使用柔和的顏色來呈現這一張卡片,希望給予一種溫暖丶柔和丶寧靜的感覺。
Picture
Picture
Picture

Supplies:
​Whimsy Stamps Rubber Stamp - Hello Friend
Sizzix texture fades embossing folder-waves & Bubbles set
​Altenew Tiny Bubbles Stencil
Tim Holtz distress oxide ink

0 Comments

Sunflower Field Birthday Card

7/22/2020

0 Comments

 
This is another set of sunflower field birthday card using Hero Arts sunflower field heroscape stamp set along with Grace's garden stamp and die set from Stampin Up.
Picture
Picture
Picture
Supplies:
Hero Arts Sunflower Field Heroscape stamp set CM411
Hero Arts Tulip Field Heroscape stamp set CM412
Hero Arts  my monthly hero January kit 2019- Bicycle stamp and die
Hero Arts Stamped Just For You CM353
Stampin Up Grace's Garden Stamp Set 151513
Stampin Up Garden Gateway Dies 151512
0 Comments

Floral Birthday Wishes with Botanical Embossing Folder

6/13/2020

0 Comments

 
Today I am showing a card with a vintage vibe. It is simple and easy to make. Hope you enjoyed it. 
Picture

1. Ink the embossing folder (the valley side) with distress oxide ink in "Hickory Smoke."
2. Die cut the layering flower, leaves and geometric shapes.
3. Love the look of the old vintage vibe. Finally, add the sentiment.
Supply list:
​Sizzix 3-D texture fades embossing folder 662716-botanical
Altenew Fantasy Floral die
Altenew Crystal Frames die
Ranger distress oxide- Hickory Smoke
​
Thank you for visiting~
謝謝觀賞
0 Comments

Happy Birthday Bouquet to you

2/24/2020

0 Comments

 
I have joined a group sometime last year, where all the members can make birthday cards for other members who's birthday are at that month. These are the cards that I've made for my crafty friends. Sending birthday cards to crafty friends and receiving birthday cards from your crafty friends is awesome.  Let me tell you, this is as much fun as you can get. 
Picture
The details
I’ve decided to use Hero Arts monthly hero kit, February kit, for birthday card. I absolutely love this kit, you can make many different cards. First, I die cut a paper and stamp the newspaper background on the front and the top portion of the paper to create newspaper-like wrapping paper for the bouquet. Second, embossing the happy birthday sentiment with white embossing powder onto black card stock and then die cut it into sentiment flag. Finally, die cut some bows for the decoration.
For the bouquet, I've die cut the flowers and leaves using color cardstock then applied the detail with sponge and ink. After that, simply glue the flower to the stem. The rest is easy assembly, in no time the bouquet is ready. Finally, I've made some background A2 cardstock using stencil and Nuvo expanding mousse. The texture definitely adds some dimensions and interest to the card.  
Picture
I am very please with the outcome. I hope my friends will like them as well.
Thank you for visiting~
0 Comments

Butterflies colorful world

9/18/2019

0 Comments

 
I had a dream the other day that butterflies were reborn from flowers. All the butterflies would have vivid color when they flew out of flower. It is almost like the petal had color-dyed the butterflies. Interesting dream I’ll say.
Picture
It is quite simple for this card. Simply blend the color using stencils and distress oxide ink pad. Then stamp the flower with black ink at last. There were only two tips and tricks for making this card. 1. Using distress oxide ink pad because the color will sit on top of previous layer, the butterflies will be more visible on the petal. 2. Stenciling first then stamping the image. The reason is simple, stencil is not flexible, if you stamp the image first, it might not match perfectly with stencil. However, clear stamp is more flexible, matching to the stencil blended area is a simple task.
My world is more colorful with you in it. ^^
Picture
Thank you for visiting~
0 Comments

Sending you a cup of happiness

8/8/2019

0 Comments

 
This is a quick and easy card. Using any landscape stamp as background and any large stamp as focal point. In this case I have used Stampin Up Mediterranean Moments and Hero arts Spill the tea stamp set.
Simply stamp the background in grey color and blend the edge with distress ink pad in vintage photo to get an old photo look. Then coloring the tea cup any color you desired and raise the cup with thick foam pad to add some dimension. After that, complete the card with a strip of sentiment.  Fast and easy as is. 
Picture
Thank you for visiting and happy crafting~
0 Comments

ATC: 夢想

4/17/2019

0 Comments

 
Picture
上個月的ATC交換題目是"外太空",所以將背景弄成外太空的樣子,再依夢想為故事與外太空無邊境結合,希望夢想丶命運掌握在自己的手裡。
四張ATC 的故事分別為~
Dream big 遠大的夢想
My soul is in the sky 我的靈魂屬於無止盡的天空
Let your dreams take flight 讓你的夢想起飛
It is not in the stars to hold our destiny but in ourselves 掌握著我們命運的不是天上的星星而是我們自己
[圖片分解動作]
用三個氧化印台salty ocean丶mustard seed 和picked raspberry無規則的刷滿一整張,再切成ATC的尺寸。
再將邊緣刷上black soot的顏色,中間不規則形狀留住彩色的部分。之後灑水用紙巾吸乾了再用白色壓克力加點水灑在卡上並吹乾。
用銀色亮粉壓克力顔料加水灑在卡上並吹乾,呈現出來的效果有如星際一般,這樣背景就完成了。接下來就可以放字章和主題章了~
Picture
Picture
感覺上放了很多照片,但都拍了。不放的話好像對不起自己啊!😆 其實這次的ATC 還隱藏了個㊙️密,不知道有收到卡的朋友們有沒有人發現呢?㊙️密就在⋯⋯

小小提示:有黑暗才能看到光明
​請容許稍後揭曉^^
Update:
這次的ATC 我用了螢光凸粉,所以在電燈下照光一陣子之後就會看到星星的出現囉~
Picture
Material / supplies used:
Hero Arts Monthly hero kit August 2017
Tim Holtz distress oxide ink
VersaFine Clair Nocturne
Dina Wakley white heavy body acrylic paint 
Hero Arts white embossing powder
Folk Art extreme glitter silver glitter finish acrylic paint
​
Thank you for visiting
0 Comments

Happy Spring one layer card

3/18/2019

0 Comments

 
The long winter is finally near to the end. I can see flower starting to bloom. Happy Spring~ I have used Waffle Flower magnolia stamp set for my one layer card. Yes I could have just color the flower, cut in out and place them on a blue background. But masking technique on one layer card was in my mind at the moment. I am glad I stick with it, Absolutely love the outcome.
Picture
Using distress oxide ink and blending brush to blend out each masking area with milled lavender and seedless preserves oxide ink in flower, mowed lawn in leaves and walnut stain in stem. 
After finished coloring each section, re-stamping the outline one more time in brown ink is necessary to make the image pop. Finally masking the entire flower and then finish off the background with salty ocean oxide ink and birch press circle burst stencil using blending tool.
Material/ supplies used:
Waffle Flower Magnolia stamp set
Picket Fence Studios Life Changing blender brush
Ranger Distress Oxide Ink
​Misti stamping tool

​​
Thank you for visiting
0 Comments

刷色工具 bits and pieces

2/10/2019

1 Comment

 
這一篇大概是我寫最久的一次,測試了將近兩個月。很多朋友都問我測試完了沒,我都是說快了快了。這兩個月我花了很多時間在刷色上面,所做的卡片都跟刷色有關係,做卡片的速度變快了所以產量也變多了。
這一次要測試的工具非常夯,是一家印章公司Picket Fence Studios的新產品,美國很多彩印界高手都有使用以及介紹,所以當它有貨時馬上就收編買回家測試~
我這次測試的是10隻的包裝,其實我覺得大支的就已經很夠用了,但為了測試還是買了大包的。上面右邊的圖可以看得出大支的尺寸和刷色海綿的比較,最大支有六公分,刷起來很過癮。

<測試過程>​
測試不同推色工具的比較
每一支都是沾印台五次,沾一次來回推色一圈
D. 還是很好用,效果顏色不錯,小細節可能不行但overall ok。E. 海棉雖硬但顏色易上易刷,刷出來的效果和D很類似,所以很適合補D刷不到細節的不足。F的海棉頭不行,第一, 沾不上色也刷不出色,第二, 海棉太軟使得黑色手指套直接刮紙面。A的毛真的好軟,很容易沾色也很容易刷色,它的強項應該是可以刷出淡彩和重口味都ok而且不用一色一支,簡單清理完就可直接刷第二色。B是刷大型版用的刷子,所以這裡線條好像比較粗。可能要沾印台多次才能有效果。C. 應該是出乎意料的可上色可刷色,雖然是不勻但角落都有cover到,效果也不錯,但太小支如果是刷卡片背景要刷很久。
​
測試類似工具的刷色效果
上圖三支長得很像的刷色工具,左1是Picket Fence Studios(簡稱為P家),其他M和KJ家是化𤕸公司出的刷子,三家刷子做出來的效果是差不多但它的過程卻差很多。

​1. P家上色2次就可以達到KJ家與M家的效果,使用到的顏料量是最省的。
2. 殘留在型版上的顏料最少的是P家,再來是KJ家,最多的是M家
3. P家是三支之中彈力最好的,中間桿子的部分可以輕易彎動,根據網路上的説辭,刷子的彈力度有時候會影響刷出來的效果,我自己覺得沒有什麼特別差別。😅
4. 價格最高的當然是P家,其他兩家我是根據買的人評價挑選出來的,算是中等價格。
5. P家的價格最高,理所當然它的毛最柔軟。
Picture
這種刷子和推色海棉最大不同的地方就是速度!刷色速度絕對是它勝過推色海綿的優點。它可以很快的刷的很淡很柔很均勻的一層也可以一直加色加到你想要的程度為止。
使用之後的結果讓我馬上了解為什麼有那麼多人願意花錢買,我有發現P家的毛量很多,多到成扇型而且毛是有弧度的,這可能就是它可以在使用少量的顔料之下也可以很均勻上色。沒錯它的價格不斐,但如果用面積來算它的價格,其實也還可以接受。再加上它減低了顔料的用量,不需要一個顏色一支,算是省了錢。
還有一些其他想測試的地方例如與水的接觸丶不同顏料的使用,有機會會再繼續更新。
​
2/14 更新:
不知道是顏料的關係或我使力過大還是毛的密度不夠,M家的有點掉毛,目前P家和KJ 家ok. 希望繼續保持。😊
2/16 更新:今天看到一篇由 Kristina Werner 幾天前發佈的影片,有介紹她第一次使用了P家的刷子,我也是覺得抓著刷子的頭最好使力,而且最容易刷出淡且均勻的色調,不過那是我個人使用後的經驗,大家還是可以依自己的喜好使用。另外Kristina 幫我回答了另一個問題就是和水的接觸,刷子是可以用沾濕的餐紙巾或stamp shammy 來清理,換顔色之前清理一下就可以繼續使用下一個顏色,非常方便。
​有興趣的朋友可以看Kristina 的影片,附上連結🔗 youtu.be/rS_dJM39na0

Thank you for visiting~ 謝謝觀賞!
1 Comment

Welcome the Year of Pig 番外篇

2/2/2019

0 Comments

 
上次使用Mama Elephant 的 hogs and kisses 以及lion dance水晶章來製作豬年賀卡時,受到很大的回應。大家對於豬小弟穿戴舞龍舞獅的表演覺得有趣,所以這次也用同樣的水晶章做另外兩張卡片。一張是豬小妹穿著舞獅裝,一張則是豬小妹豬小弟的父母獻元寶賀新年。這樣全家都到齊了~ 豬小弟舞龍舞獅卡可以看這裡: www.elainelaine.com/blog/welcome-the-year-of-pig-2019
Picture
同樣是使用復古氧化印台刷背景,之後將剪好的舞獅貼在豬小妹身上像是穿著舞獅正在觀望的樣子。製作這張時發現了一個蓋印上的問題,謹賀新年字章蓋完黑色會慢慢變不深,還好我有好多手作朋友幫我一起找答案,很快就找到了解決方法。解決方法會在下面解說~
Picture
利用Mama Elephant 的兩隻坐豬剛好坐在墊子上,手托著黃金元寶,豬年獻元寶是很喜氣的一張~
Picture
〈關於蓋印字體不黑的問題〉
背景使用氧化印台上色,有時可能因起化學變化而導致之後蓋印上去的顏色會稍微變淡,幾個方法可以改善:
​
1. 使用油性印台
氧化印台會和水起化學作用所以用油性印台會比水性印台來的出色,很多廠牌都有出油性印台,我這次測驗了3款,最黑的是Versafine onyx black~
Picture
2. 吹風機是freeze time 的最佳幫手
雖說使用油性印台,但不同牌子的配方都不太一樣所以顏色還是有深淺之分,被氧化的程度也不一定,Versafine 的Onyx black 黑色的確最深,但如果要使用其他顏色蓋印,另外兩個印台Versafine Clair 和Ranger archival 就有很多非常漂亮的顏色可蓋印,那要如何不讓顏色好像被吃掉的感覺,這時候就要靠熱風槍了,蓋印完後要以迅雷不及掩耳的速度趕快吹乾它,讓所有畫面定格。其實要多謝Ann Chuang老師的一句話,Ann老師說一定要蓋兩次才會黑,因為第一次一定起化學作用第二次是和油性顏料接觸所以一定黑。因為這句話突然想到那就不讓它起化學作用,所以要在起化學變化之前趕快吹乾所有蓋印,用heat set 來定色。
Picture
3. Micro Glaze 除了有保護作用還有拋光的效果
不只一家廠商有出Micro Glaze,比較有名的是Judikins 和Tim Holtz。Micro glaze 大部分都用來保護作品,在作品上塗上薄薄的一層可以不讓指紋丶水漬殘留在作品上,有防水的功能。這一次也是為了保護作品而使用micro glaze卻意外發現可以讓蓋印字的顔色更加明亮,就像車子打完蠟之後,顏色變亮一樣。
Picture
這些是我的作卡心得,有興趣的朋友也可以試試,如果你有新的發現也請多多分享。最後分享我的春節卡片大合照💕
Picture
Material/supplies used:
Mama Elephant hogs and kisses clear stamp
Mama Elephant lion dance clear stamp
Micia Chinese New Year wood mount stamp
Tim Holts distress oxide ink
Tsukineko VersaFine onyx black ink
Tsukineko VersaFine Clair Nocturne ink
Ranger archival jet black ink
Tim Holtz Micro glaze

​
在此感謝老師們的幫助,可以從老師們的部落格學到很多,有興趣者請看看下面的連結🔗
​Ann 的手作花園  anncard.blogspot.com
Thank you for visiting~ 謝謝觀賞!
0 Comments

Welcome the Year of Pig 2019

1/17/2019

0 Comments


It is a tradition to have a lion dance to chase away bad luck and bring on the good thing for the new year. Obviously it is piggie's turn to do the lion dance for us. May the New Year bring in your life joy that never fade, hopes that never die, and strength that never weakens.
祝福大家豬年行大運,壊運去好運來,開開心心一整年~

Picture
舞獅章雖說是2018年的舊款,但搭配性很高,只要是跟舞龍舞獅有關的,過年過節都可以用到它。先蓋印小豬上完色之後再用removeable tape遮住小豬方便上背景色。發現Post-it 出的removable labeling tape 非常好用,連小小的尾巴都不會翹起來,很容易刷色,使用完的遮蔽貼紙就直接黏在印章膠片上面方便下次使用。
舞獅章的腳被我剪掉才可以露可愛的小豬,兒子說應該就擺在他頭上可是會像最後一張根本不知道是誰😂所以將舞獅頭和背部拆開來使用,看起來像小豬在奔跑表演的樣子,效果非常好!舞獅背部看起來很像軟軟的白毛是使用了加熱會起泡的白色凸粉,通常是用在雪景上但只用在造雪實在是太可惜了,它的3D效果增加了趣味性。
Picture
Material/supplies use:
Mama elephant hogs and kisses clear stamp
Mama elephant lion dance clear stamp
Miciacrafts good luck sentiment wood stamp
Hero Arts white puff embossing powder
Hero Arts  thick lacquer pen
Versafine Clair-nocturne
Distress Oxide ink pad- peacock feather
Picket fence studios life changing blender brush
謝謝光臨~
Thank you for visiting~
0 Comments

Merry Christmas from Santa to you-2018 Christmas card collection

12/24/2018

0 Comments

 
I am sharing a Christmas card that how I pictures a white Christmas will be. Using embossing powder as snow on the roof of each house can be tricky since it is applying on an embossing folder, in this case it isn't the more the merrier.  By gently brush a think layer of Versamark ink will get plenty of snow effect. I choose white satin pearl embossing powder instead of white powder to give the snow enough shine and ​pearlescent white look. The result is magical. 
Picture
Material/supplies used in cardmaking:
Cuttlebug embossing folder-village
Memory Box 30043 circle forest scene dies
Hero Arts white satin pearl embossing powder
Hero Arts My monthly hero kit October 2017
Tim Holtz distress oxide ink pad
Picture
Thank you for visiting~
0 Comments
<<Previous
Forward>>

    Author

    Elaine Lin
    San Francisco USA

    Picture
    elainelaine.com

    Archives

    June 2026
    February 2026
    May 2025
    June 2024
    February 2024
    December 2023
    December 2022
    November 2022
    December 2021
    November 2021
    October 2021
    May 2021
    January 2021
    December 2020
    November 2020
    October 2020
    July 2020
    June 2020
    May 2020
    April 2020
    March 2020
    February 2020
    December 2019
    November 2019
    October 2019
    September 2019
    August 2019
    July 2019
    May 2019
    April 2019
    March 2019
    February 2019
    January 2019
    December 2018
    November 2018
    May 2017
    March 2017
    February 2017
    January 2017
    December 2016
    November 2016
    October 2016
    April 2016
    March 2016
    February 2016
    December 2015
    November 2015
    October 2015
    September 2015
    April 2015
    March 2015
    February 2015
    January 2015
    December 2014

    RSS Feed

    Categories

    All
    12 Tags Of 2015
    Announcement
    Artist Trading Card/Coin
    Art Journaling
    Birthday Card
    Cards
    CHA 2015
    Challenges
    Chinese Lunar New Year
    Christmas
    Papercrafting
    Tags
    Thank You Card

    Picture
    Picture
    Simon Says Stamp Monday Challenge Blog
    Simon Says Stamp Wednesday Challenge Blog
    Picture
    Picture
    Picture
    Picture
    Picture
    Picture
    Picture
    Picture
    Instagram
    Picture

[email protected]