
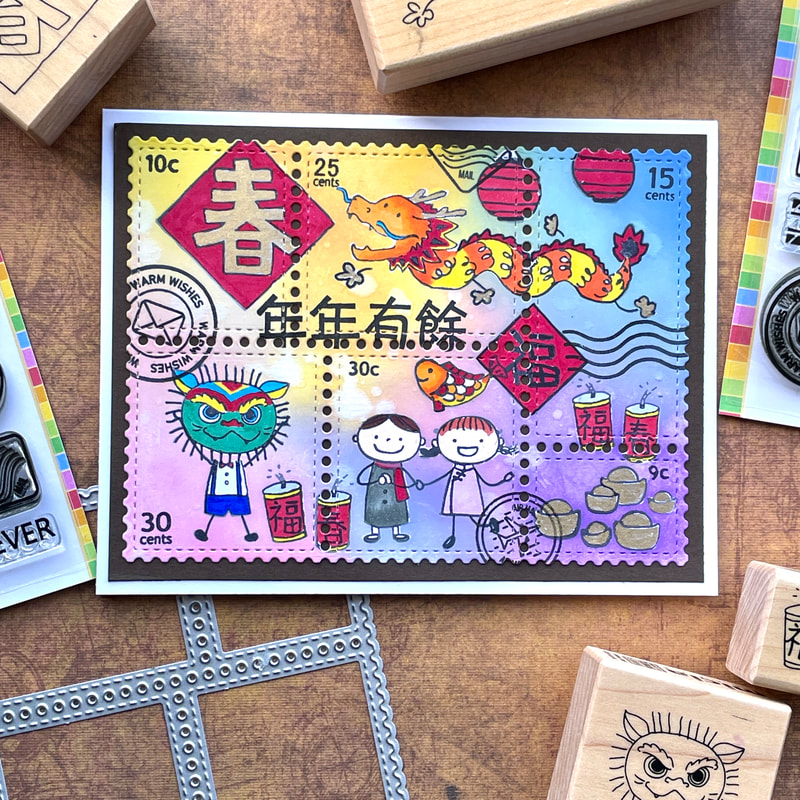
 Supplies: Waffle Flower Postage Collage Die Waffle Flower Postage Collage Stamp Set Waffle Flower Postage Collage for Fall Stamp Set Waffle Flower Postage Collage for Fall Stamp Set Miciacrafts Chinese New Year Stamp Set Thank you for visiting and happy crafting!
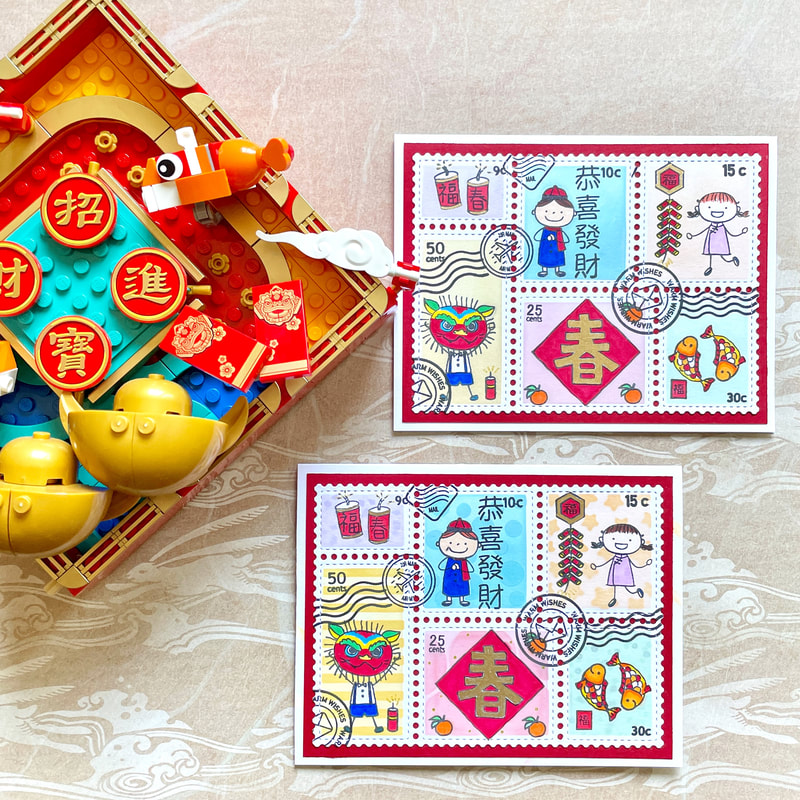 Supplies: Waffle Flower Postage Collage die Waffle Flower Postage Collage Coloring Stencil Waffle Flower Postage Collage Stamp Set Waffle Flower Postage Collage for Fall Stamp Set Miciacrafts Chinese New Year Stamp Set Thank you for visiting and happy crafting~
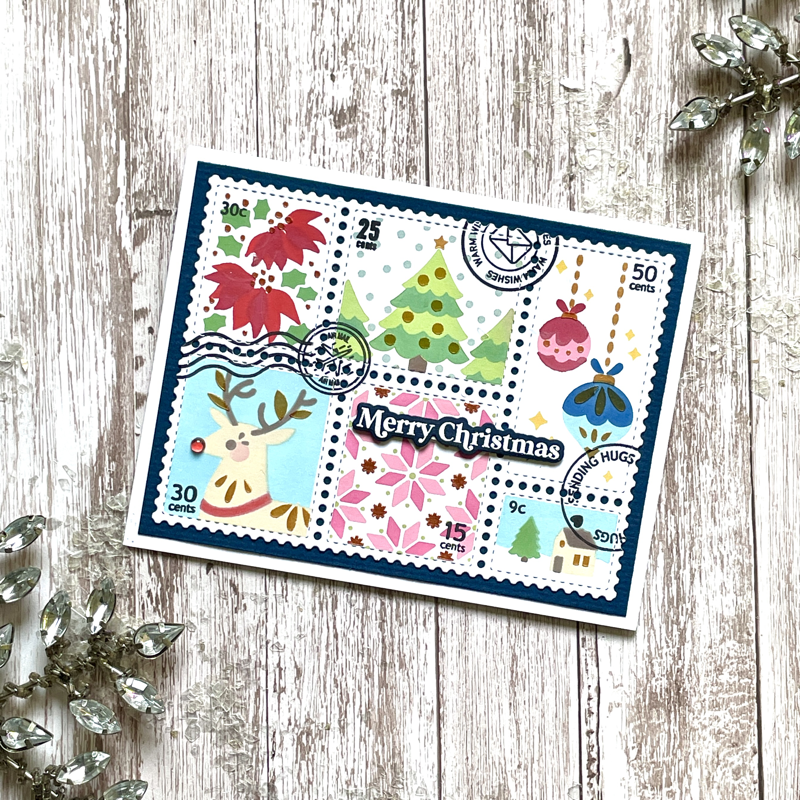
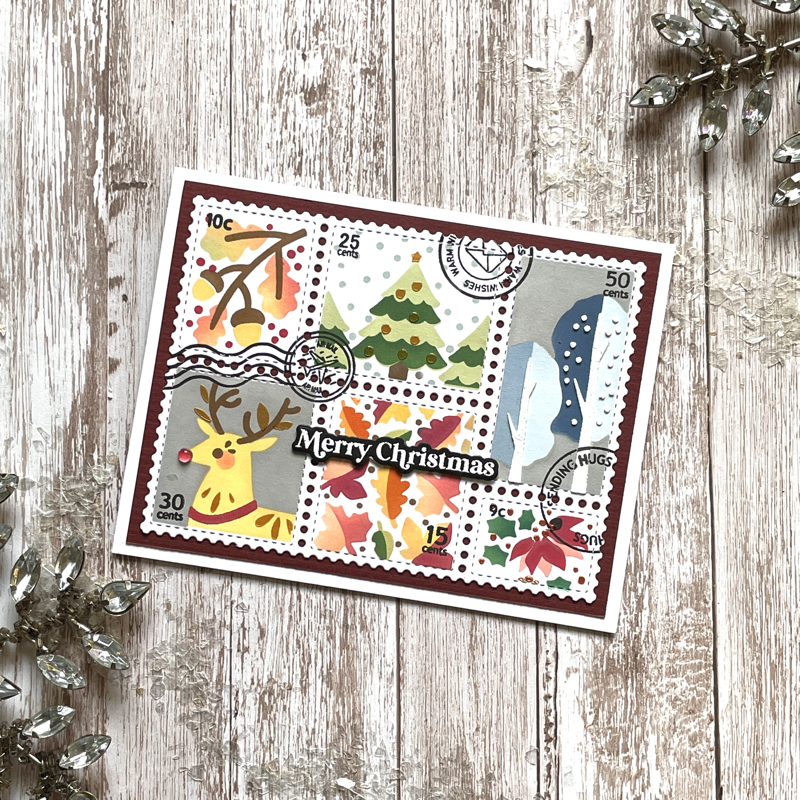
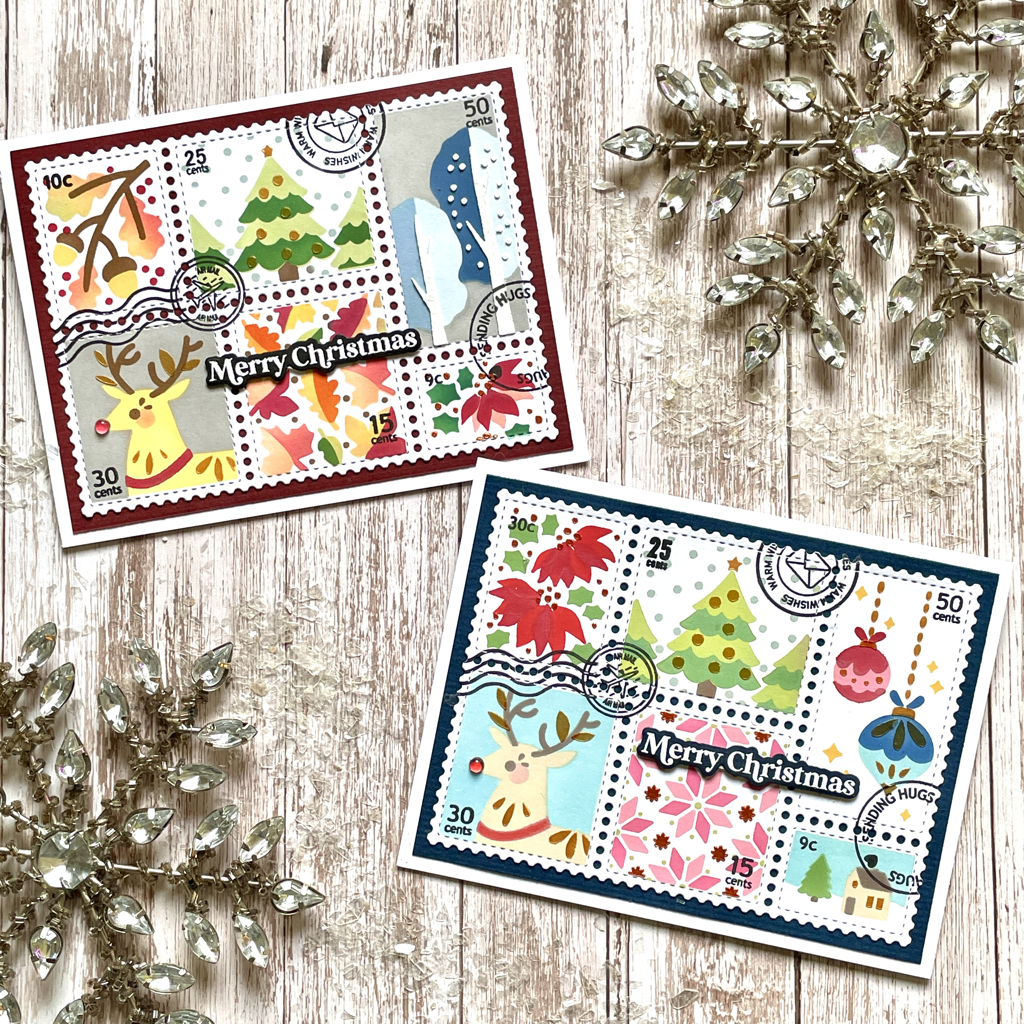 Supplies: Waffle Flower Postage Collage Die Waffle Flower Postage Collage Christmas Stencil Waffle Flower Postage Collage Fall Stencil Waffle Flower Postage Collage Stamp Set Waffle Flower Postage collage for Fall Stamp Set Waffle Flower Holiday Cheer Sentiment Stamp Set Thank you for visiting! Happy Crafting!
This is the second Christmas card that was created with the exclusive STAMPtember collaboration stamp/stencil set with Tim Holtz from SimonSaysStamp. This is a fun image of Santa climbing up the chimney. I have also created an edge to edge shaker card to add a more whimsical feel. I'm excited to share some inspiration with you! 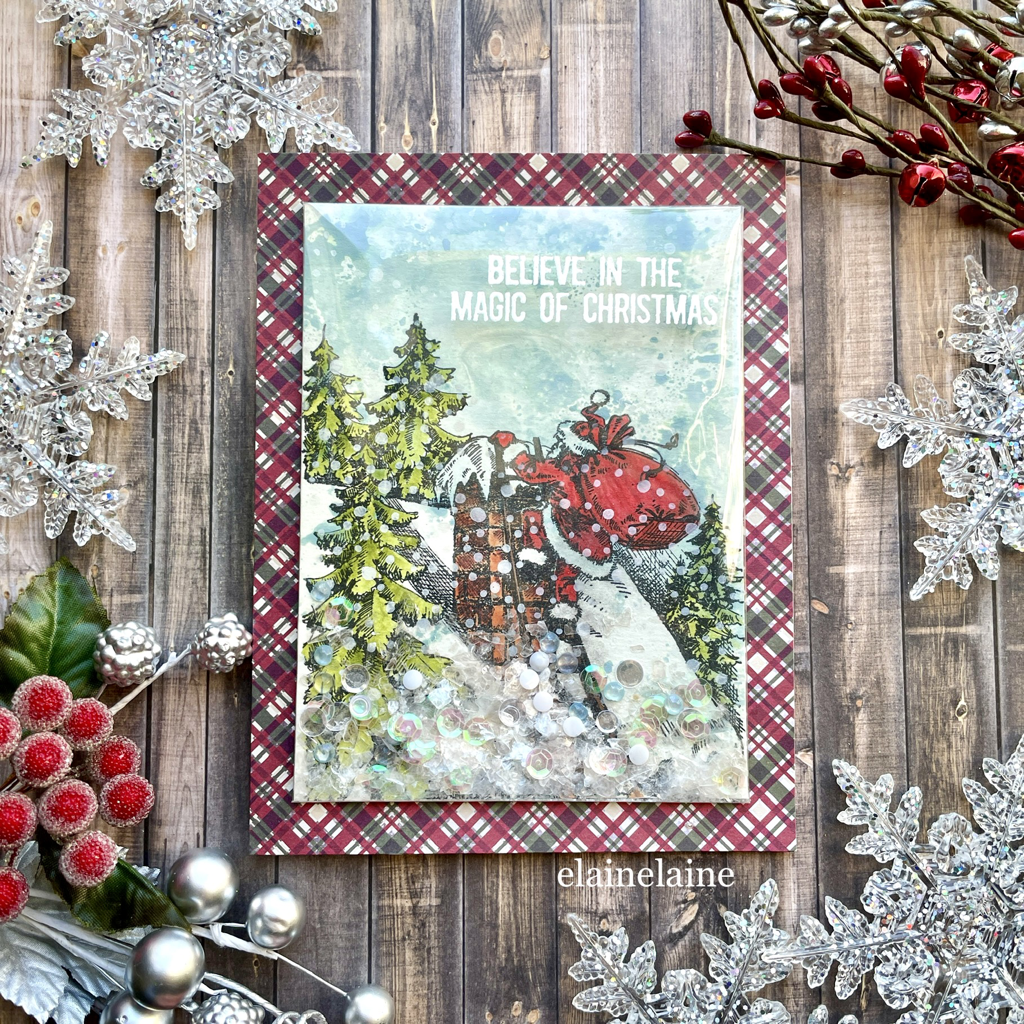 Ink smooshing on watercolor cardstock with a piece of plastic film and distress oxide speckled egg ink pad 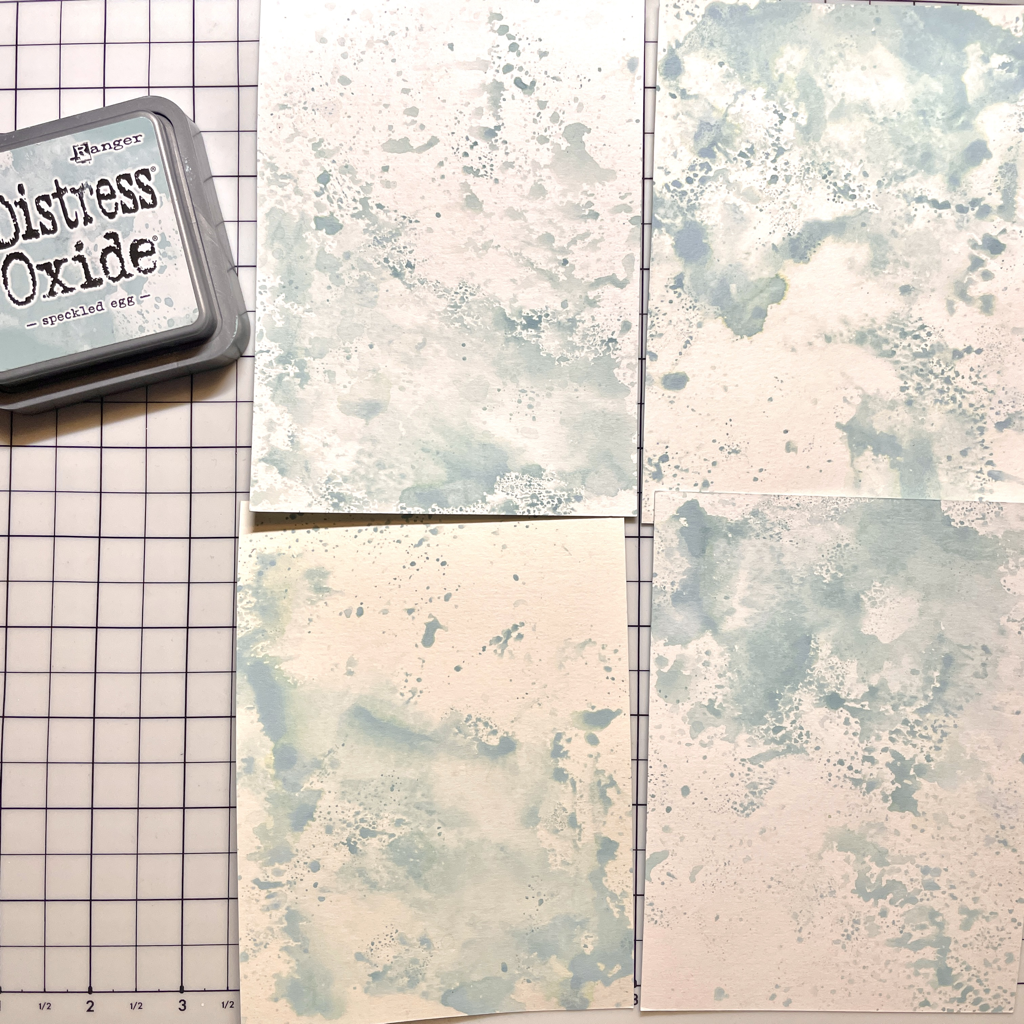 Stamping over watercolor cardstock using Altenew Obsidian pigment ink  Coloring the image using Tim Holtz distress watercolor pencils  Creating a snowy sky using snowy stencil and Avery Elle white pigment ink pad 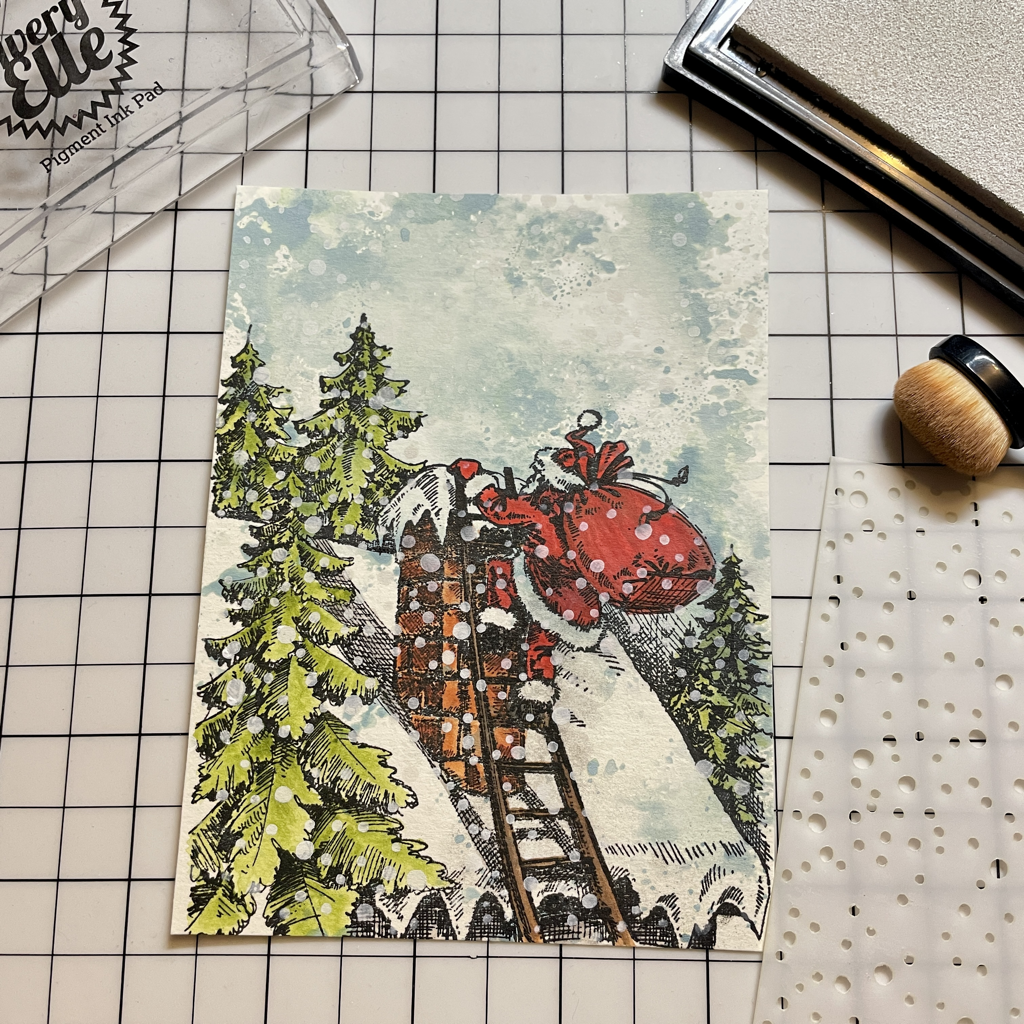 Stamping Believe in the Magic of Christmas sentiment onto a heat resistant dura-lar sheet using VersaMark watermark stamp pad 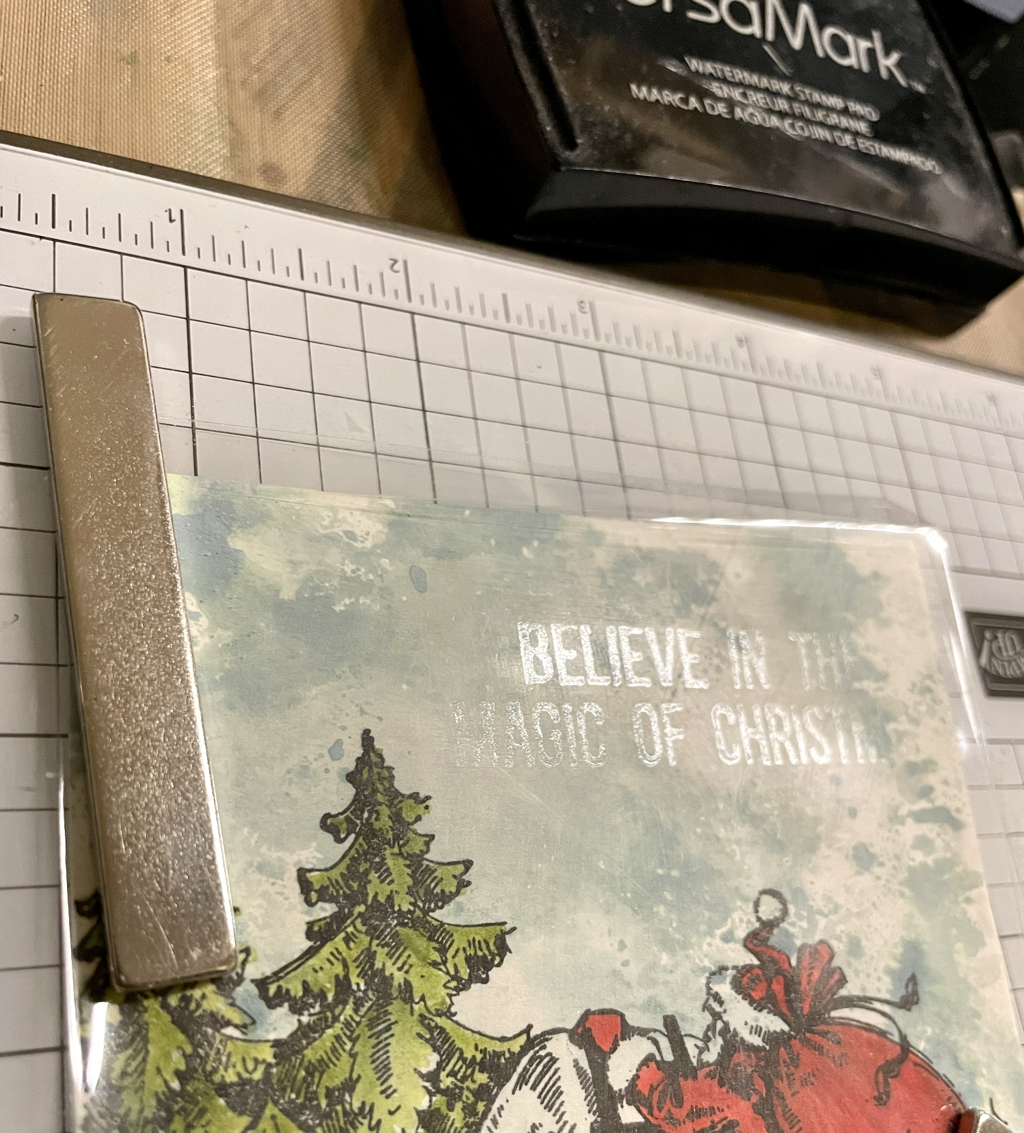 Then the sentiment was heat embossed with Hero Arts white embossing powder. After the sentiment cooled down, I then added strips of ultra sticky double sided tape on a four side of dura-lar sheet 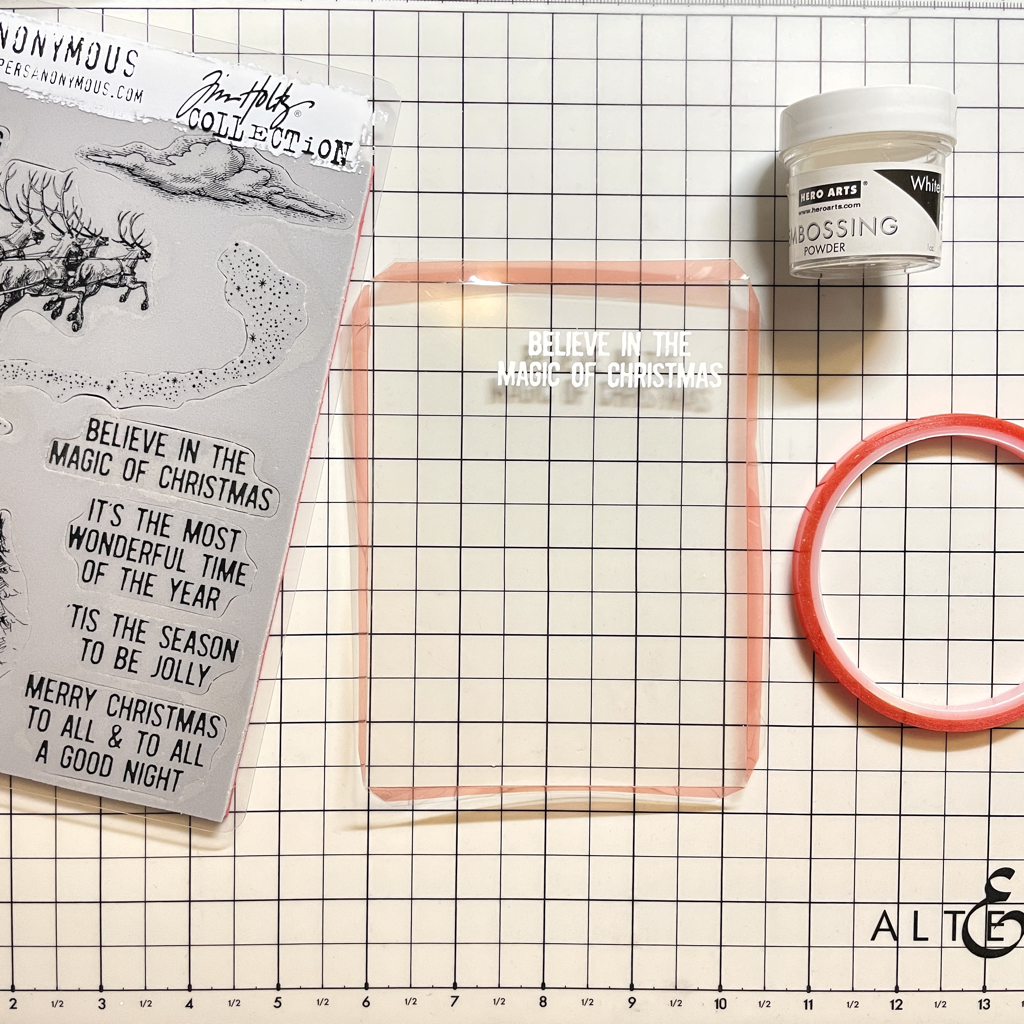 I placed the dura-lar sheet and the adhesive on top of the card, then I tucked the extra dura-lar sheet flaps behind the card. I left the top side of the card open so I could add embellishments inside the card later on. 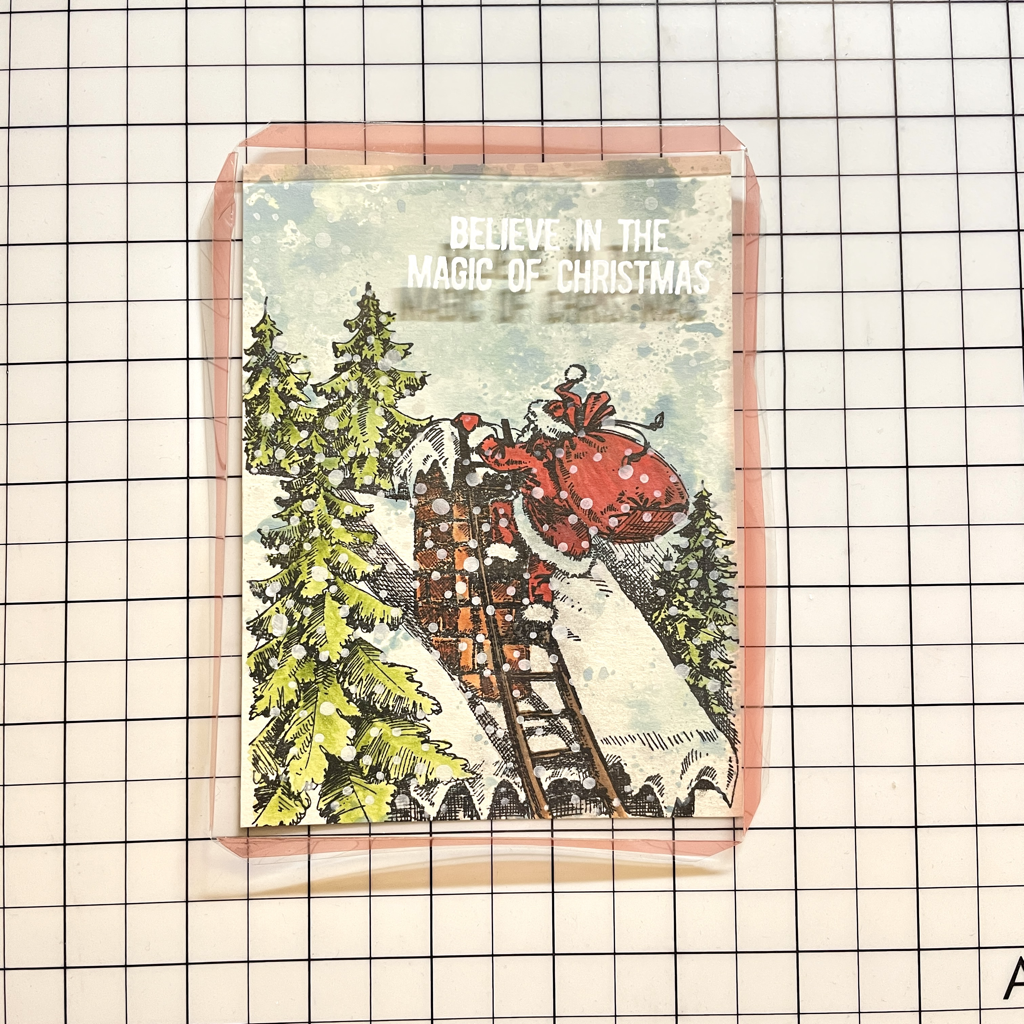 After the three sides of the shaker card were sealed, I added beads, sequins and mica flakes 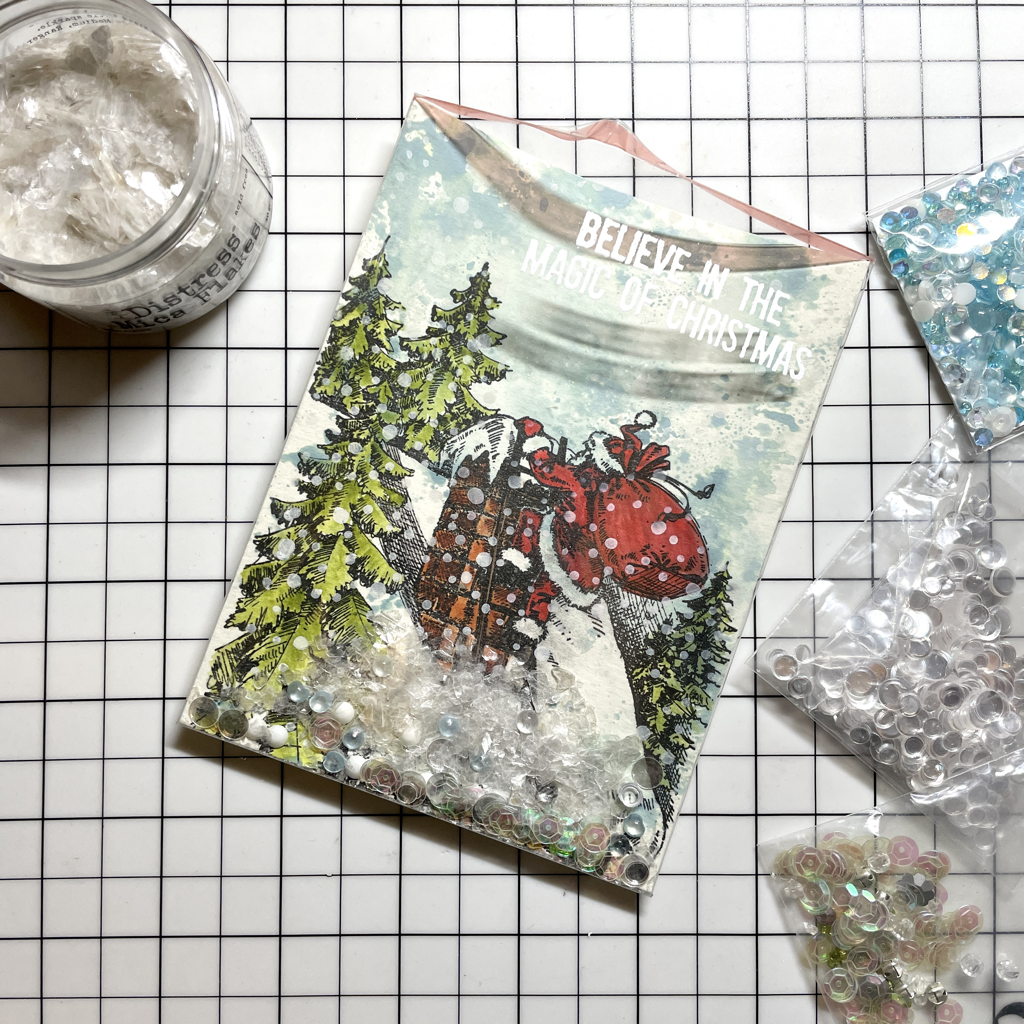 The card is now completed with a plaid cardstock as the background 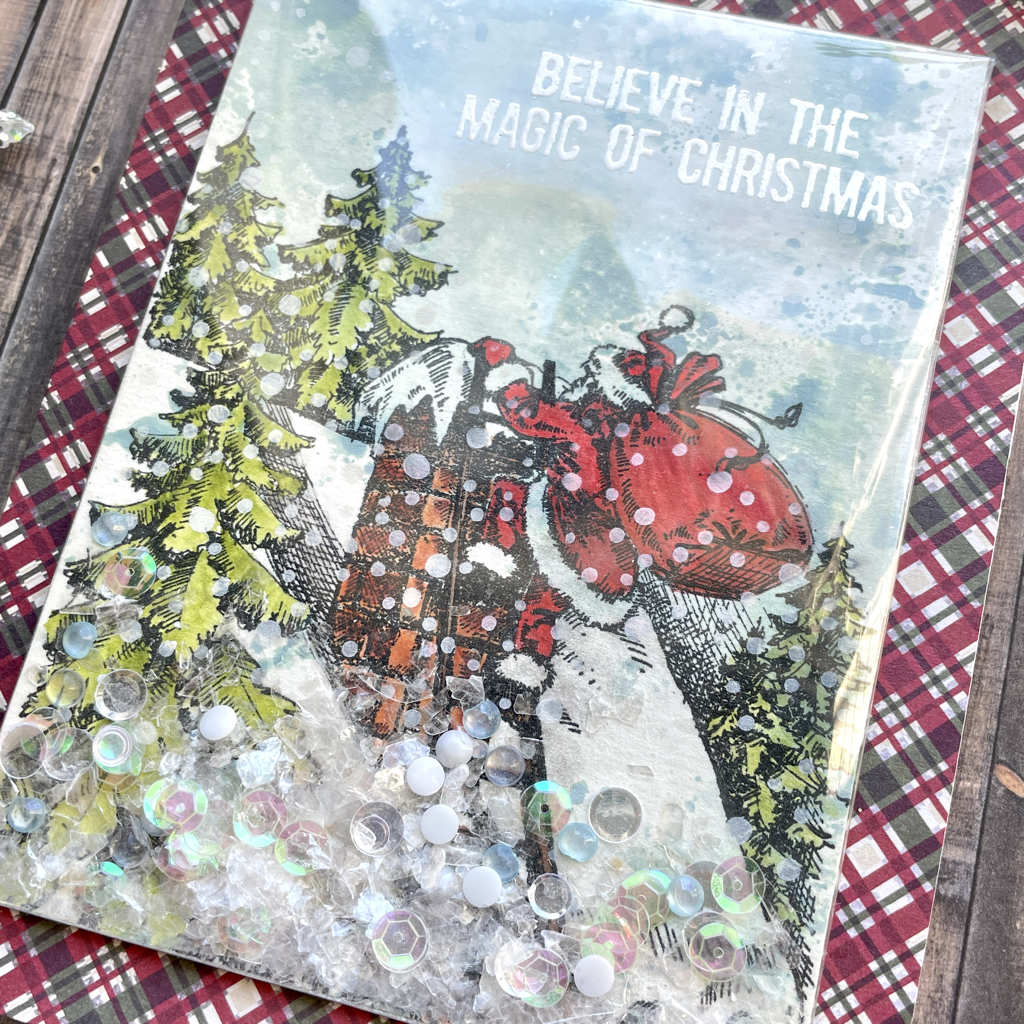 Supplies: 2022 Tim Holtz STAMPtember exclusive stamp set from Stamper Annoymous for SimonSaysStamp Altenew Obsidian pigment ink Tim Holtz Distress watercolor pencil set Tim Holtz Distress Oxide ink pad- Speckled egg Grafix heat-resistant, durable, acid free and archival dura-lar film Ranger Distress Mica Flakes Buttins Galore & More Sparkletz embellishments Thank you for visiting! Happy crafting~
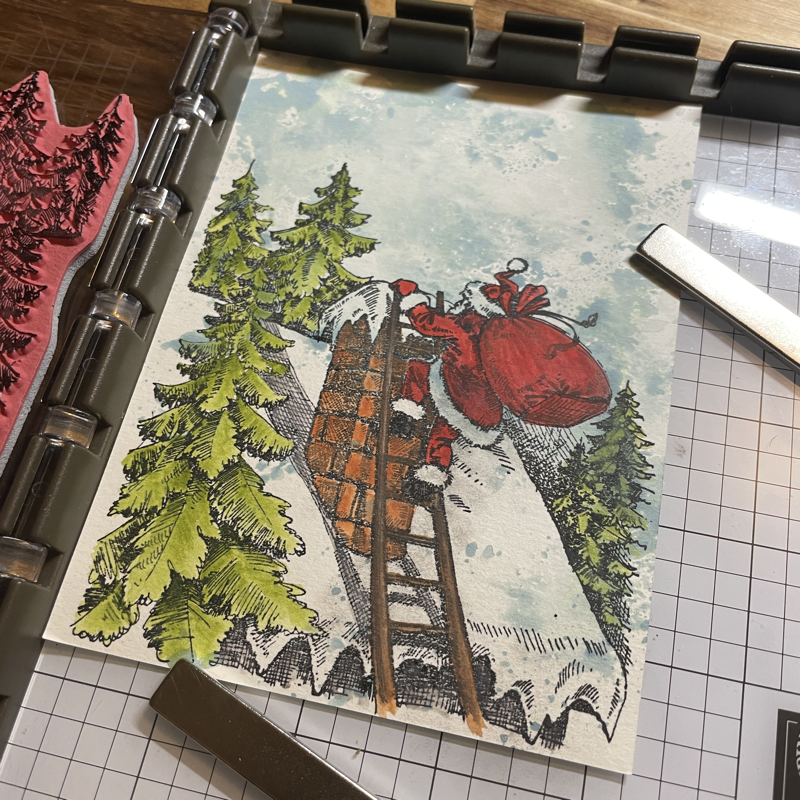
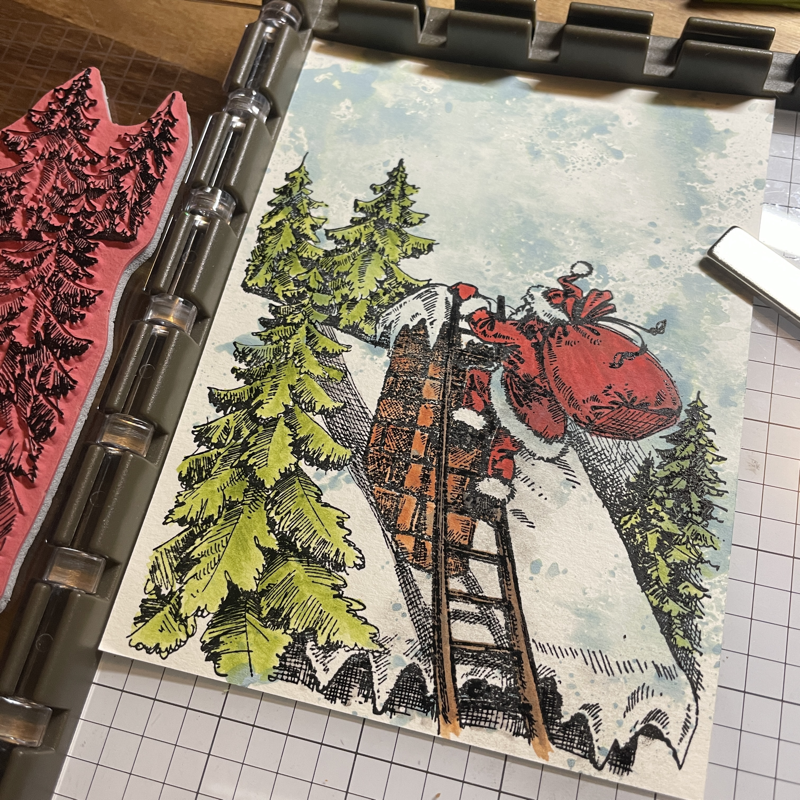
This Christmas card was created with the exclusive STAMPtember collaboration stamp/stencil set with Tim Holtz from SimonSaysStamp. This is a fun image of Santa giving out Christmas gifts. I'm excited to share some inspiration with you! 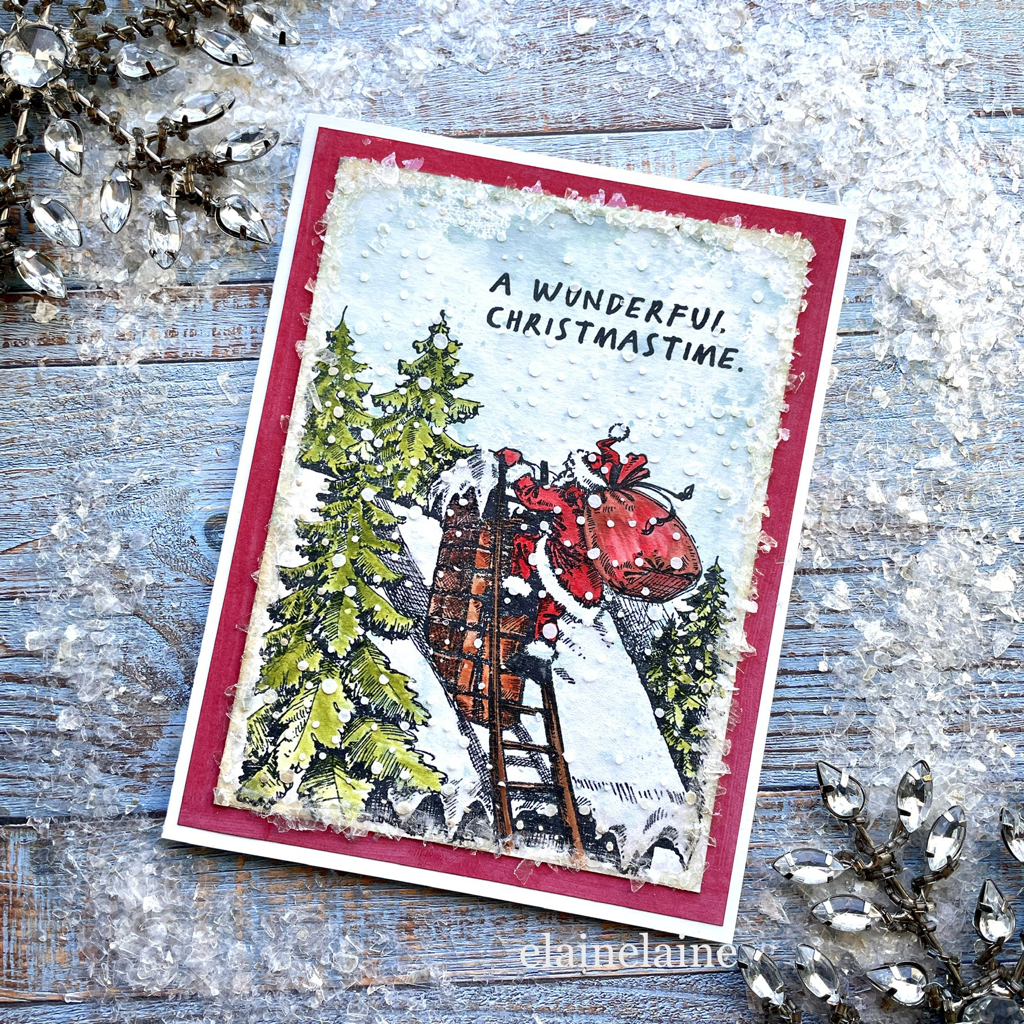 Ink smooshing on watercolor cardstock with a piece of plastic film and distress oxide speckled egg ink pad 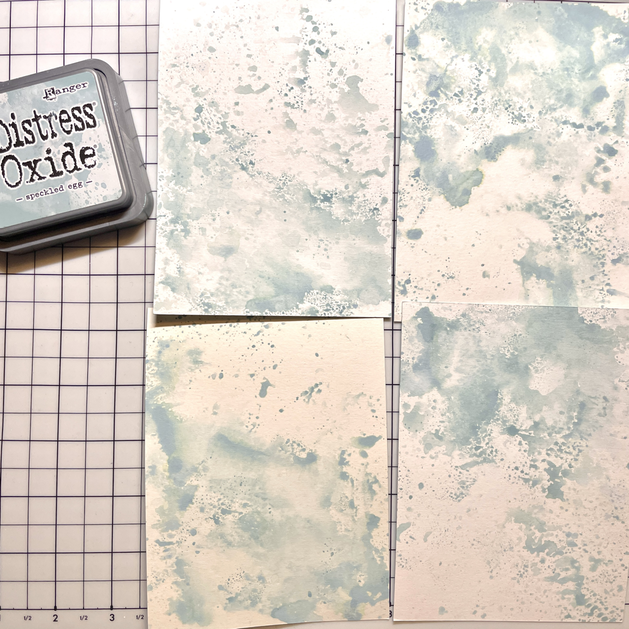 Stamping over watercolor cardstock using Altenew Obsidian pigment ink 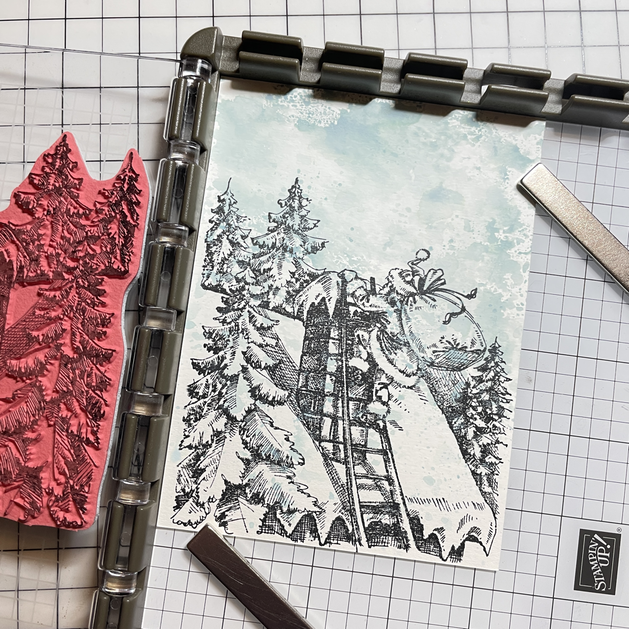 Coloring the image using distress watercolor pencils. 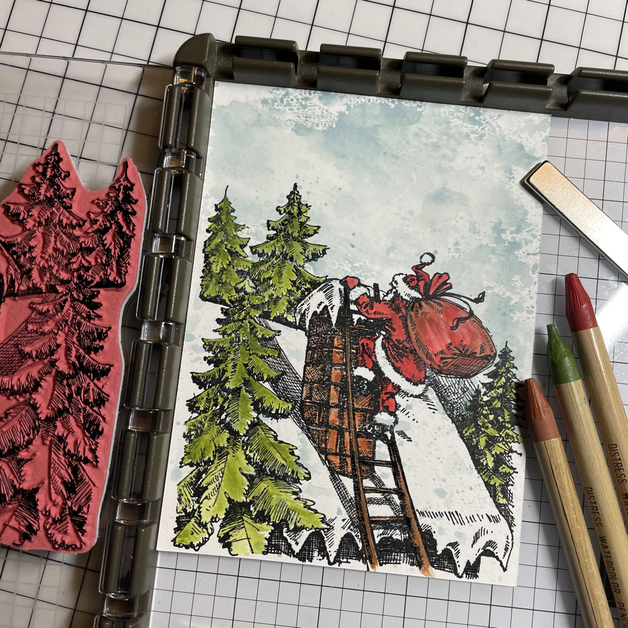 Even though some of the sky color was smooshed onto the tree, it didn't affect the color of the tree and the green color turned out clean. The outline of the black ink slightly turned matte. The black can be treated as is or you can double stamp the image one more time to revive the look. 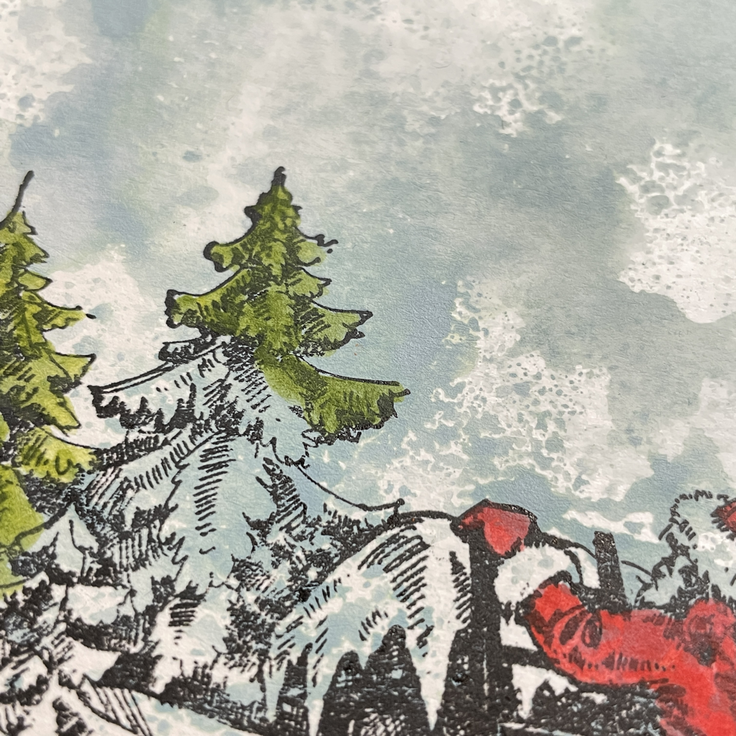 I decided to stamp the main image one more time and this is the before and after look. Adding some grit paste on the roof using a spatula to create snow  Adding more snow using snowy stencil and texture paste 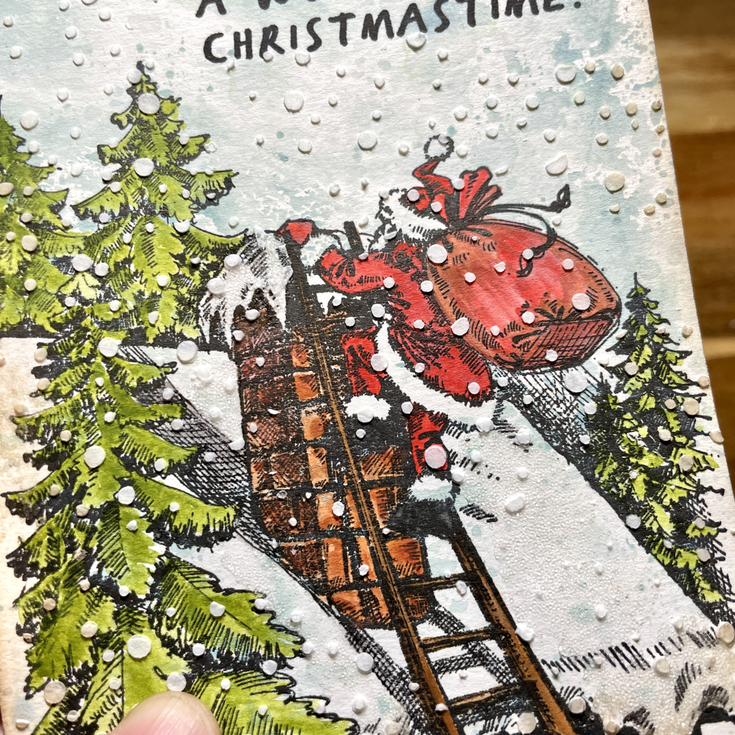 I couldn't find a vintage red cardstock that I really liked, so I brushed the red frame using distress oxide lumberjack plaid ink pad for the backing piece. 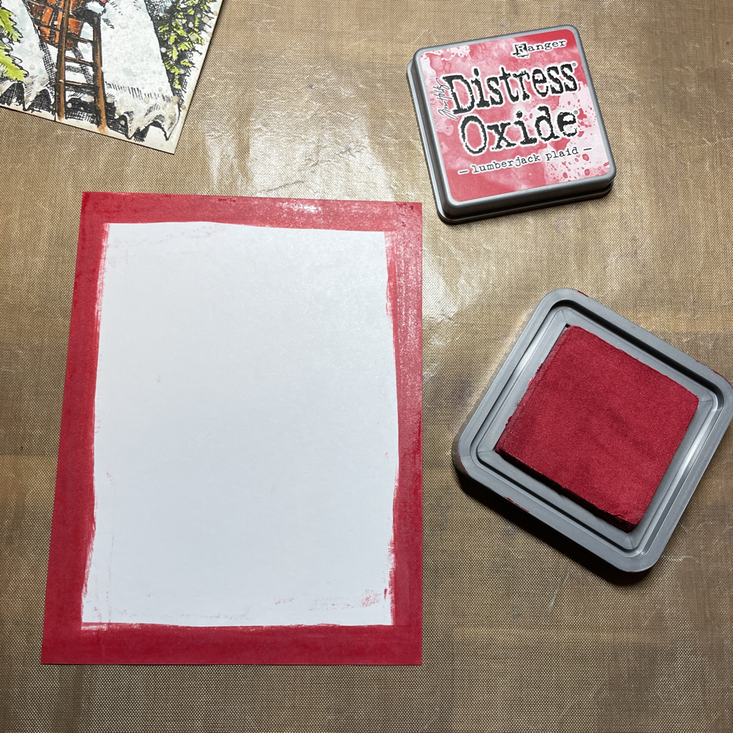 Once I set the main image on the backing, it felt a little flat. Maybe it needs more decoration. 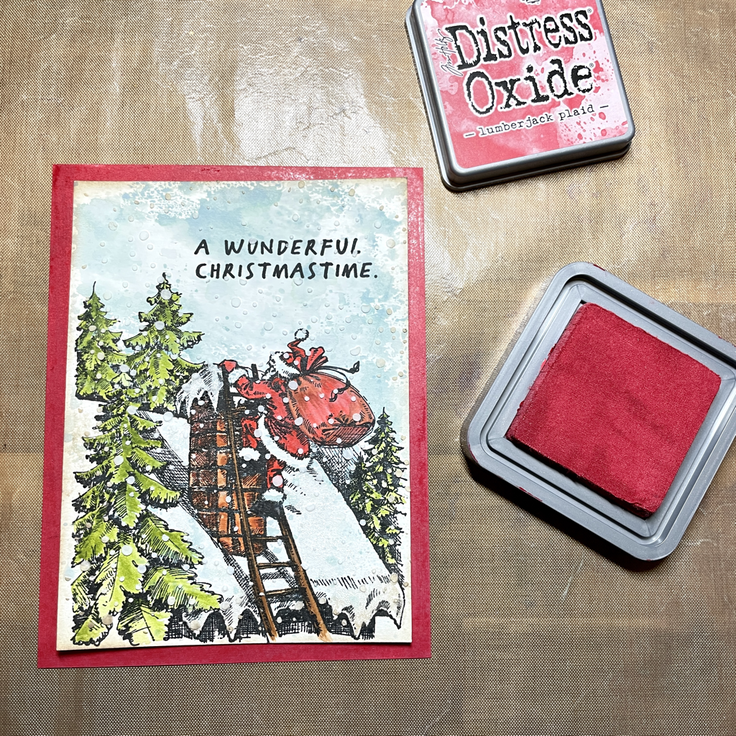 I decided to add a frame with snowy effect using glossy accents and mica flake. 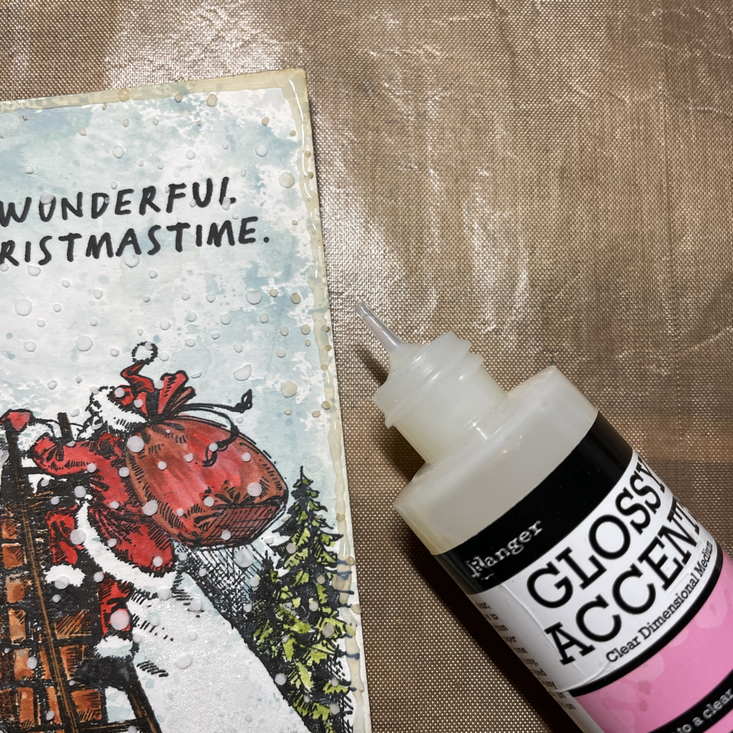 Sprinkle mica flakes  Adding more gloss accents and mica flake in some area 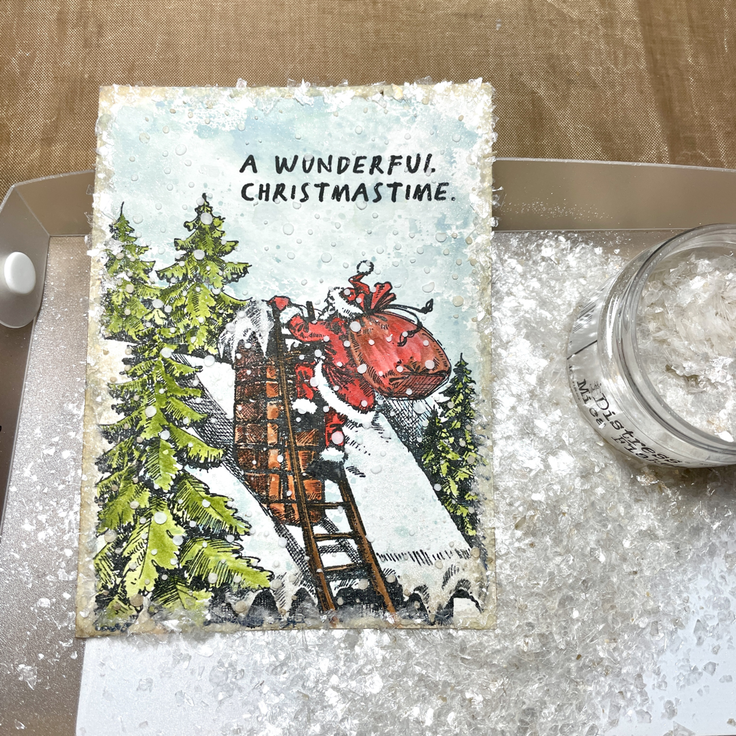 The card is now completed. A fun card with Santa climbing up the chimney. Ho Ho Ho Merry Christmas!_  Supplies: 2022 Tim Holtz STAMPtember exclusive stamp set from Stamper Annoymous for SimonSaysStamp Altenew Obsidian pigment ink Tim Holtz Distress watercolor pencil set Tim Holtz Distress Oxide ink pad- Speckled egg Tim Holrz Distress Oxide ink pad- Lumberjack Plaid Ranger Distress Girt Paste-Snowfall Ranger Distress Mica Flakes Ranger Texture Paste Thank you for visiting! Happy Crafting~
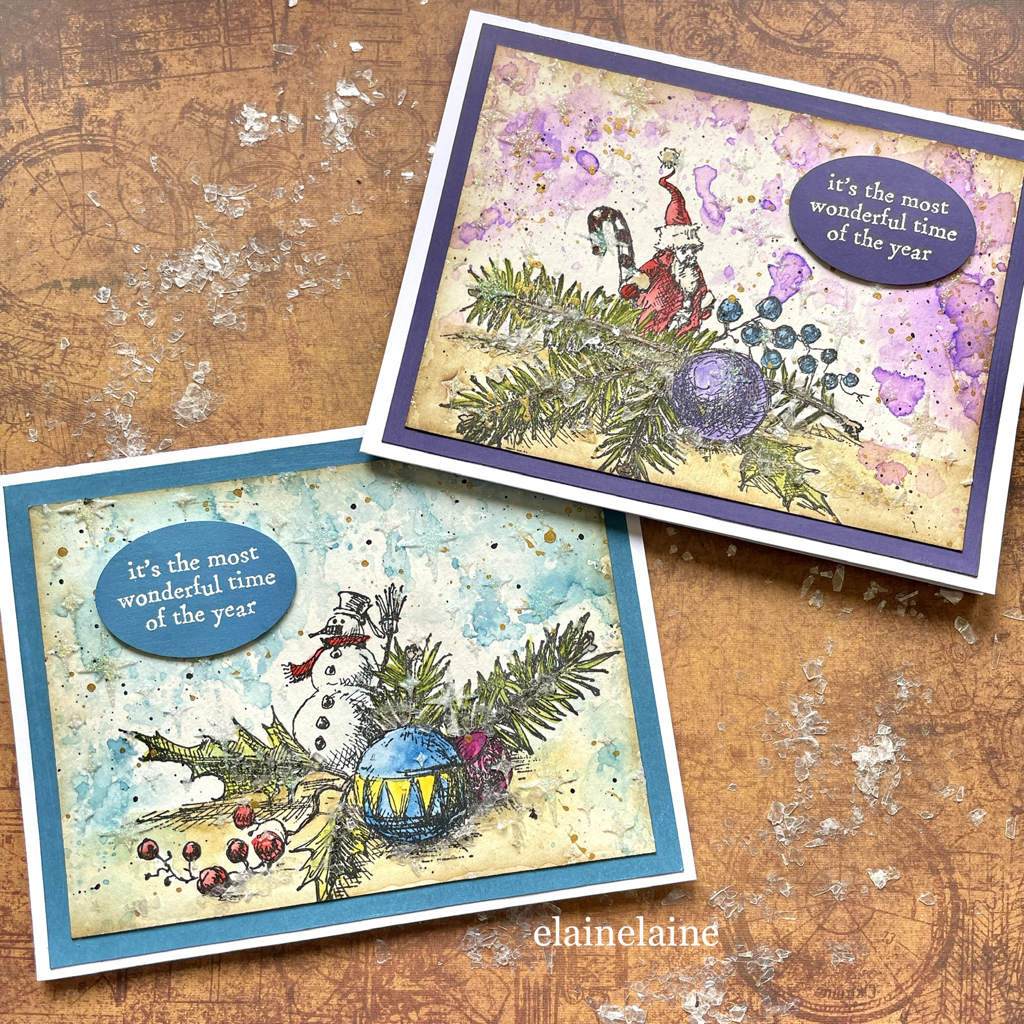 A very simple but classic Christmas card. This card was created on 140 lb watercolor paper with basic stamping, distress watercolor pencil coloring, ink blending, ink smooching, glimmer paste stenciling and mica flakes decorating. 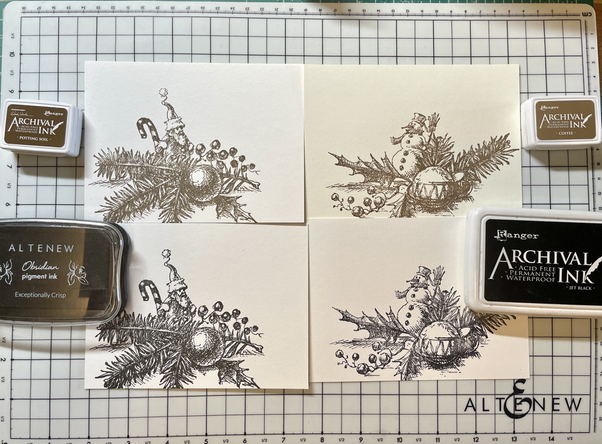 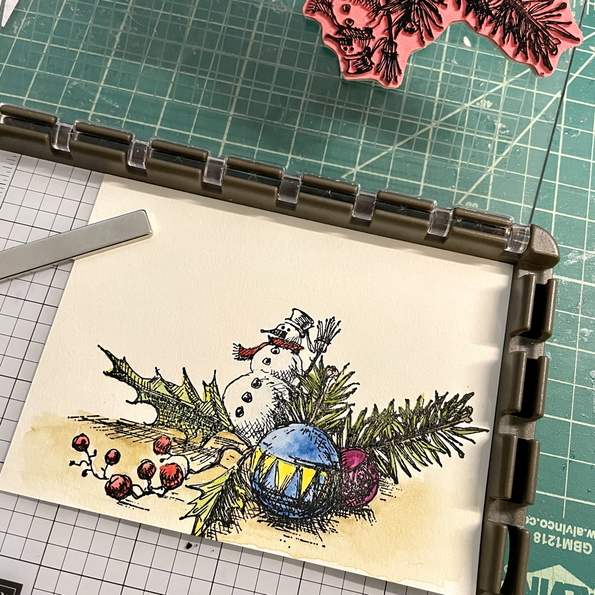  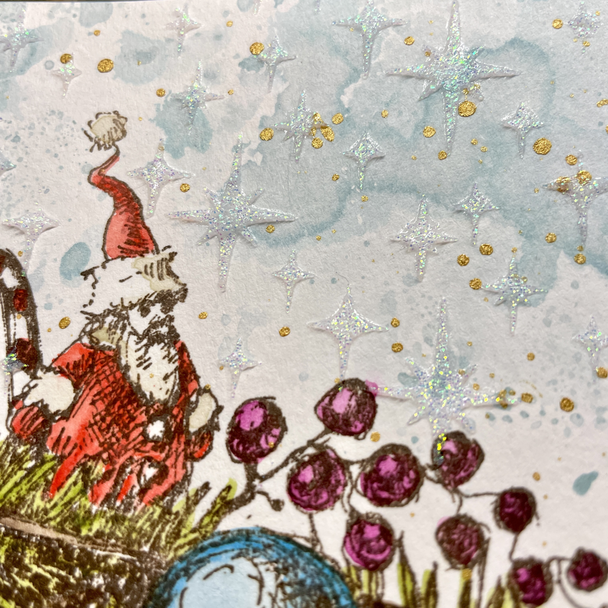 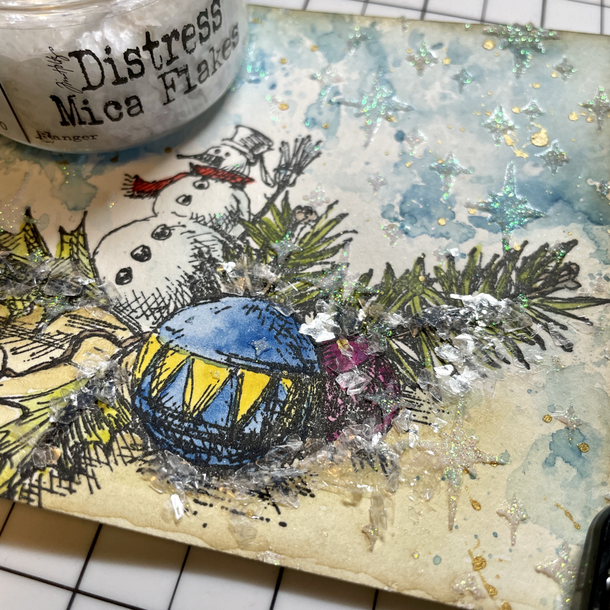 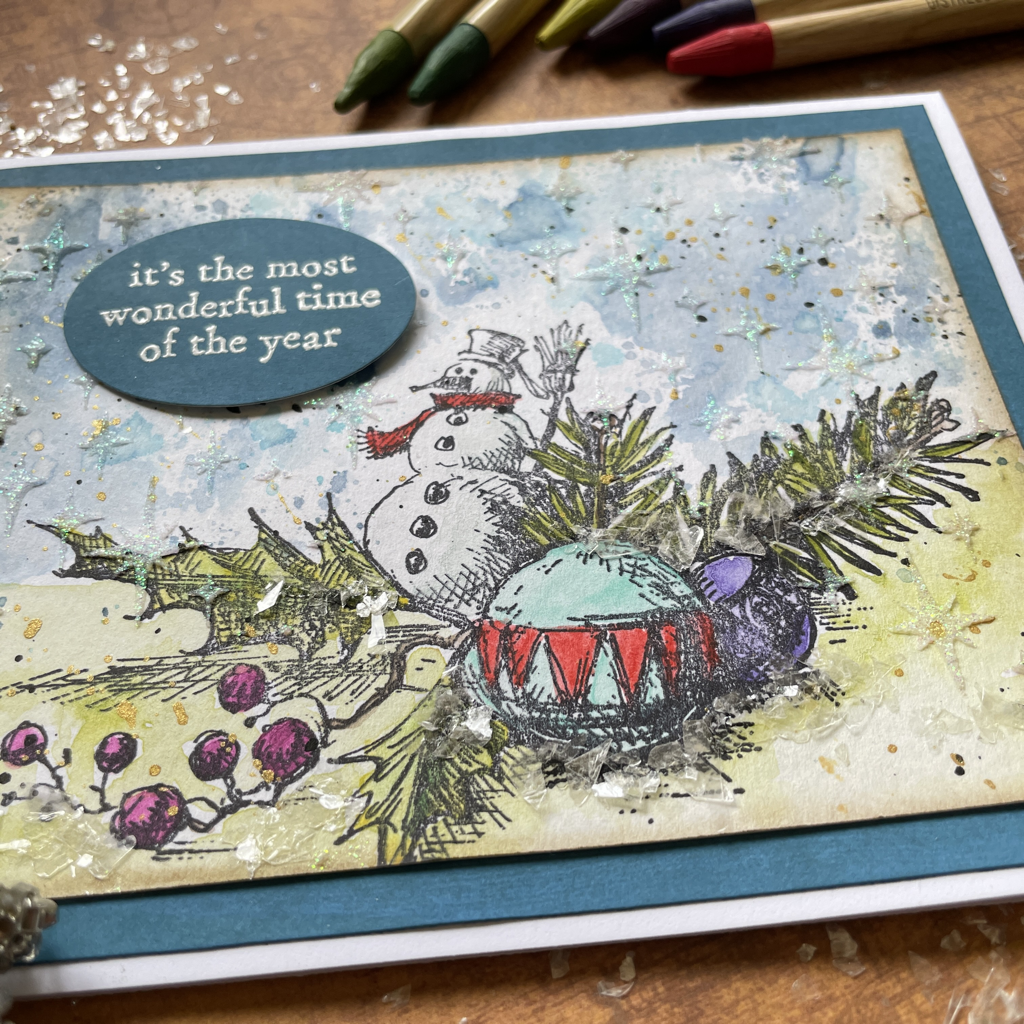 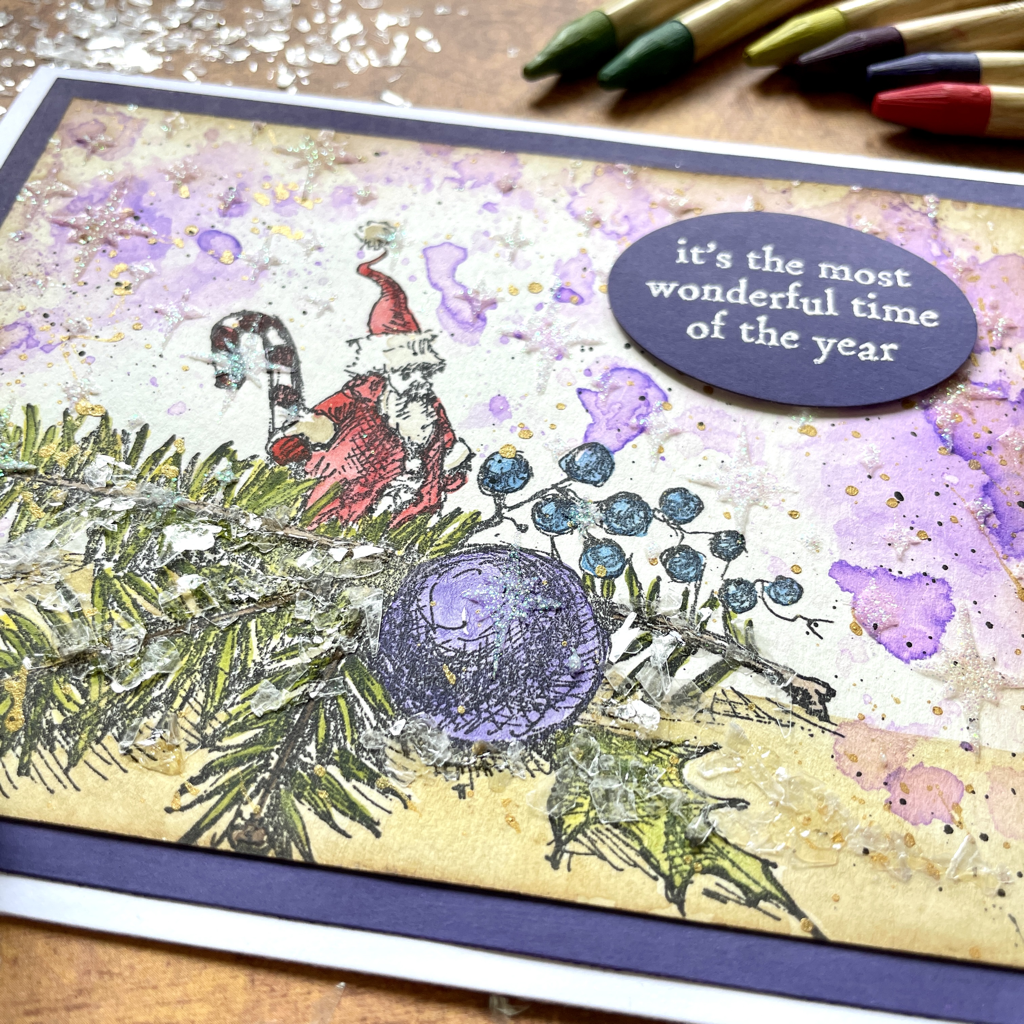 Supplies: Stamper Anonymous Tim Holtz Cling Stamp CMS444 Cozy Christmas Tim Holtz distress watercolor pencil Tim Holtz distress oxide ink- Wilted Violet, Villainous Potion, Uncharted Mariner, Speckled Egg Tim Holtz distress Mica Flakes Nuvo Glimmer Paste Thank you for visiting~ Happy Crafting
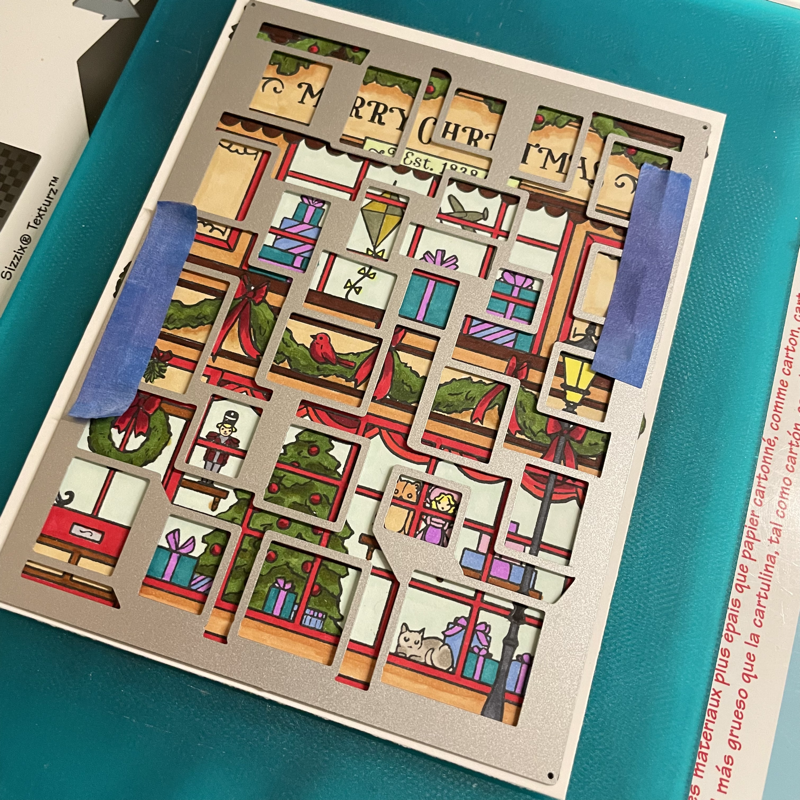
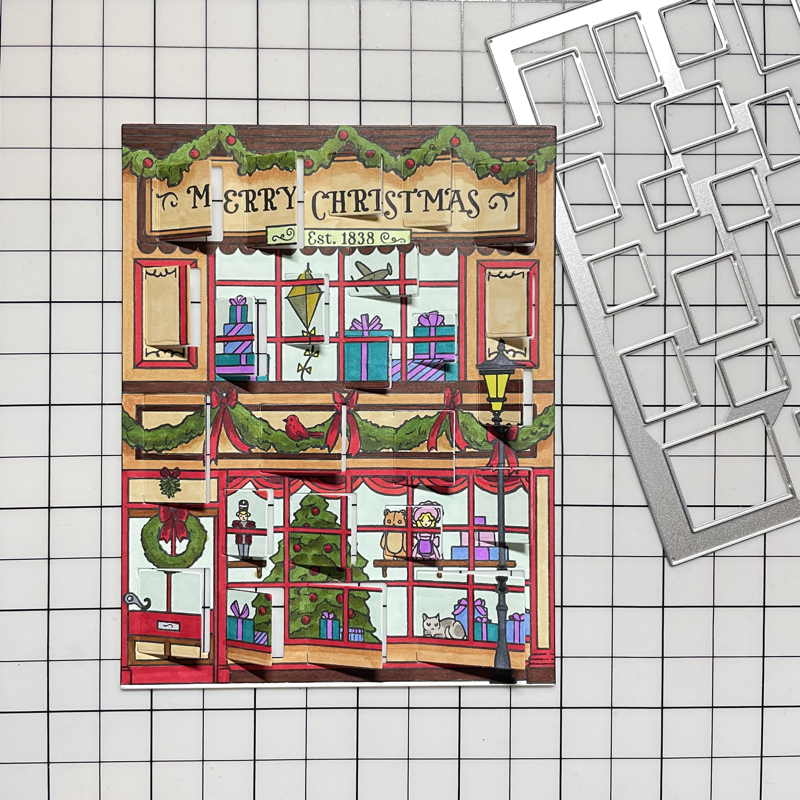
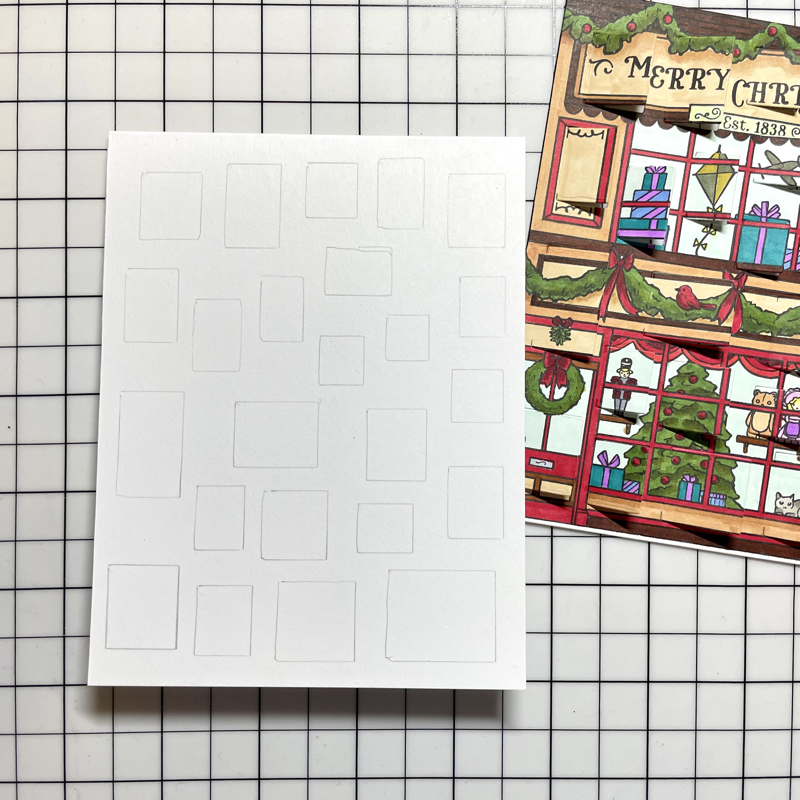
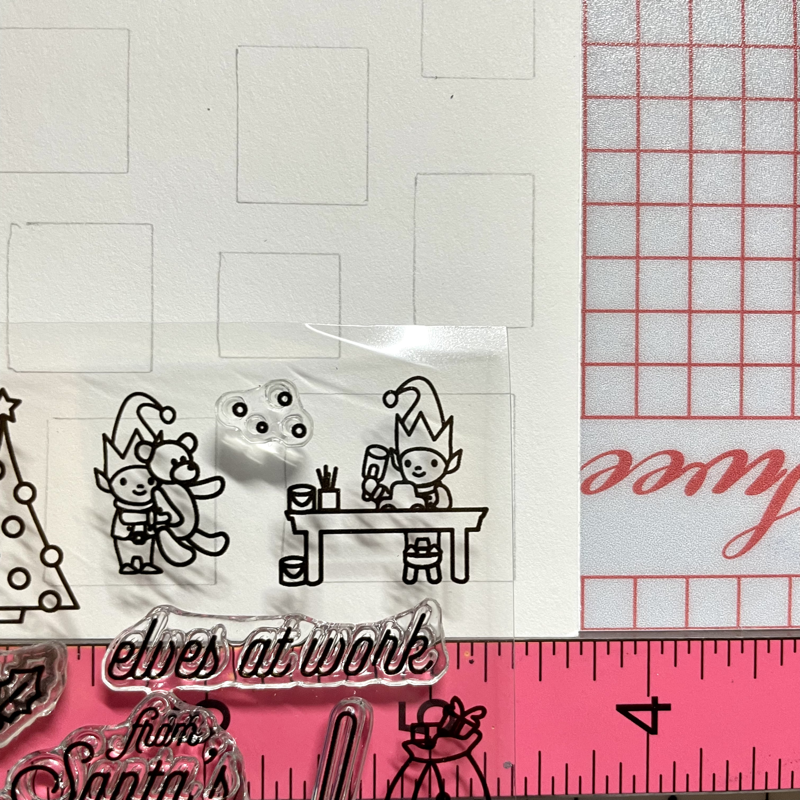
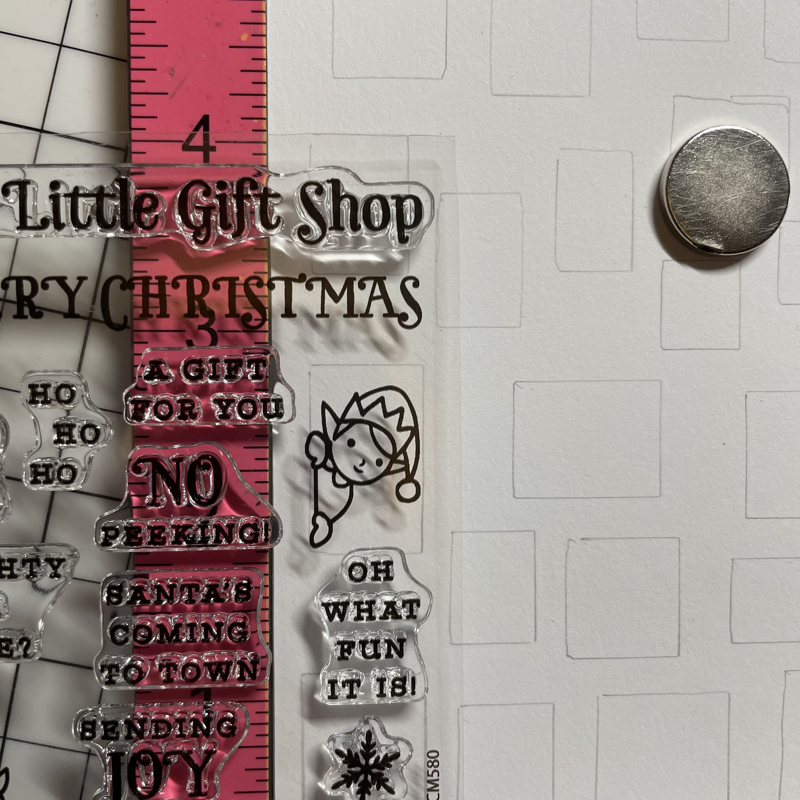
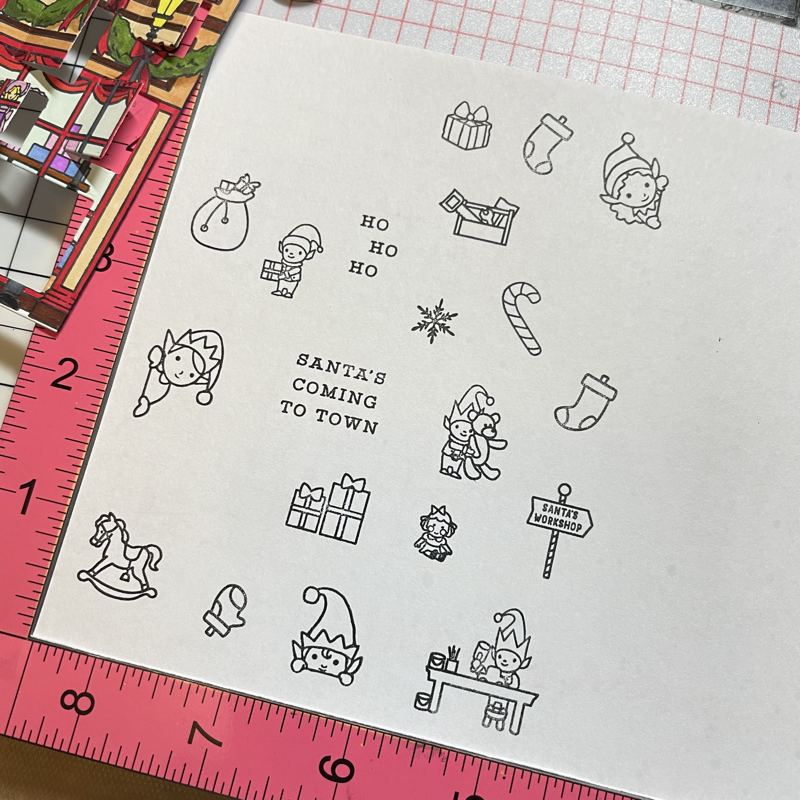
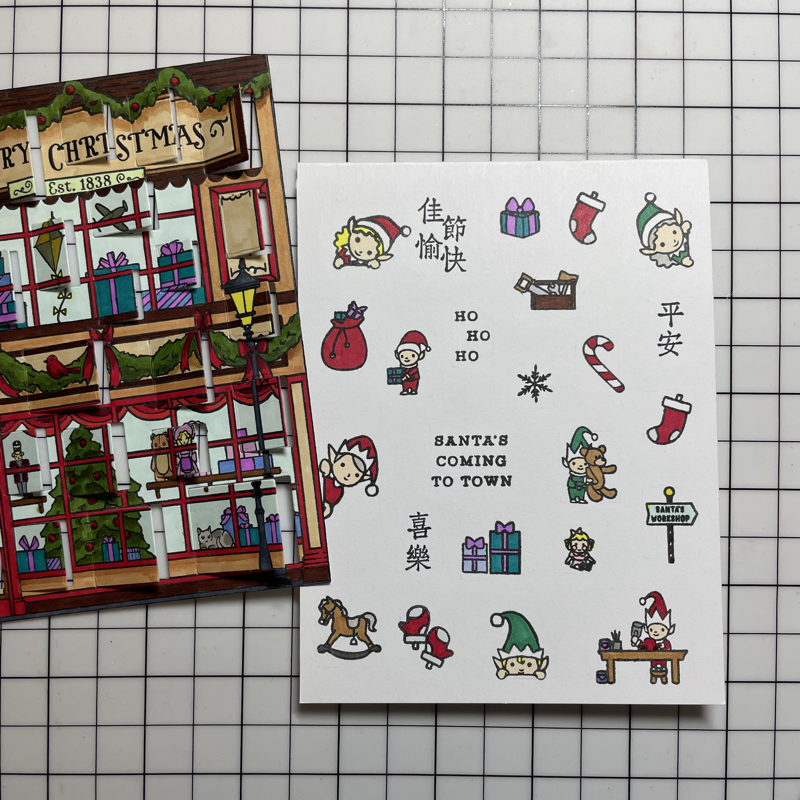
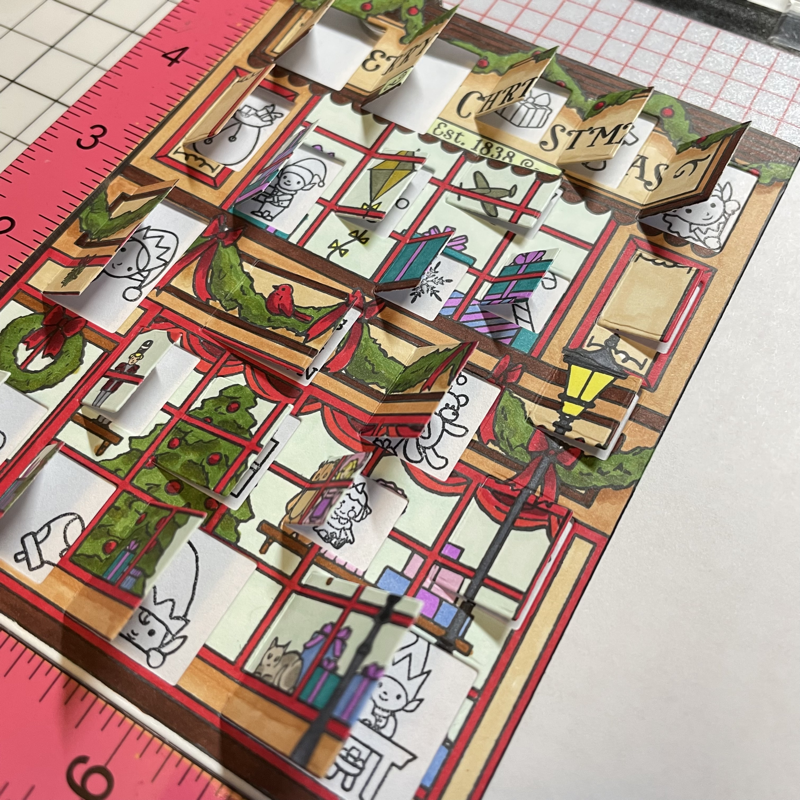
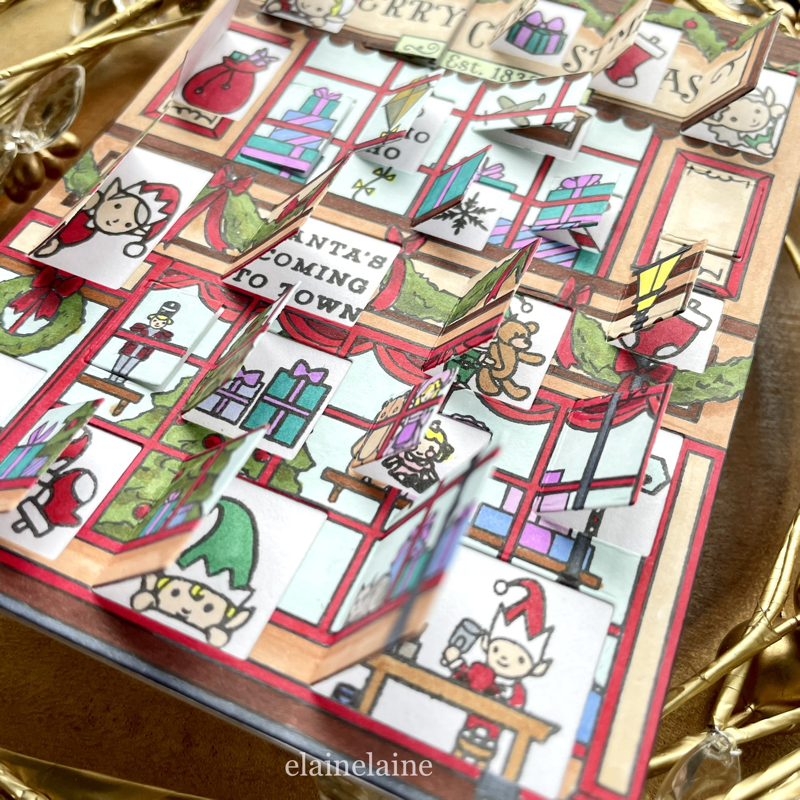
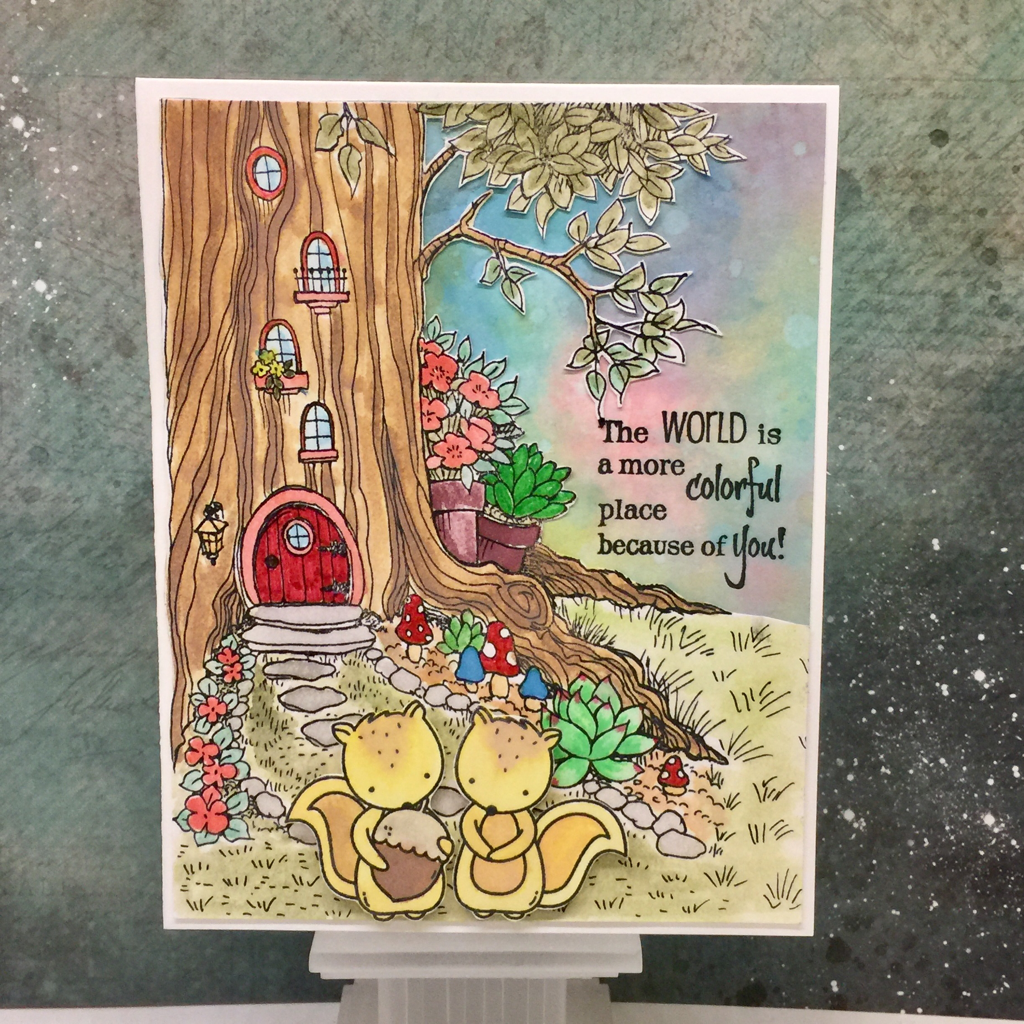
Our store will not be accepting orders from 12/18/2021 to 12/31/2021 as the elainelaine family is celebrating Christmas. Apologies for any inconvenience caused, thank you for your patience and for being a loyal customer – we’ll be back and running again on 01/01/2022! The orders will then be processed accordingly. Wishing you a joyful holiday season and a happy new year.  This is a Peek A Boo holiday gift shop card. Toy shops and craft stores are two of my favorite places. For this gift shop, I have created a behind-the-scene Peek A Boo effect, and it includes holiday greetings and elves busy with crafting holiday toys. The inspiration came from ig@delandartie and the Hero Arts Gift Shop project. It is truly a fun card to make. 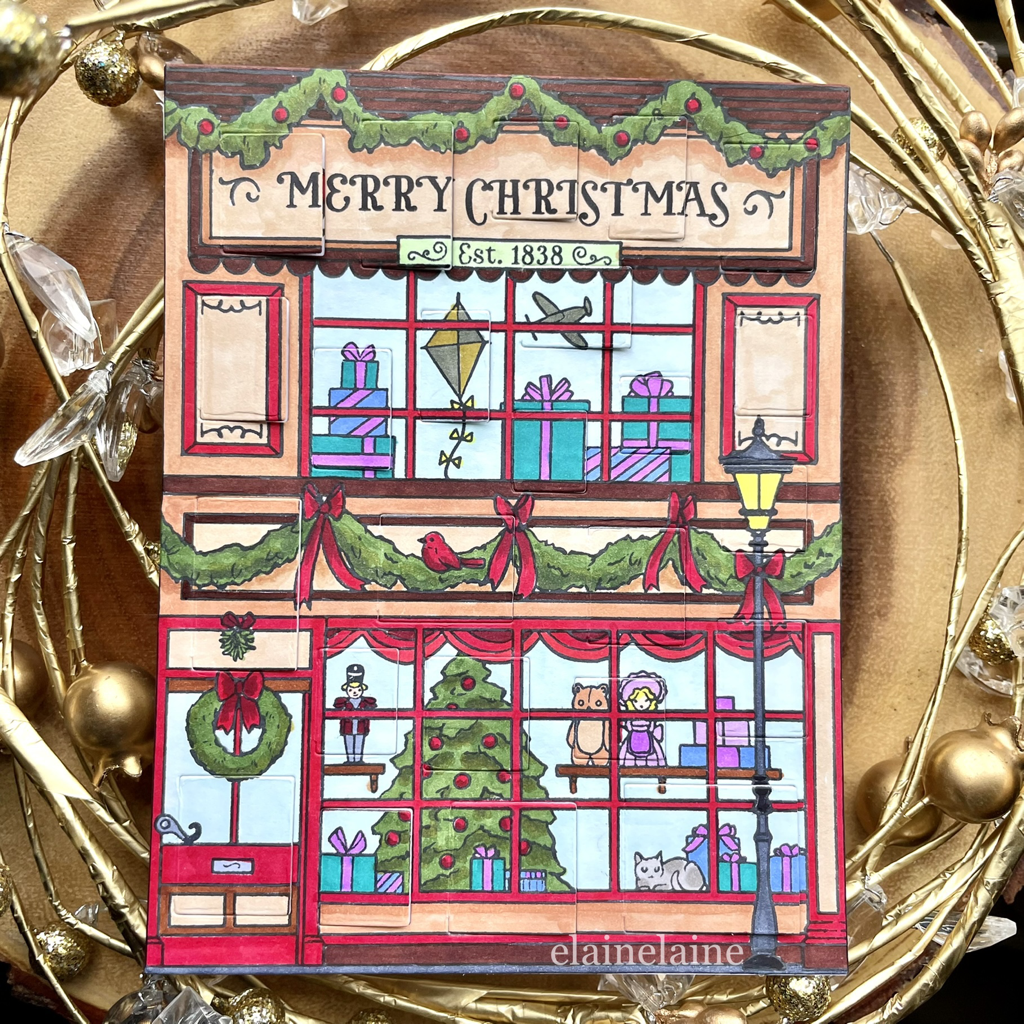 I used Copic to color the entire panel and then died cut the window using Hero arts Door fancy die. Then I traced the window onto another white card stock which will be the back panel for the gift shop. After that I stamped some elves images and holiday greeting. Once the images were stamped then color them with Copic. I also traced and stamped extra copy. Next time when I make this card, I will have reference to follow. 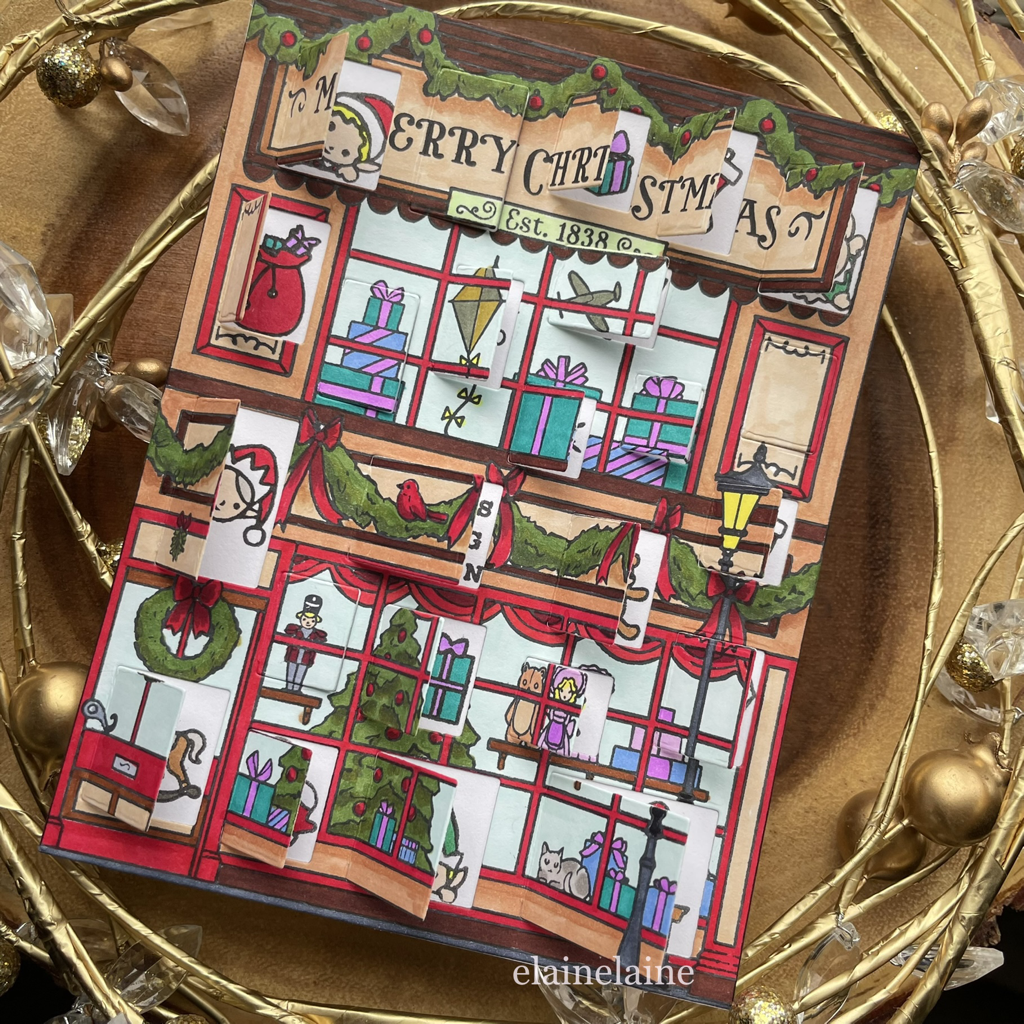 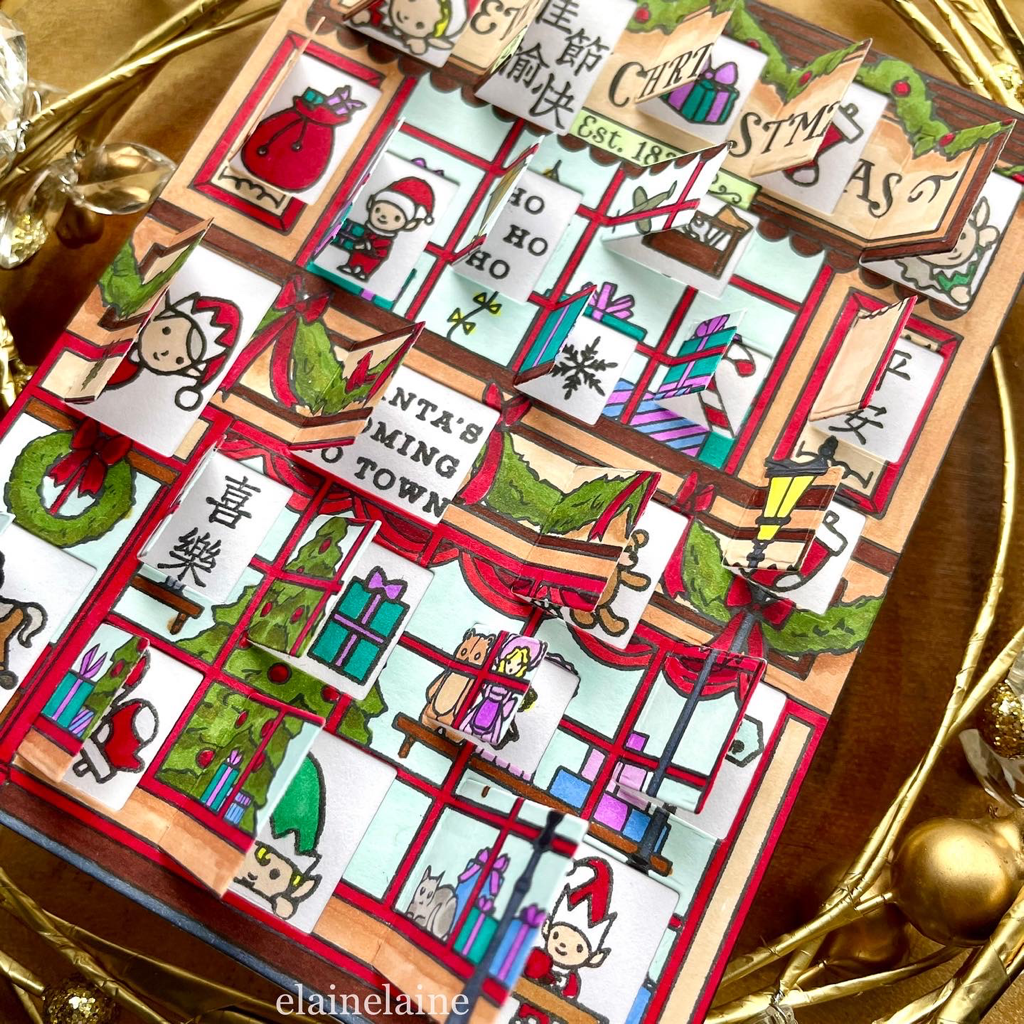 Supplies: Hero Arts Gift shop background cling stamp Hero Arts Hero greetings Christmas gift ship clear stamp Hero Arts Peek A Boo Doors fancy die Hero Arts MH1017 My monthly hero kits October 2017 Thank you for visiting! Happy Crafting~
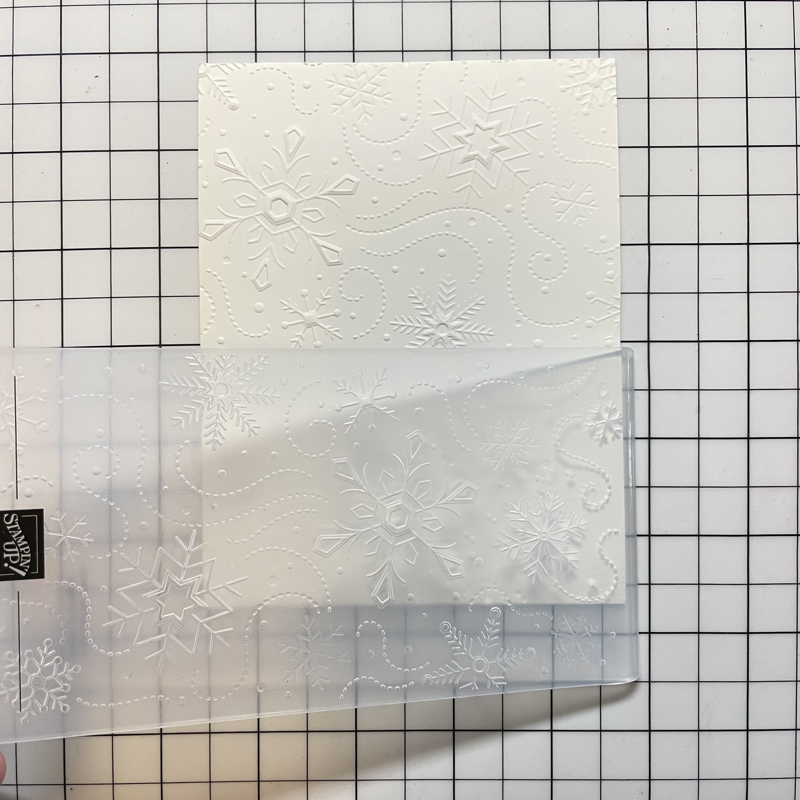
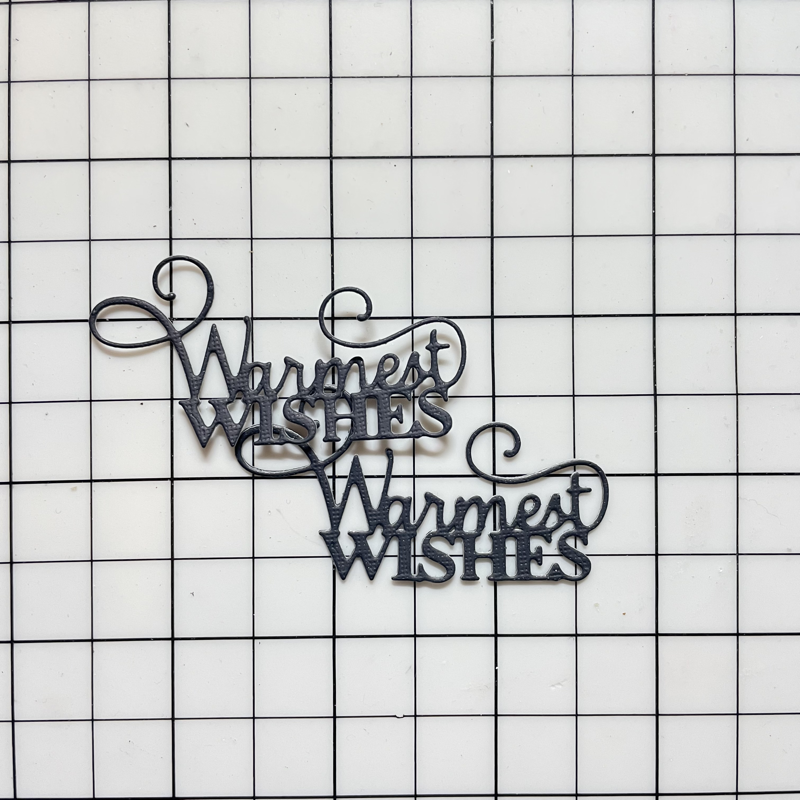
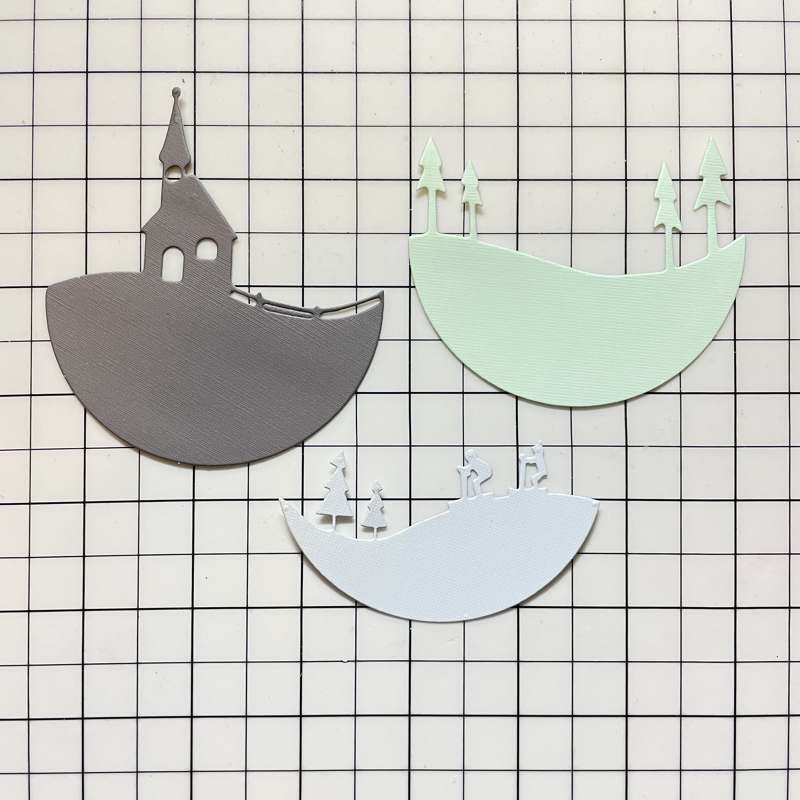
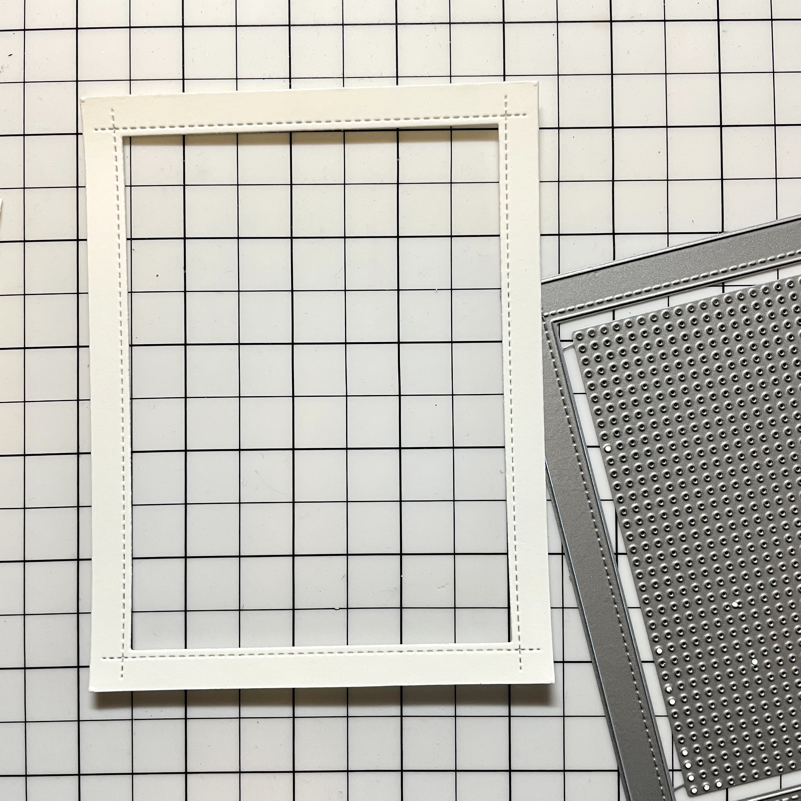
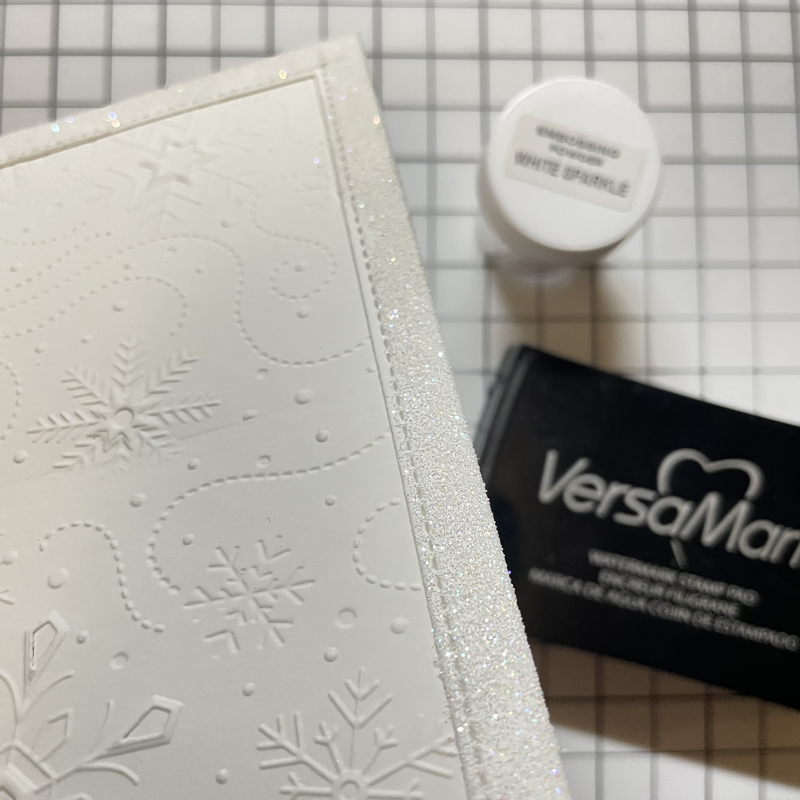
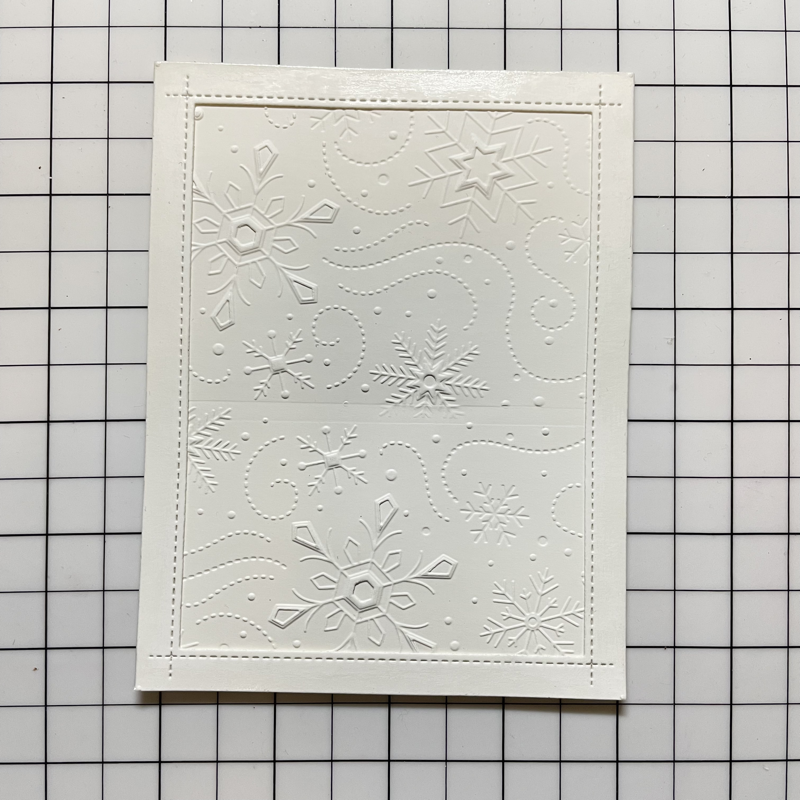
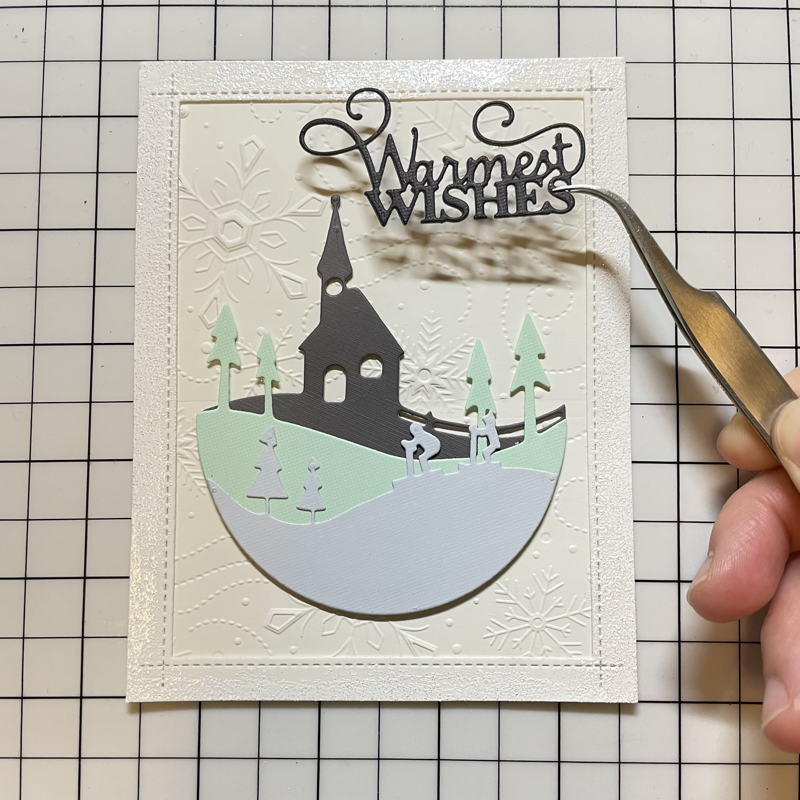
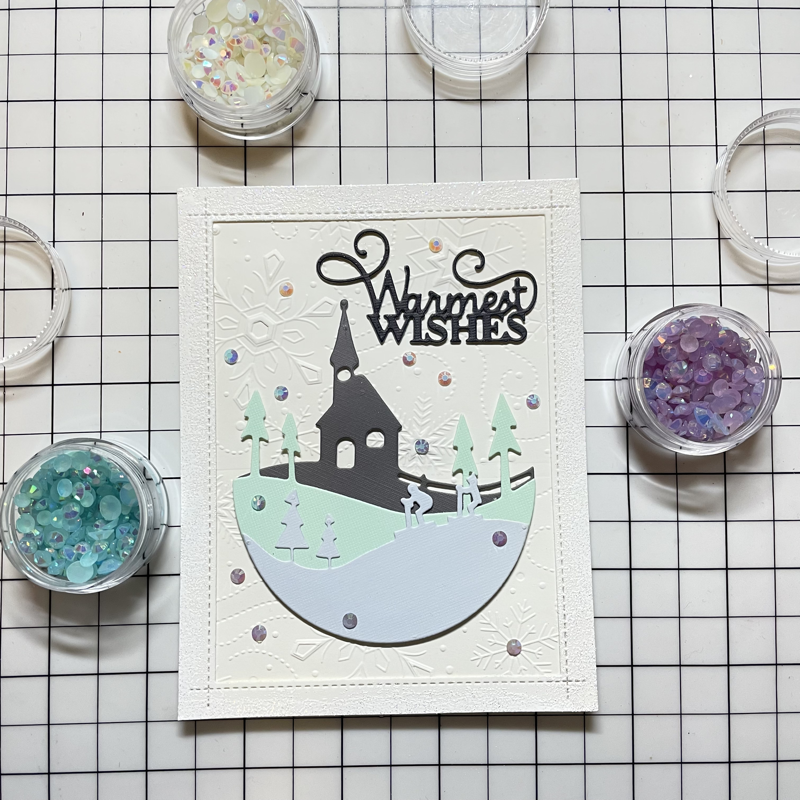
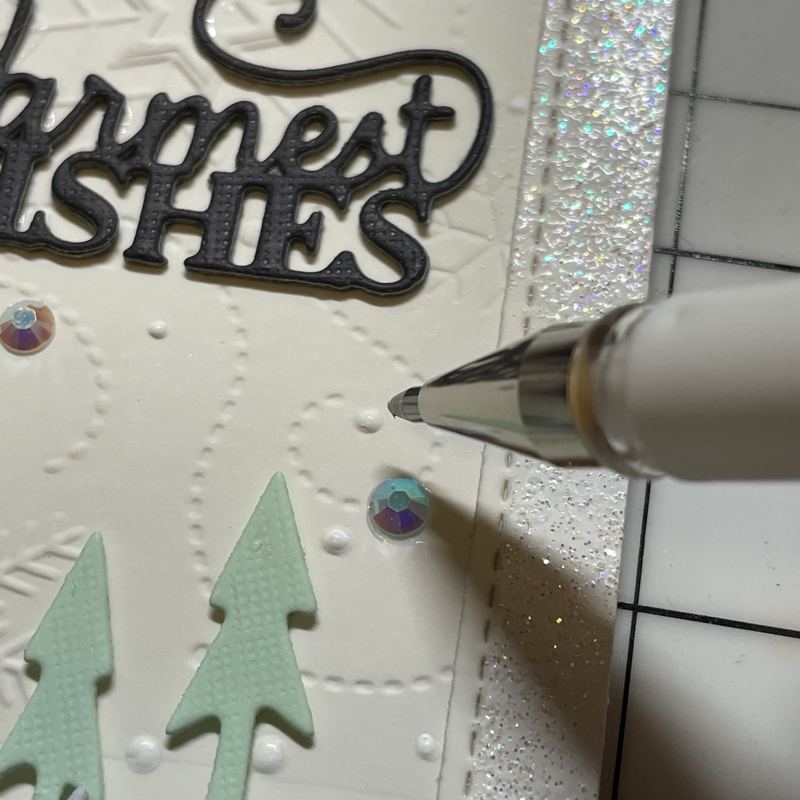
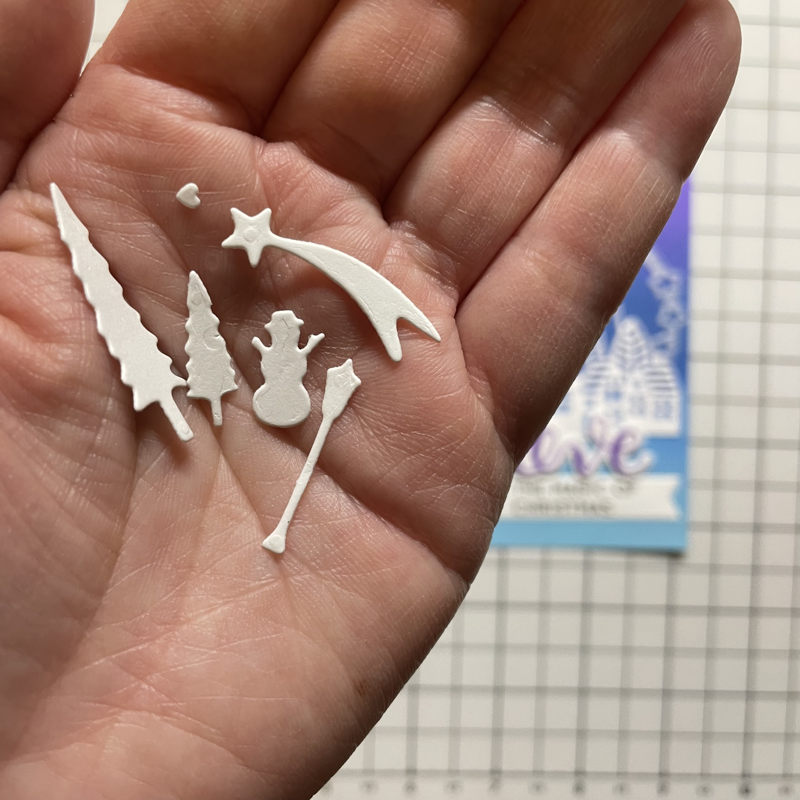
Warmest wishes in a winter wonderland. I used a church, trees and children skiing craft dies to create a forest scene. I then added a 3D snowflake and some crystal jewels for the background. Wish everyone warm, joyful holiday this season. 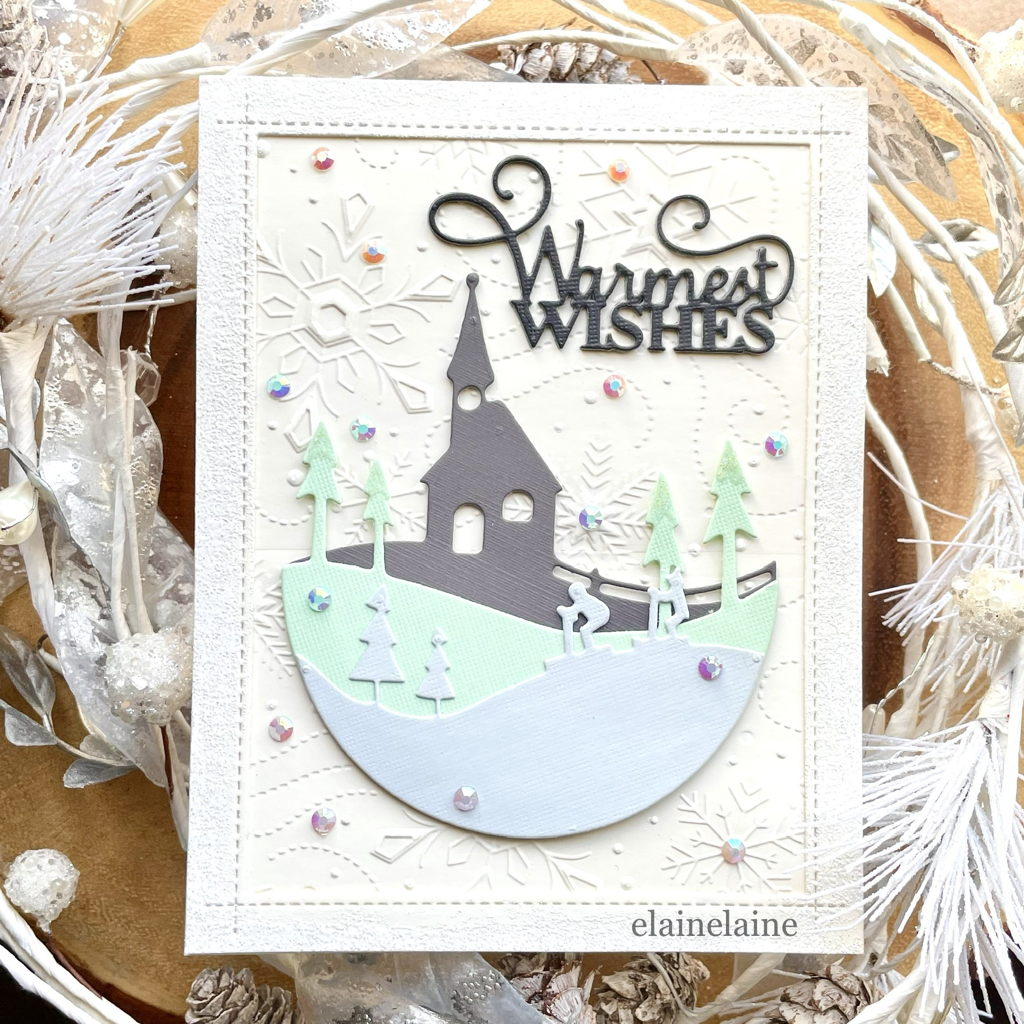 Supplies: Creative Expressions Warmest Wishes craft die Alexandra Renke Winter scene dies Stampin Up 3D Wintry embossing folder Mama Elephant Pegworks creative cuts Pinkfresh Studio Pinkfresh Jewel Essentials Thank you for visiting! Have fun crafting~
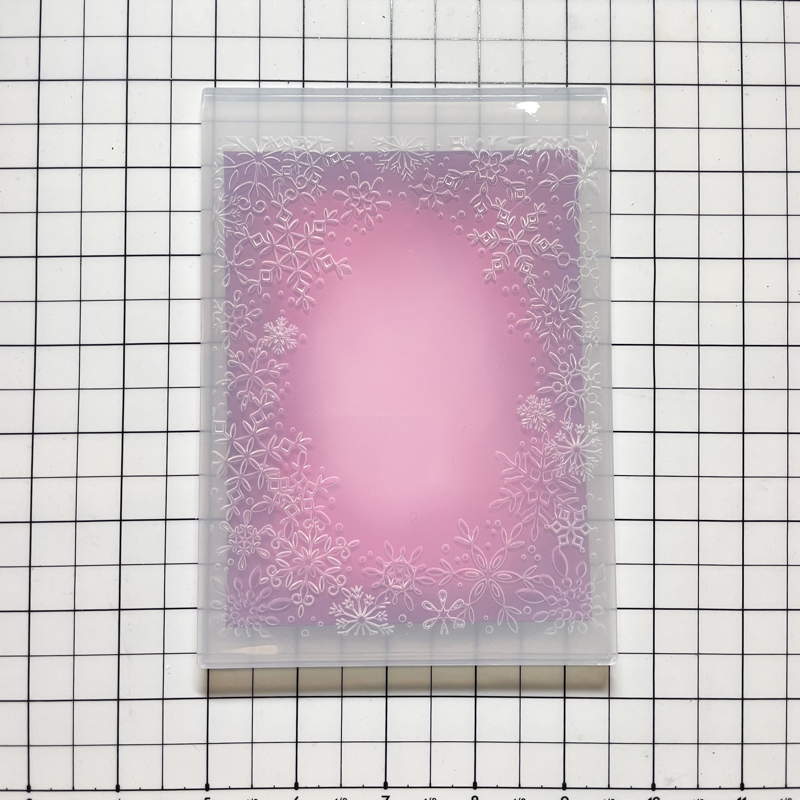
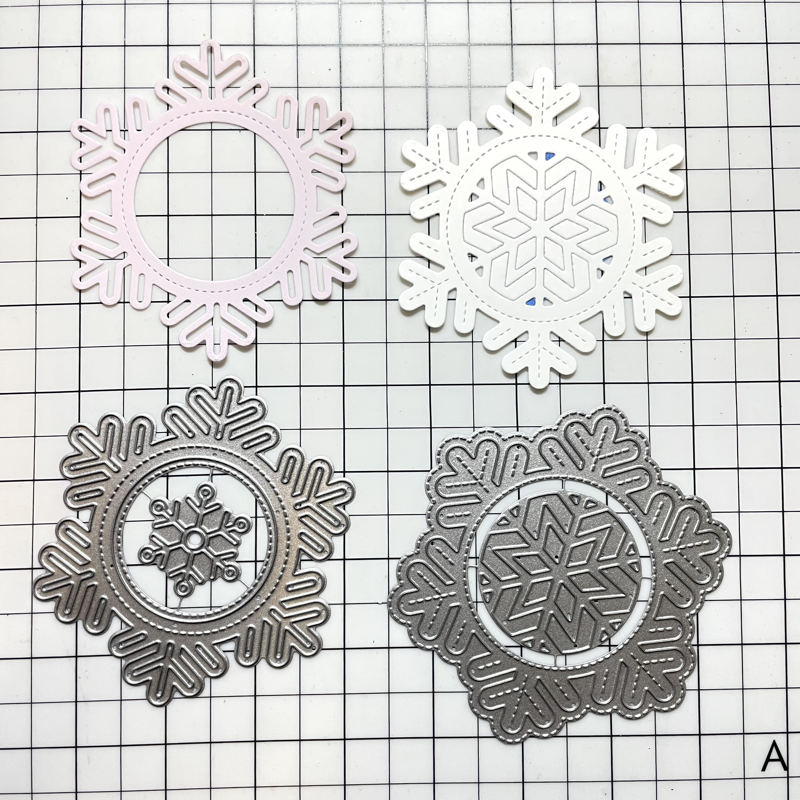
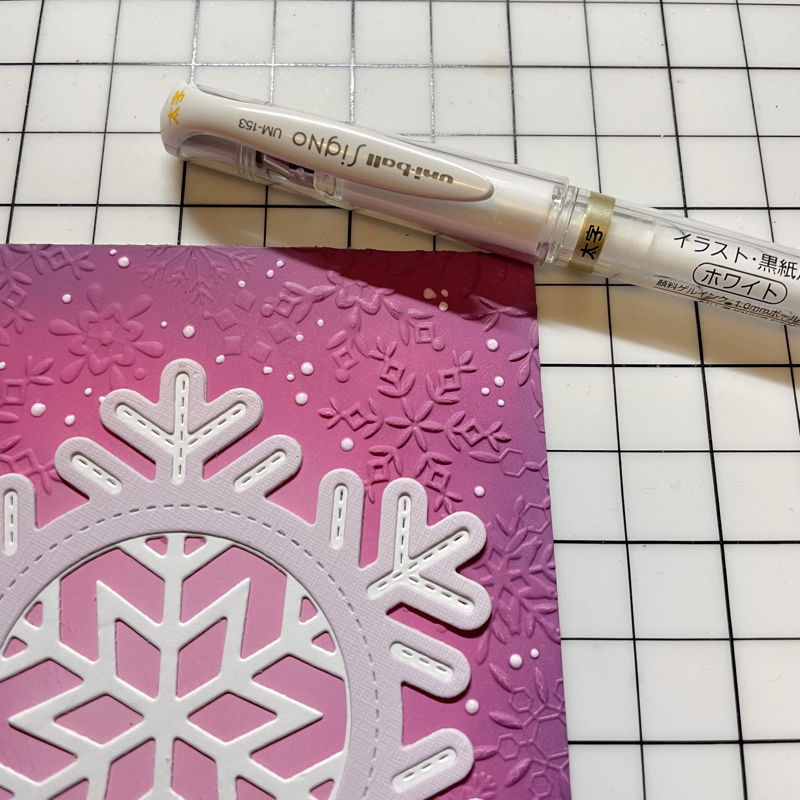
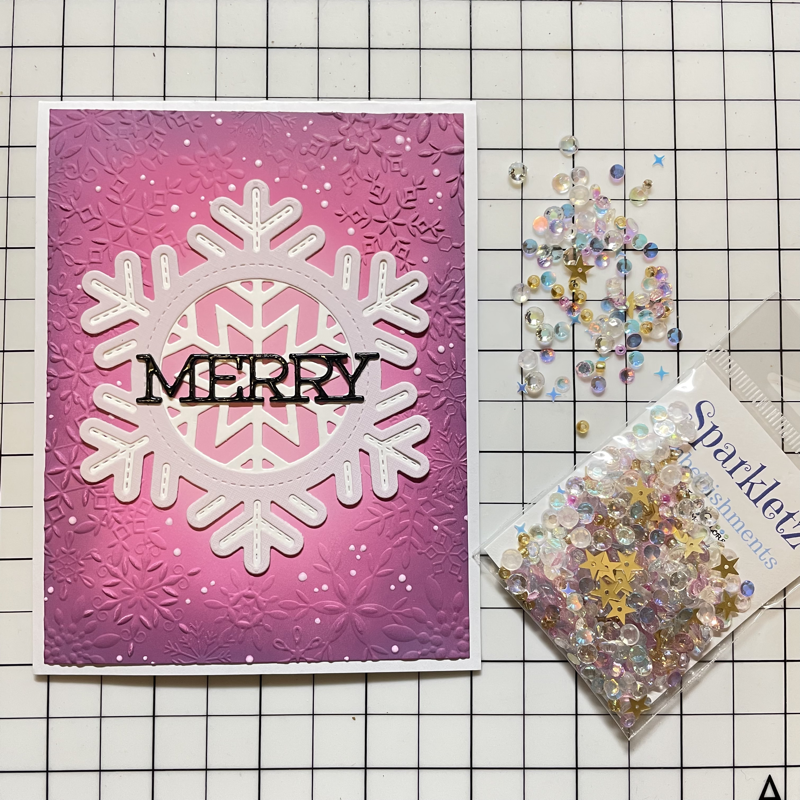
I always enjoy making Christmas cards with a snowflake as a center piece. For the card below, I used the color pink because I haven't seen a lot of people use pink for Christmas cards yet, and I wanted to try something new. I love how the word "Merry" contrasts with the snowflake.  First, I created a background using a very light pink cardstock. I blended the cardstock with some Distress Oxide ink in Kitsch Flamingo, Spun Sugar, and Seedless Preserves using a blending brush. Then I embossed the blended cardstock with a snowflake embossing folder. After completing the background, I die cut two sets of snowflakes from Lawn Fawn out of some lavender and white cardstock. I layered the white cardstock snowflake with the lavender cardstock snowflake. I also die cut the word “ MERRY” and added glossy a accent on the "MERRY" for the shine. The final step is putting the layered snowflake on the center of the cardstock. I also added some white dots on the card itself using a gel pen and some crystal beads for some bling. The layered snowflake Christmas card is then completed. 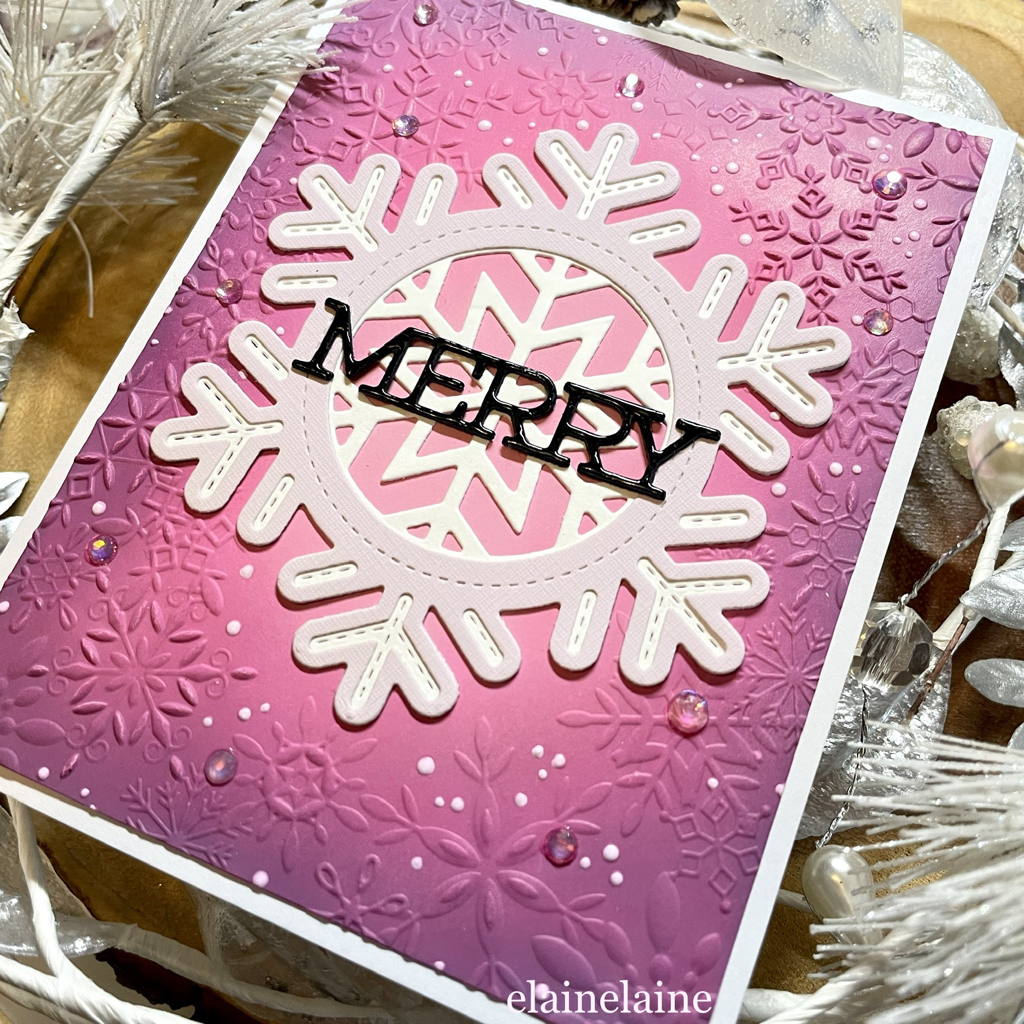 Supplies: Lawn Fawn Stitched Snowflake Frame die cuts Lawn Fawn Outside in Stitched Snowflake die cuts Simon Says Stamp embossing folder snowflake oval frame Simon Says Stamp Merry frame wafer dies Pinkfresh Studio Pinkfresh Jewel Essentials Thank you for visiting! Happy Crafting!
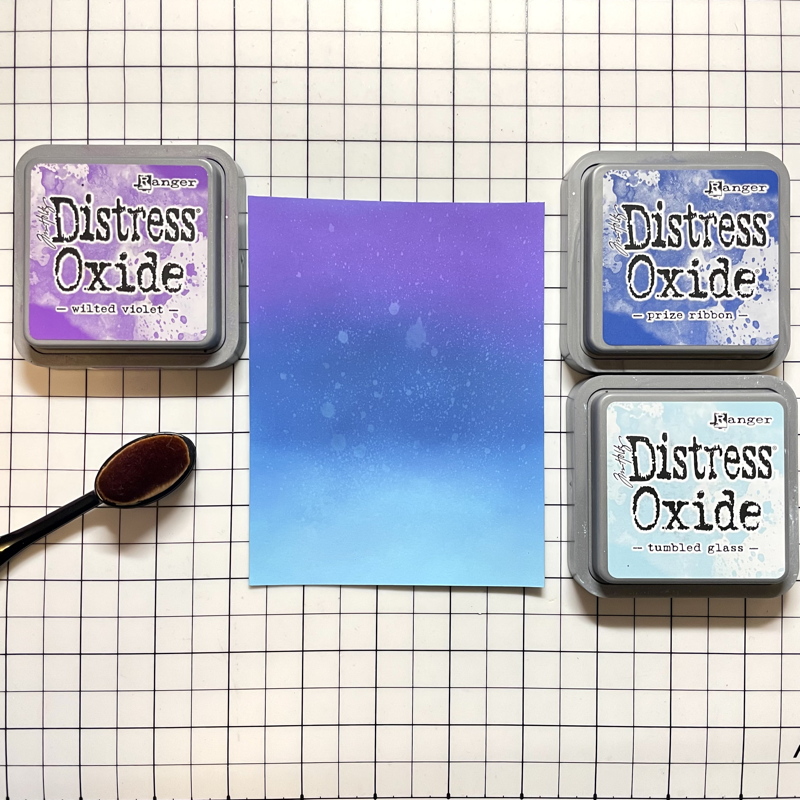
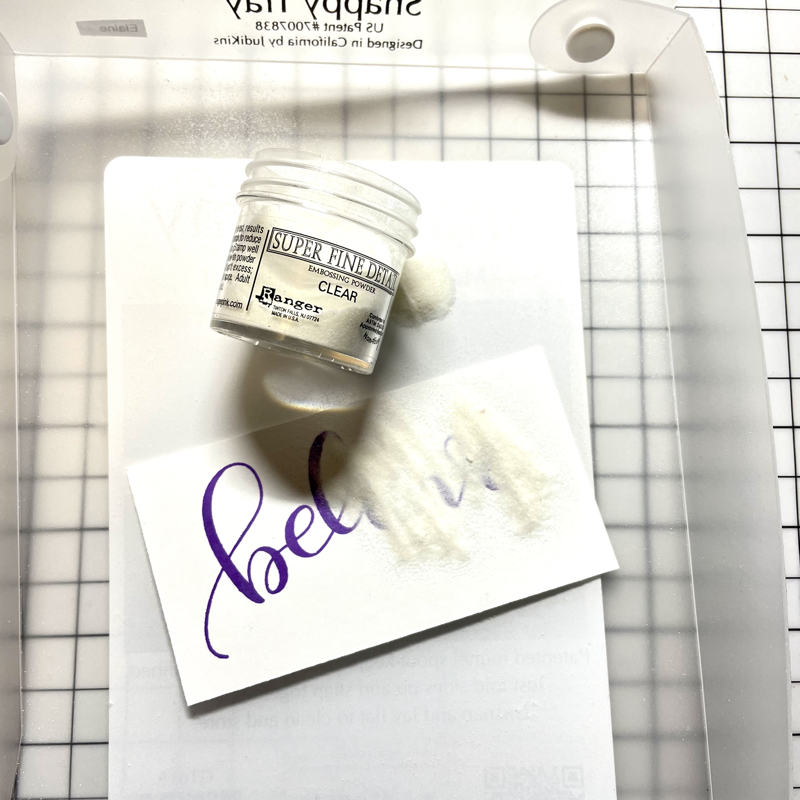
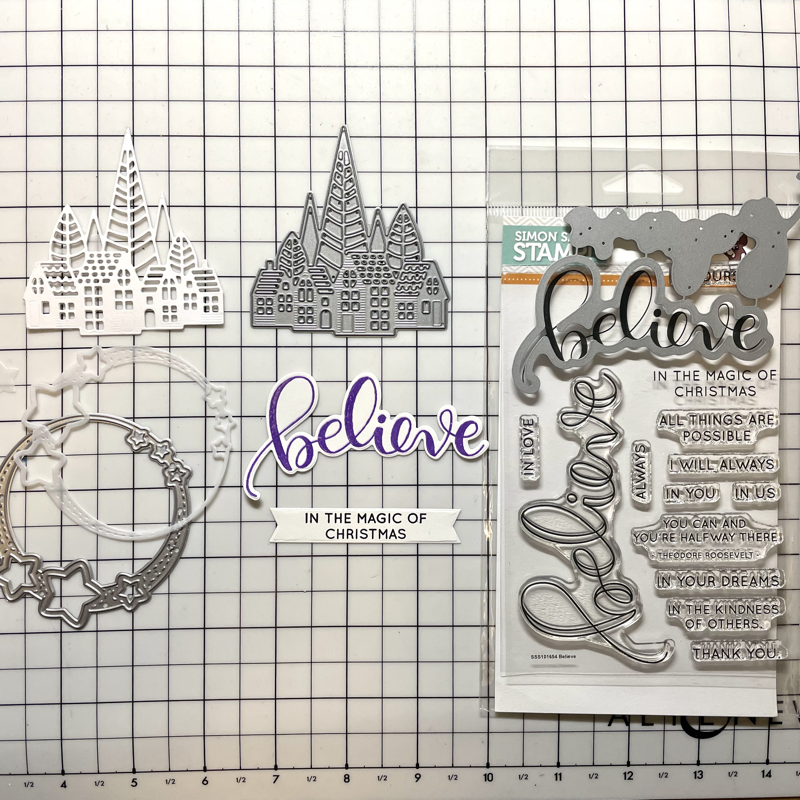
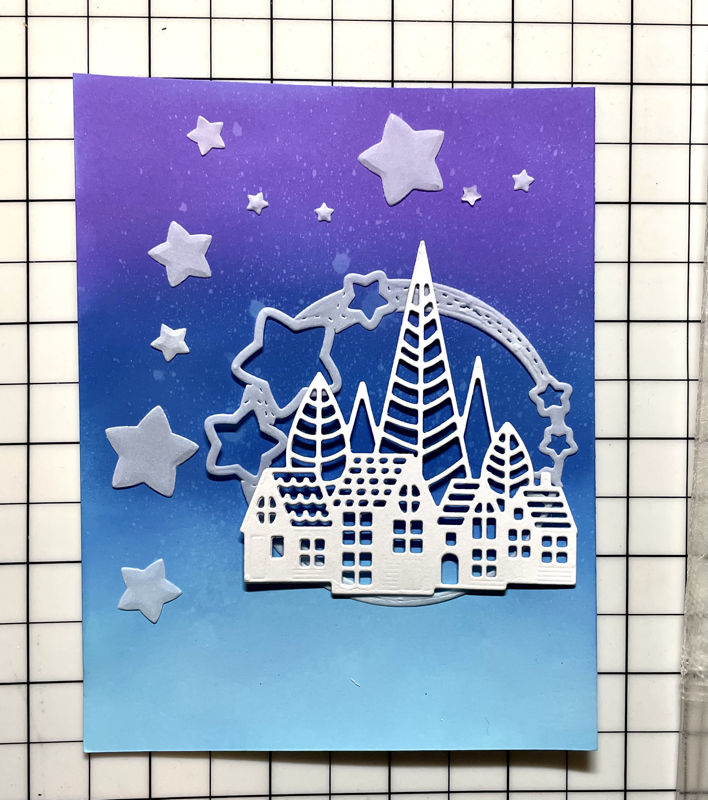
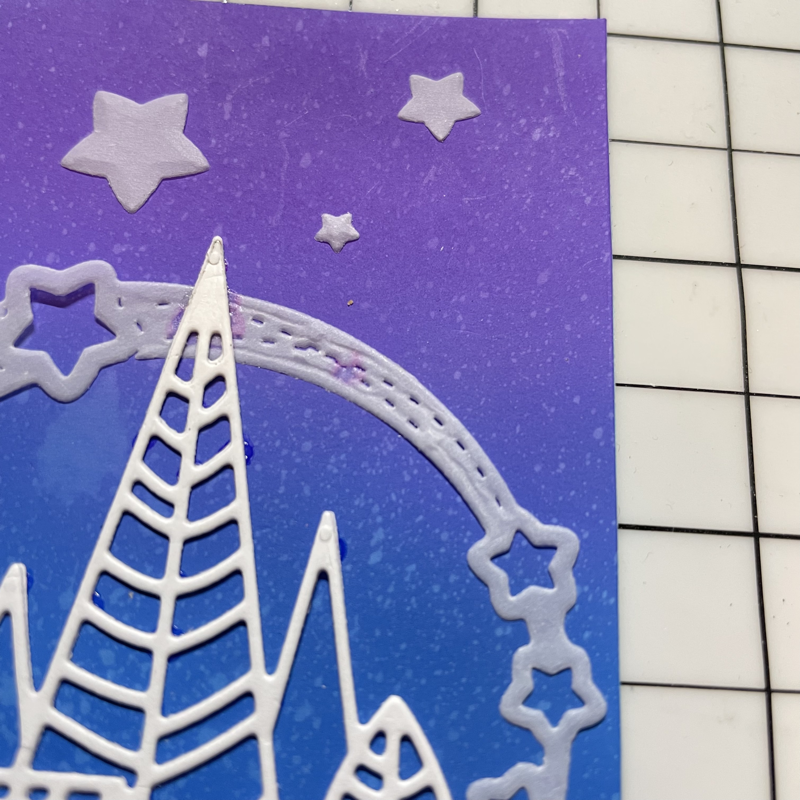
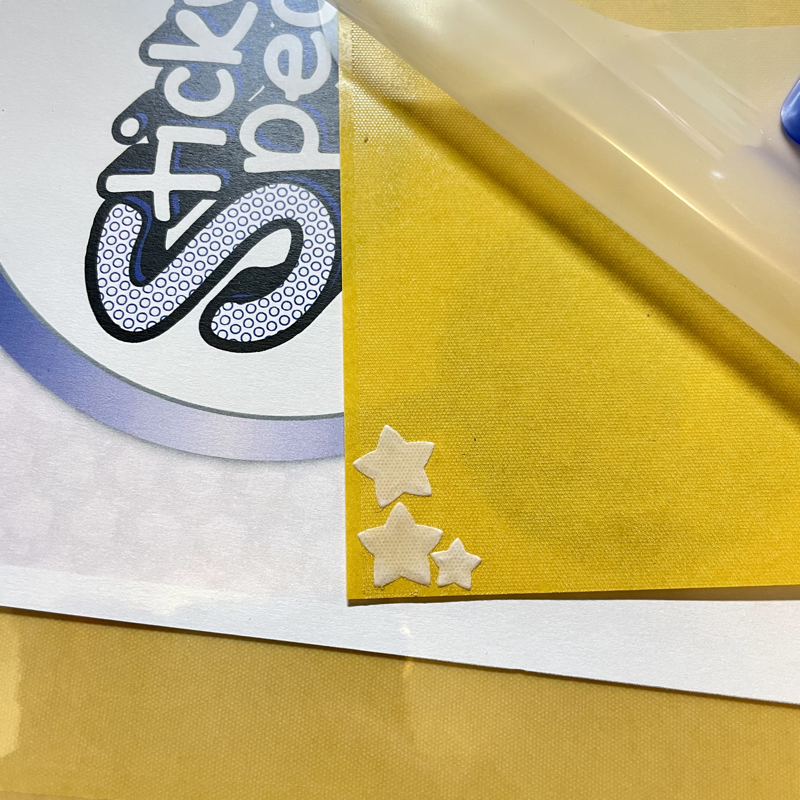
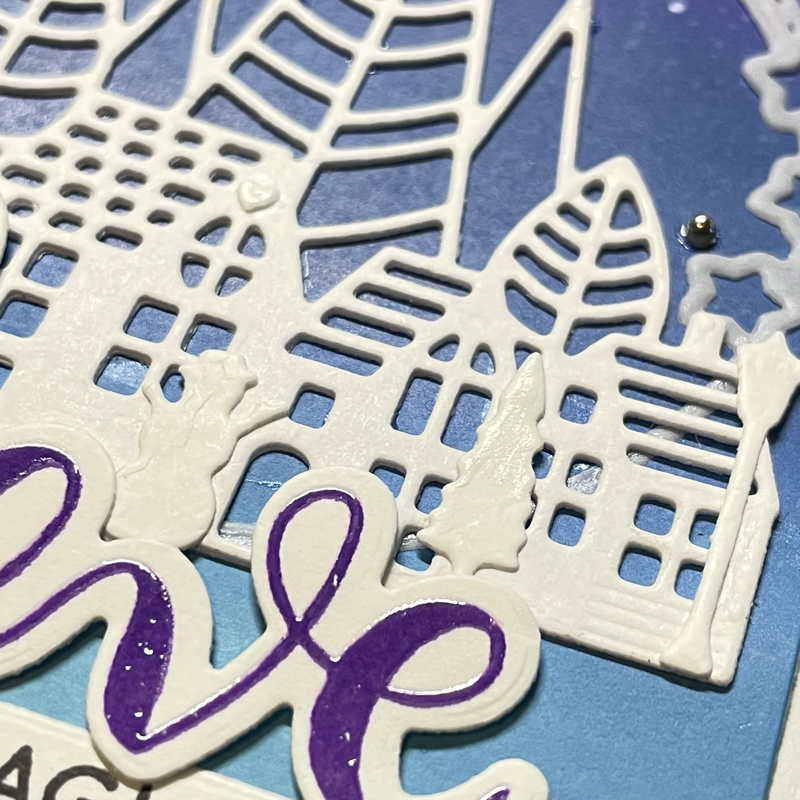
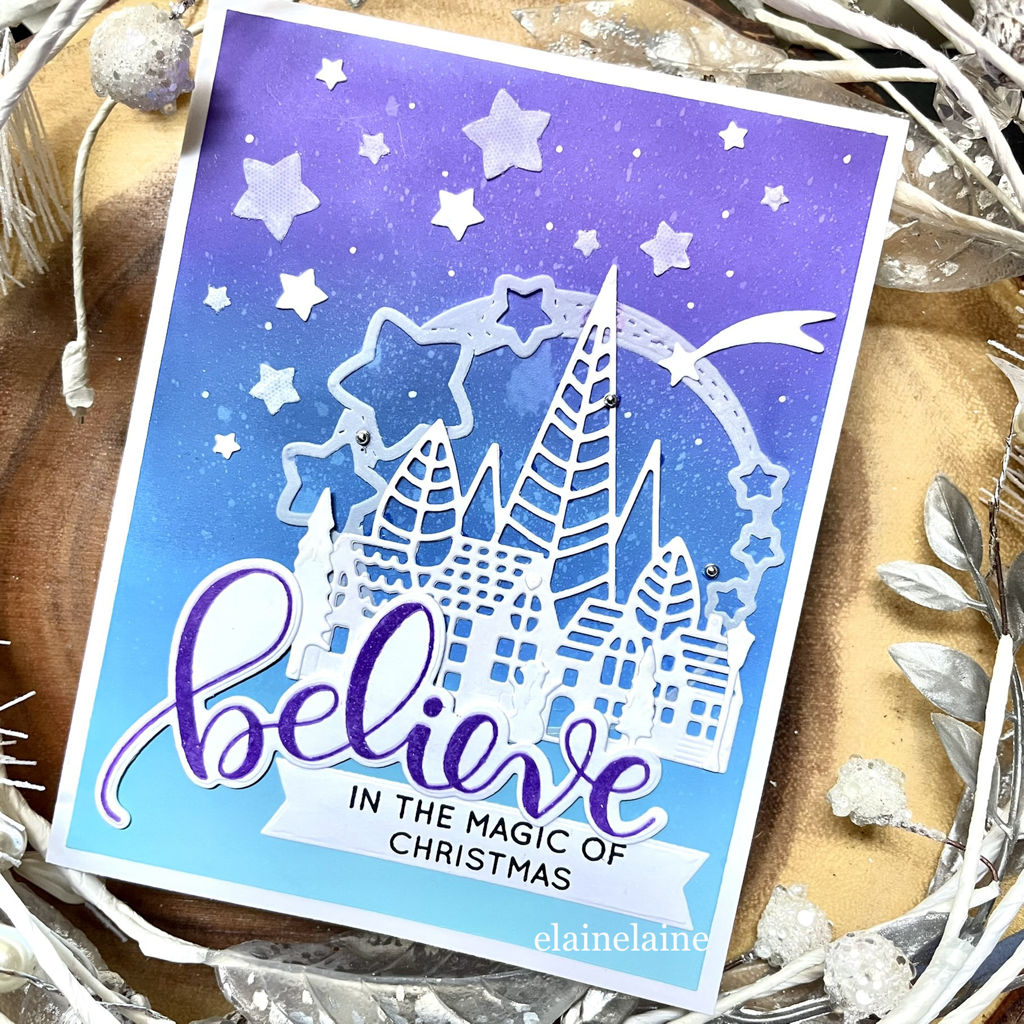 First, to create the background, I blended the distress oxide ink onto the card, spritzed some water on the card, and then padded it dry with a paper tower to create a "water marks" effect. For the sentiment, I stamped the "believe" using distress oxide ink in Wilted Violet and then went over the letters with the Versamark watermark ink, to make it sticky. After that, I heat embossed the text with clear embossing powder. After I heat embossed the word " believe," I die cut it out, along with the house and wreath below. I decided to add some more stars in the sky. Unfortunately, while I was gluing the wreath and the star, I noticed that the glue stained the background. Because of the staining issue, I changed the adhesive to Sticky peck instead of glue. To make the house more interesting and more detailed, I added some pieces of die cut for some additional dimension. This is the final look of the card. I really like how the color of the word "Believe" matches the background. As well as the look of the house with the star wreath. 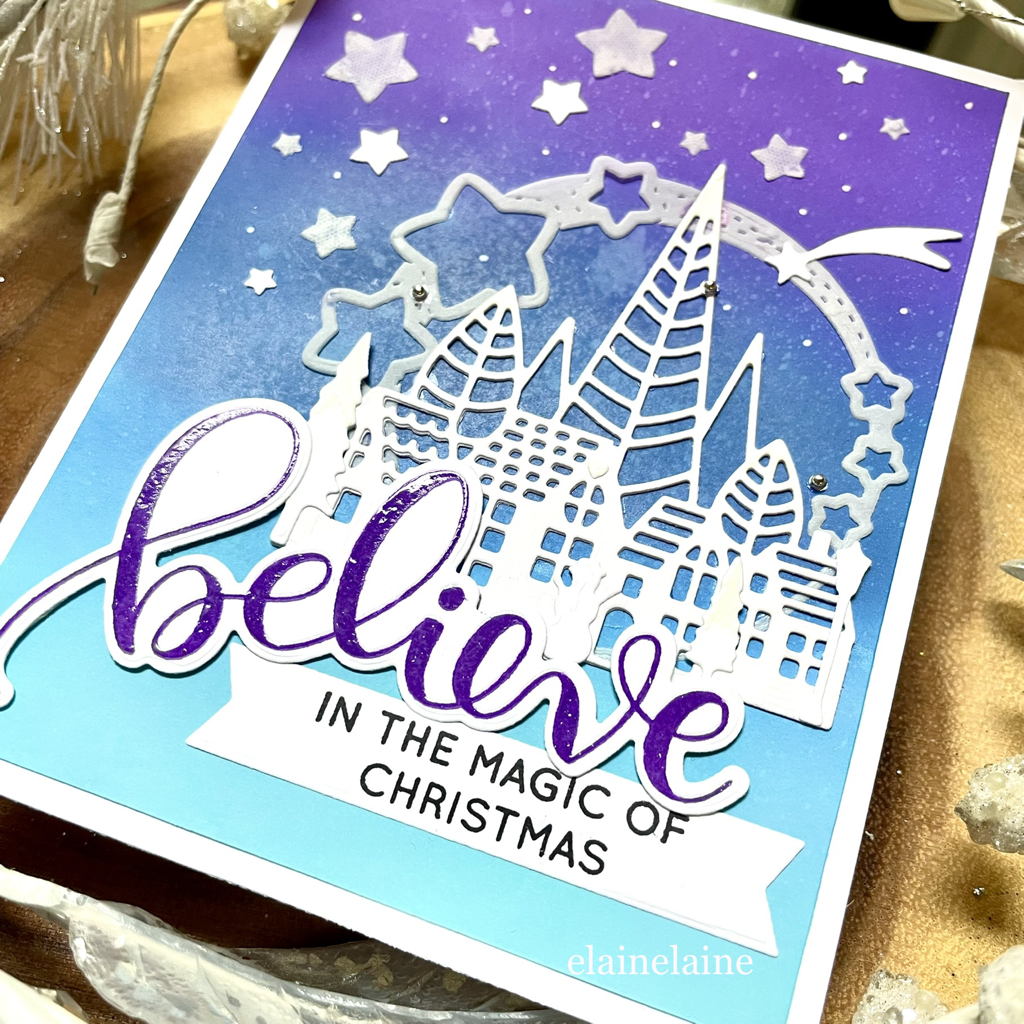 Supplies: Poppystamps County Houses craft die Simon Says Stamp Believe clear stamp set Simon Says Stamp Believe craft die Thank you for visiting~
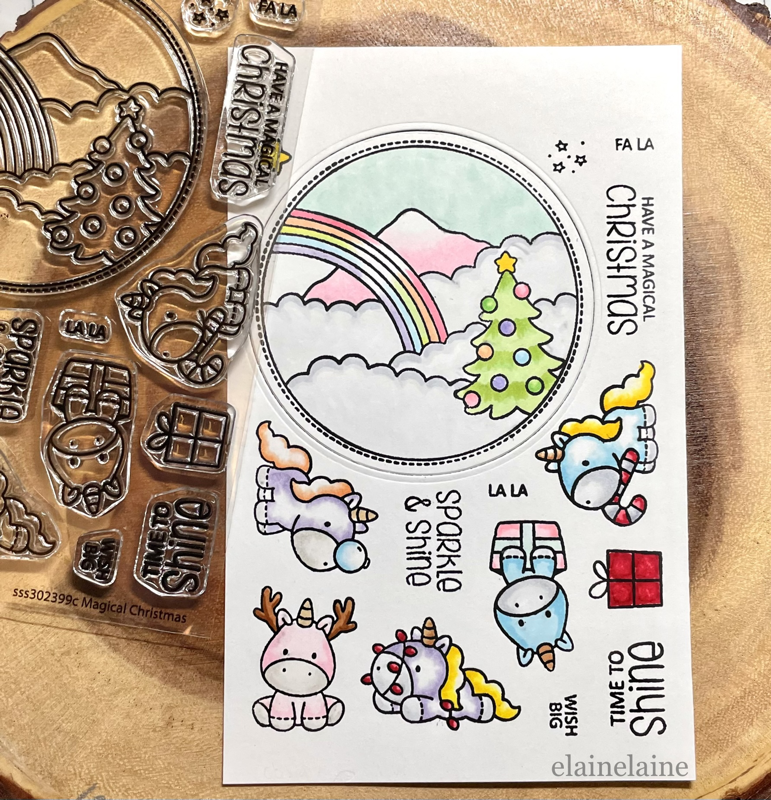
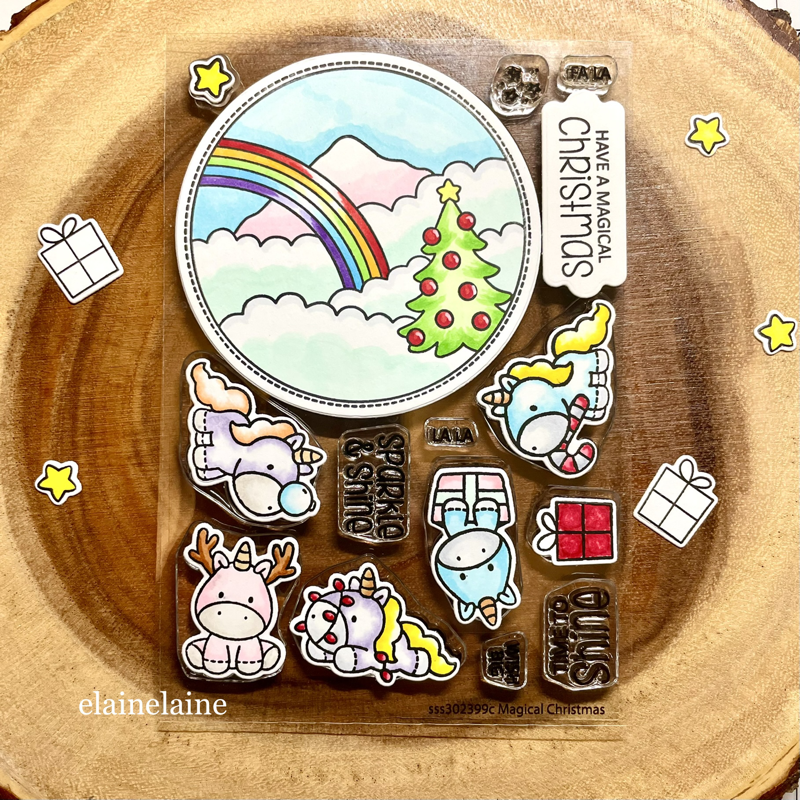
Our store will not be accepting orders from 11/20/2021 to 11/27/2021 as the elainelaine family is celebrating Thanksgiving. Apologies for any inconvenience caused, thank you for your patience and for being a loyal customer – we’ll be back and running again on 11/28/2021! The orders will then be processed accordingly. Wishing everyone a joyful Thanksgiving. 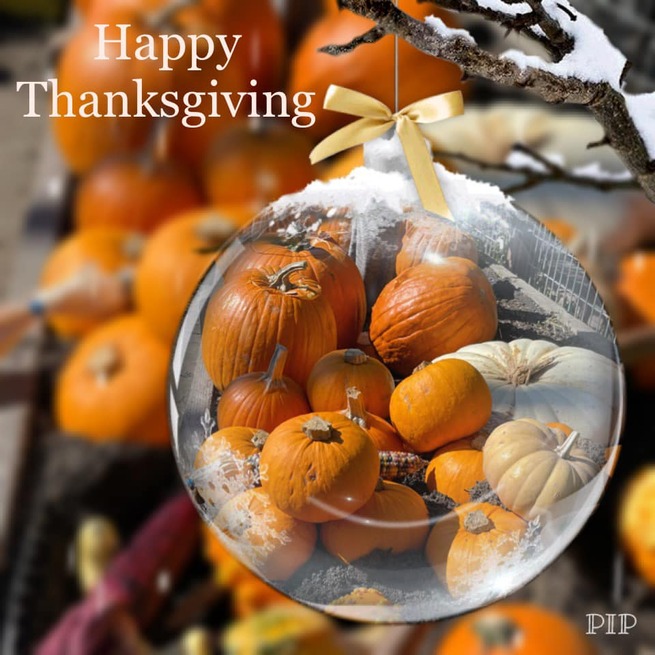 I am sharing this whimsical Christmas card with a rainbow, fluffy clouds, a Christmas tree and an adorable unicorn. The stamp set I used is a Simon Says stamp from the STAMPtember collaboration release with Clearly Besotted. I have previously created another card using the same stamp set. You can see it here. This is a simple and easy to make card, and I love the look of pastel. Hope you like it! 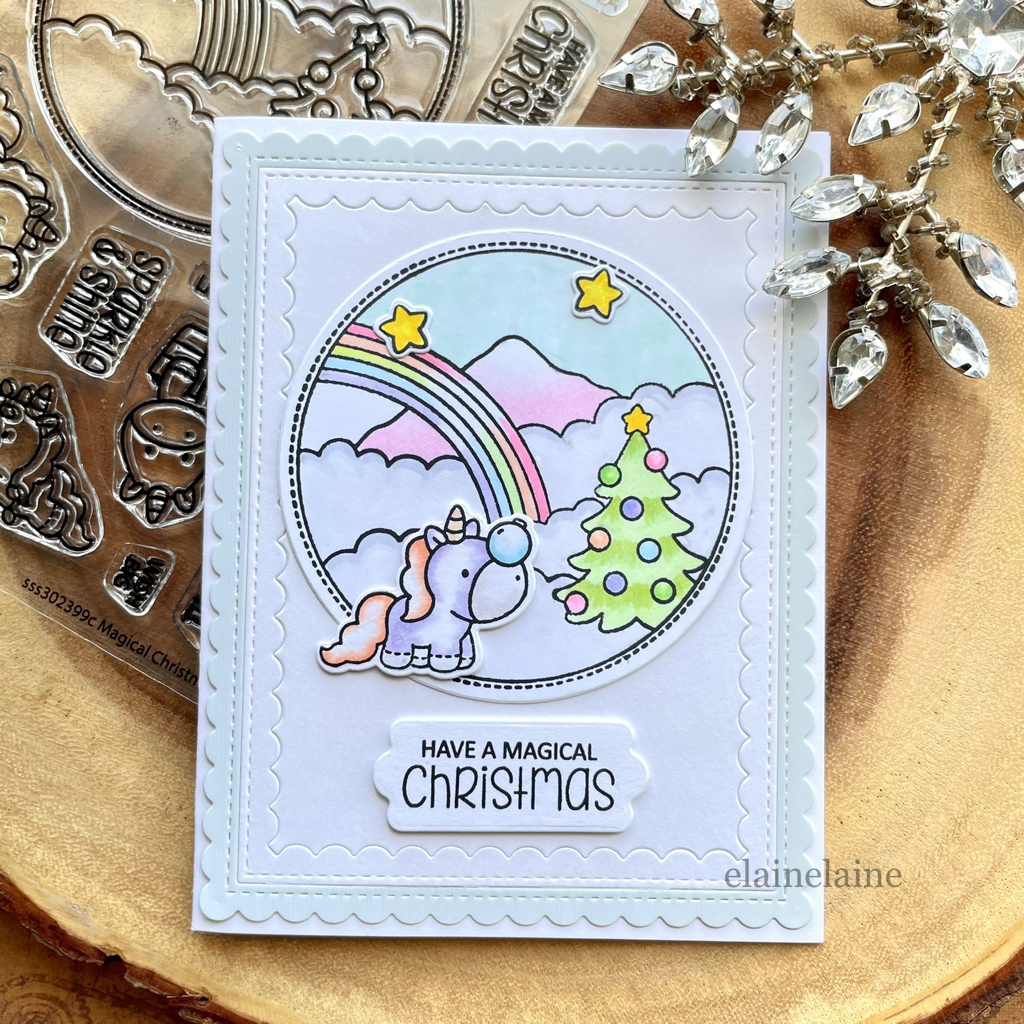 For this card, I wanted everything to stay in soft tones so all the Copics I chose were very light in color. You can see the color numbers are listed below. Once the coloring was finished, I die cut all the pieces, making the card ready for assembly. Supplies: Clearly Besotted clear stamp Magical Christmas STAMPtember 2021 PinkFresh Studio Stitched Scallop Rectangles crafting dies Thank you for visiting~
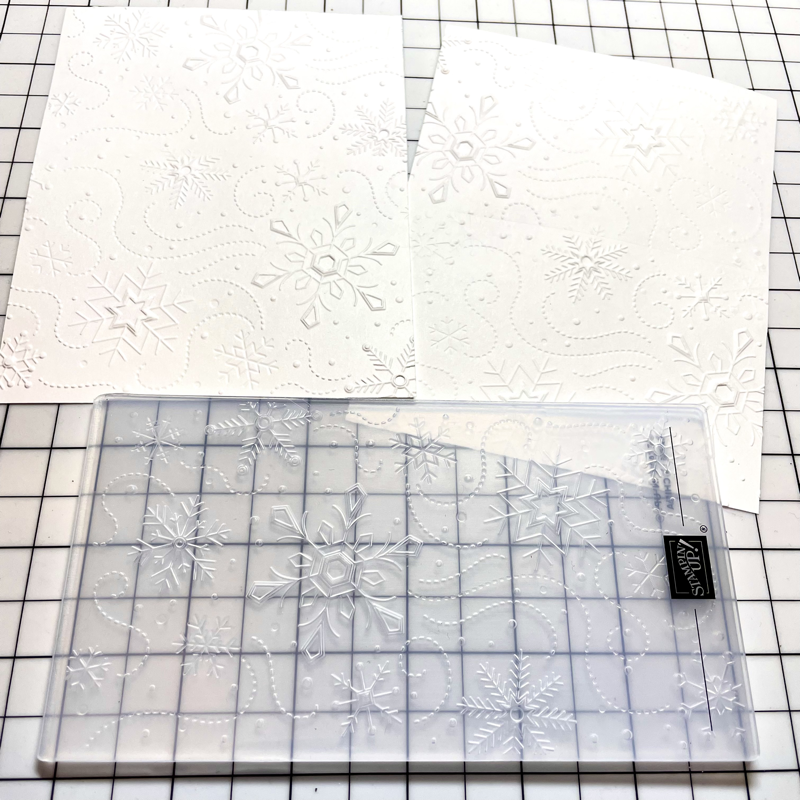
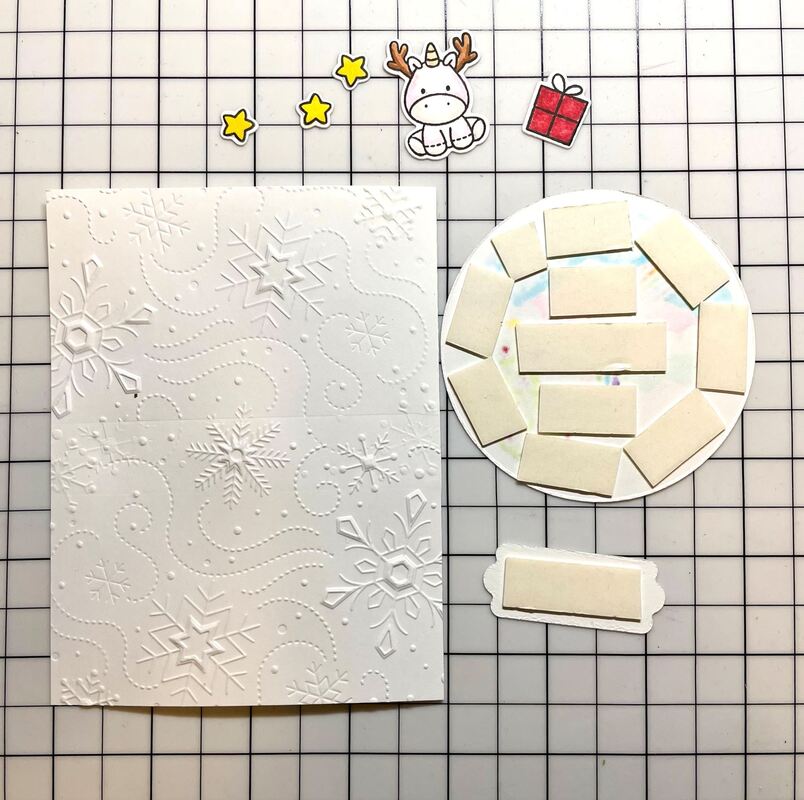
This Christmas card is set in a very whimsical scene. The cute unicorn looks just like a stuffed animal, which I absolutely love. The rainbow, the fluffy clouds and the Christmas tree in the circular card goes really well with the white 3D snowflakes in the background. 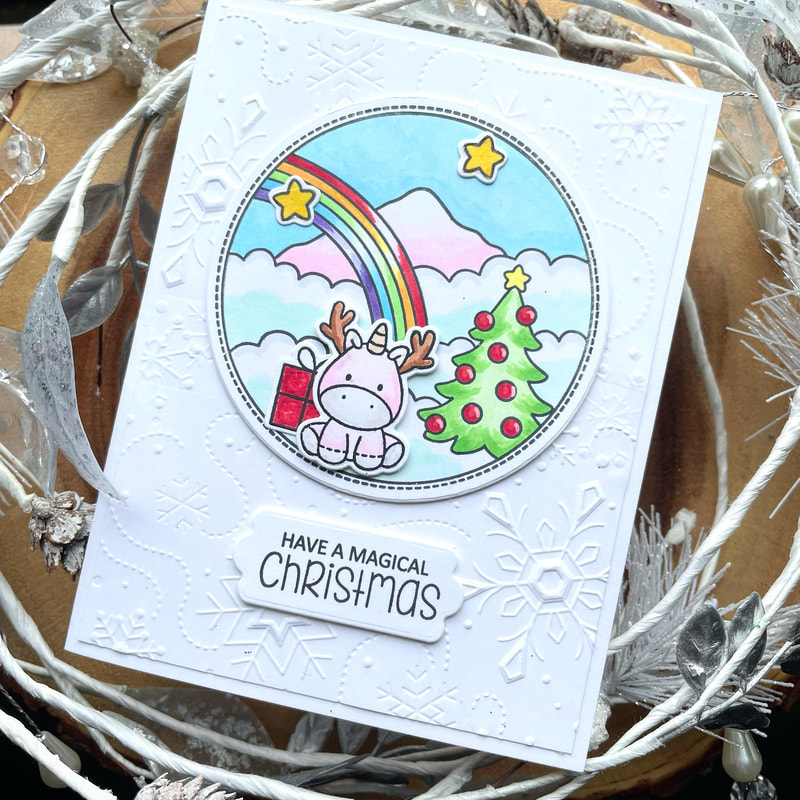 First, I stamped the rainbow, clouds, Christmas tree and animals with the VersaFine Clair ink in Nocturne, and then colored them with Copic markers. At this point, I have not decided which stamps will go on the card, so I colored them all. I have saved some stamped animals for another card. For the background, I have decided to leave it white and embossed it using the Stampin Up Wintry Snowflake embossing folder. Since the folder was designed to be 3" by 6", I embossed the top and the bottom sections of the panel individually to cover the whole panel. Before I assembled the card, I added some foam tape on the stamped items to add some dimension. Then I put all of the components together. 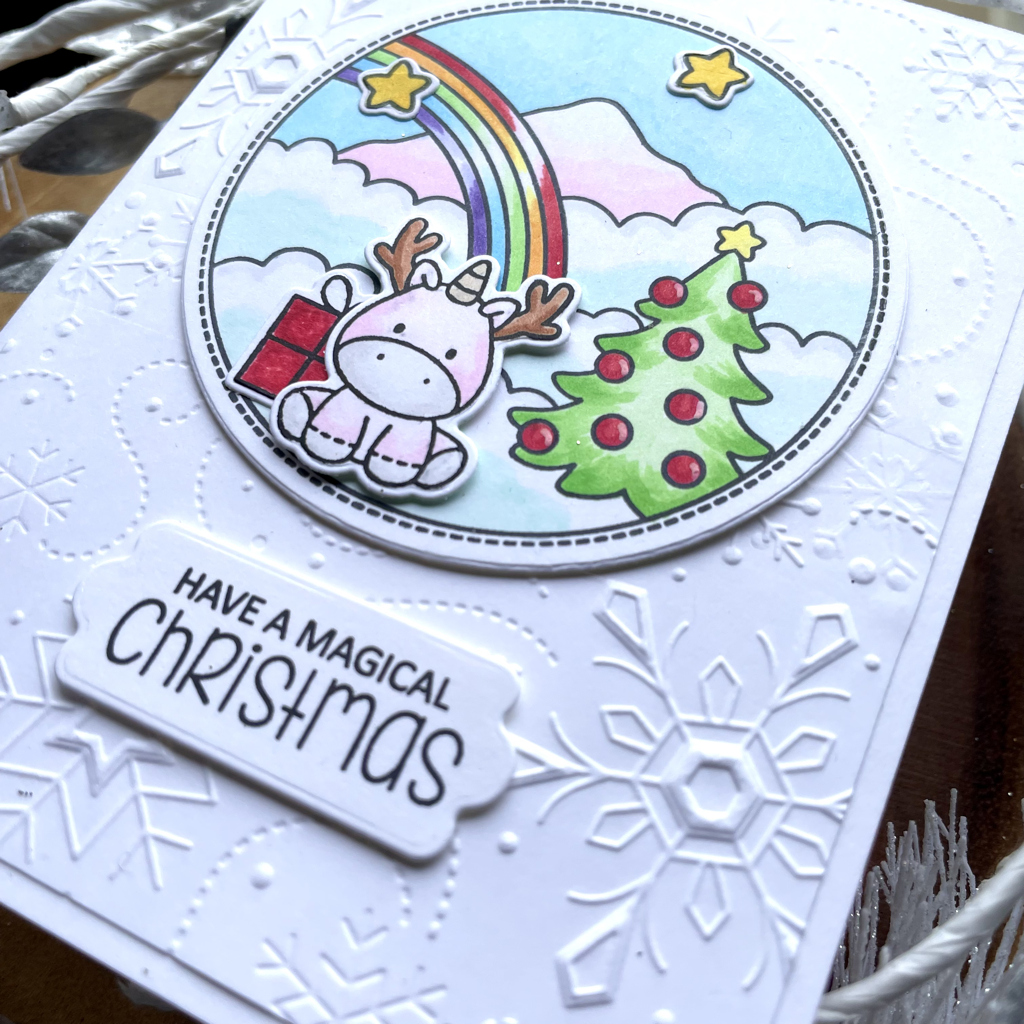 Supplies: Clearly Besotted STAMPtember 2021- Magical Christmas Stampin' cut & emboss Wintry 3D embossing folder Thanks for visiting~
|
Author
Elaine Lin 
elainelaine.com
Archives
June 2024
Categories
All


|


 RSS Feed