follow us @
elainelaine
  • Home
  • Store
  • Blog
  • Contact Us
  • FAQ

Tis the Season Holiday Greeting

11/26/2020

0 Comments

 
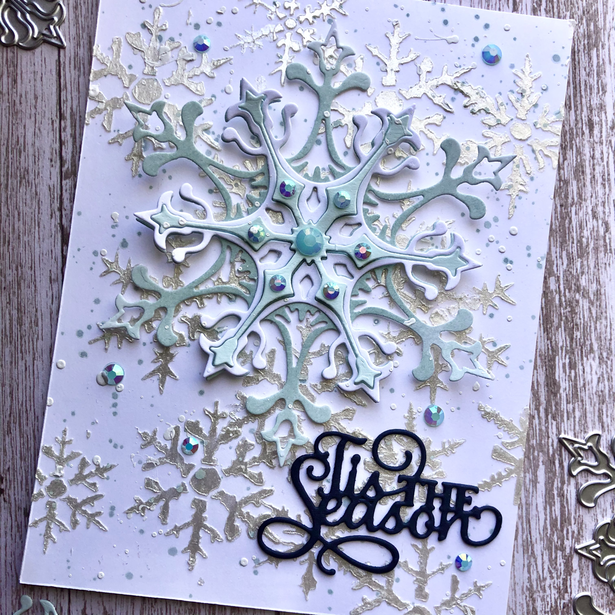
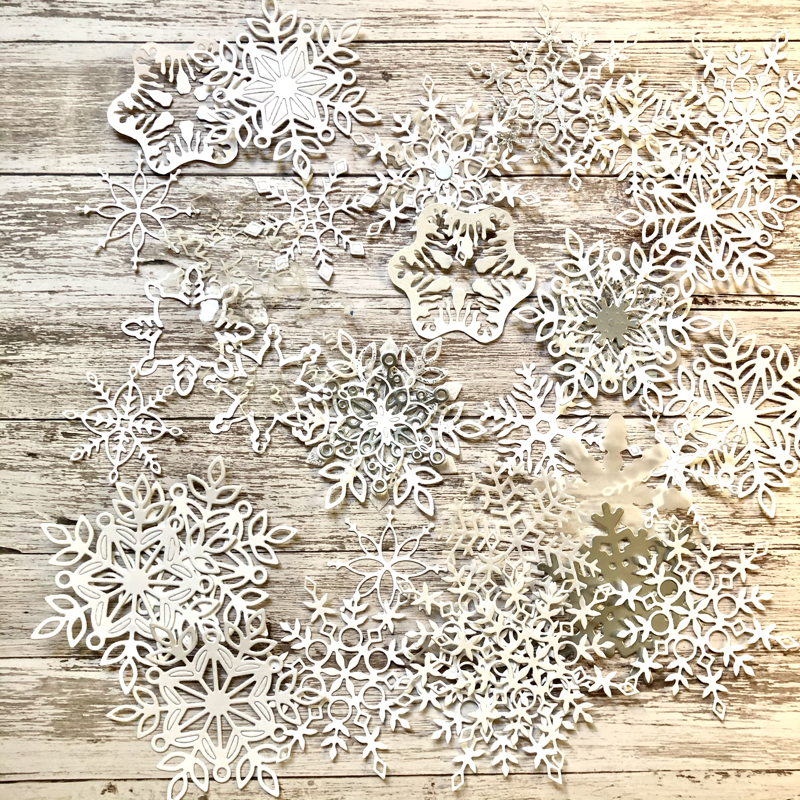
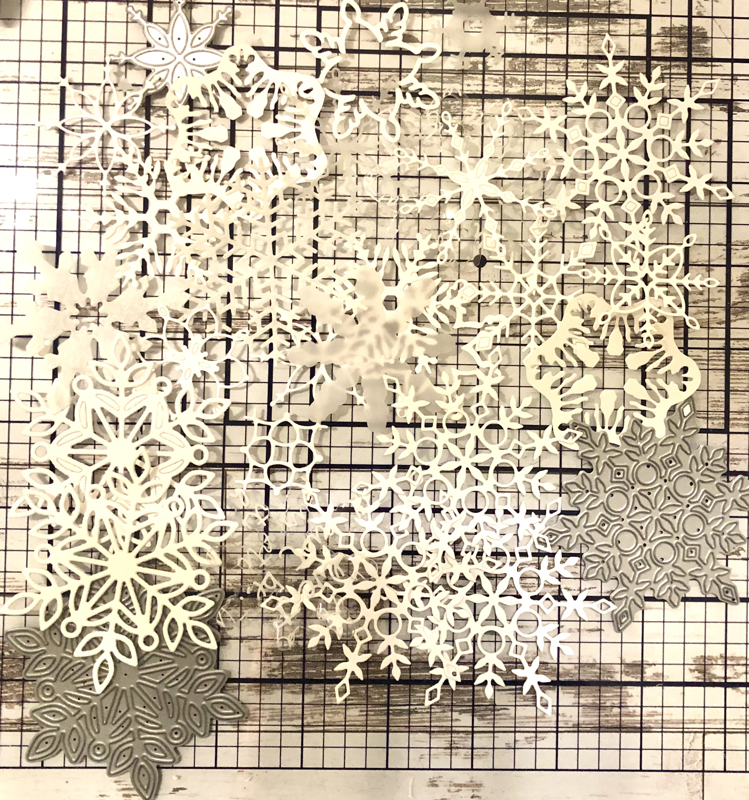
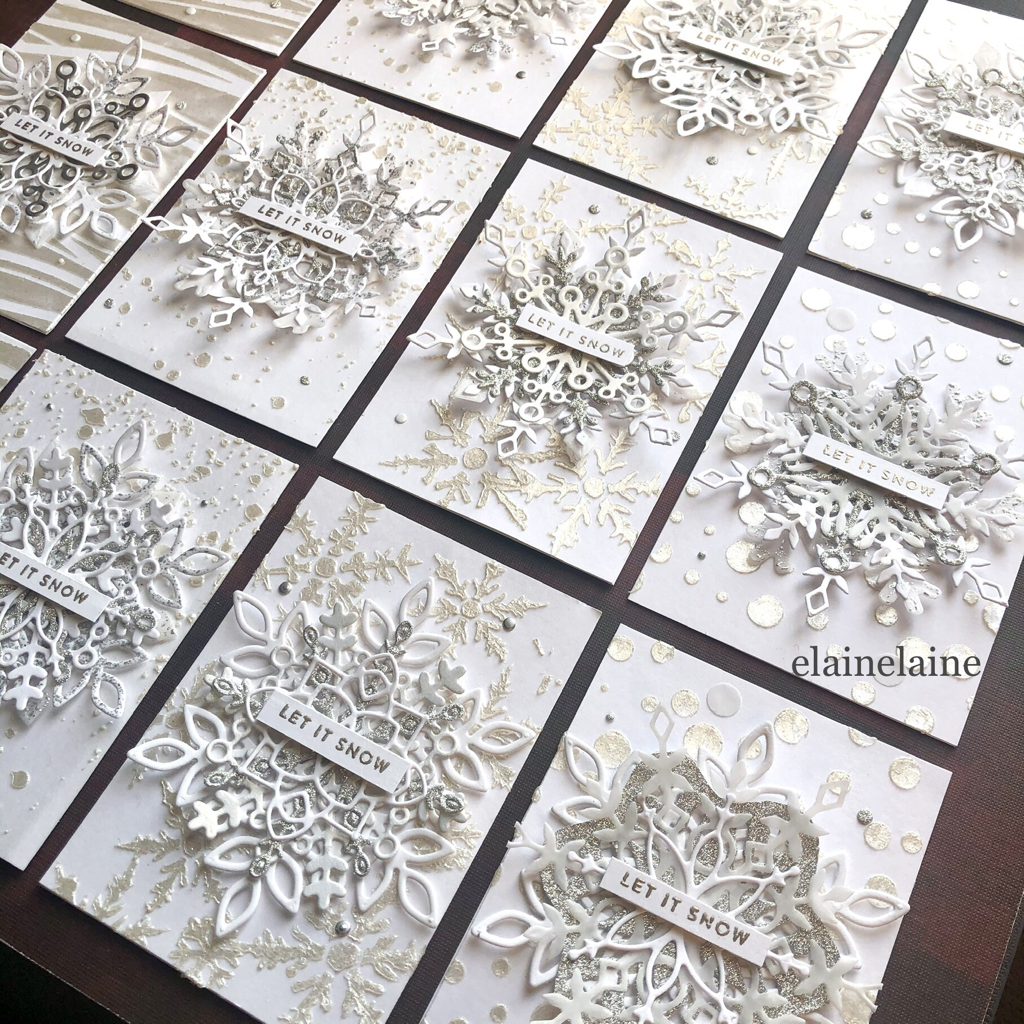
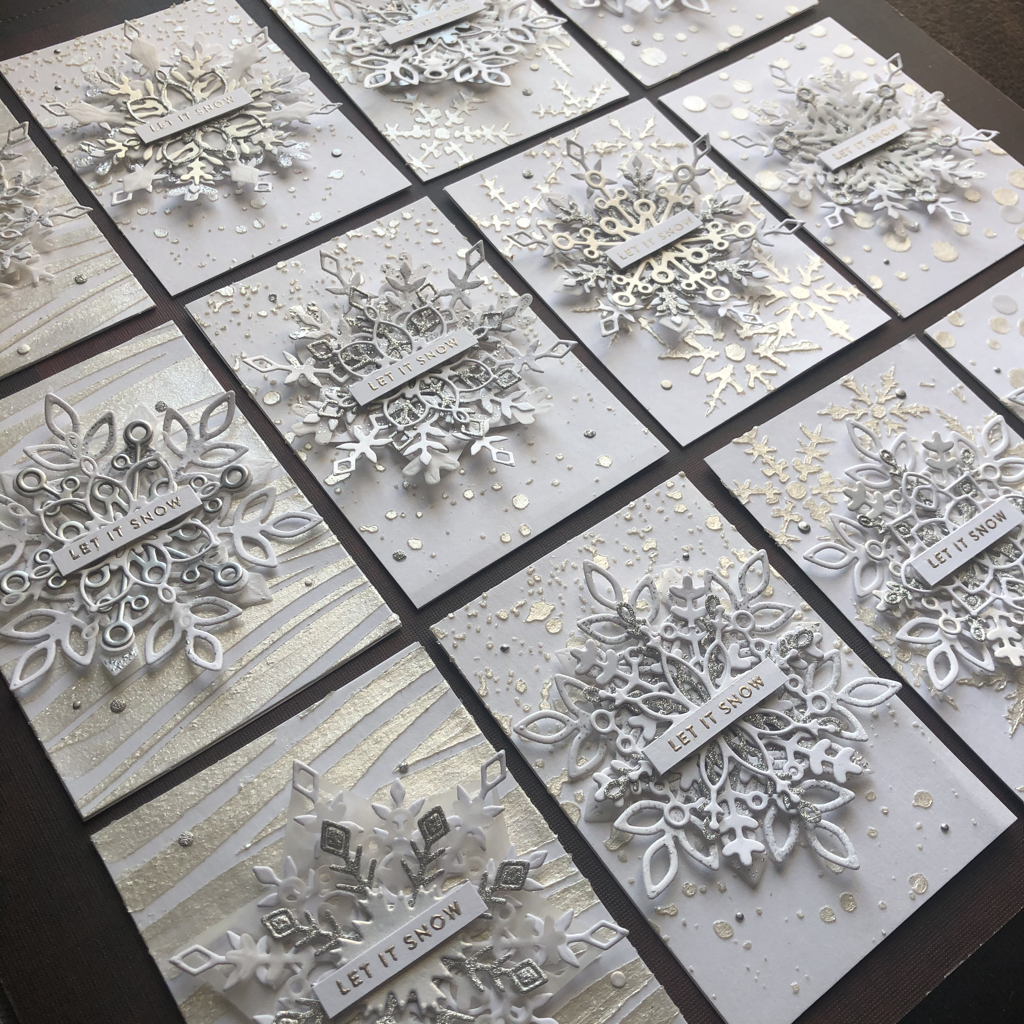
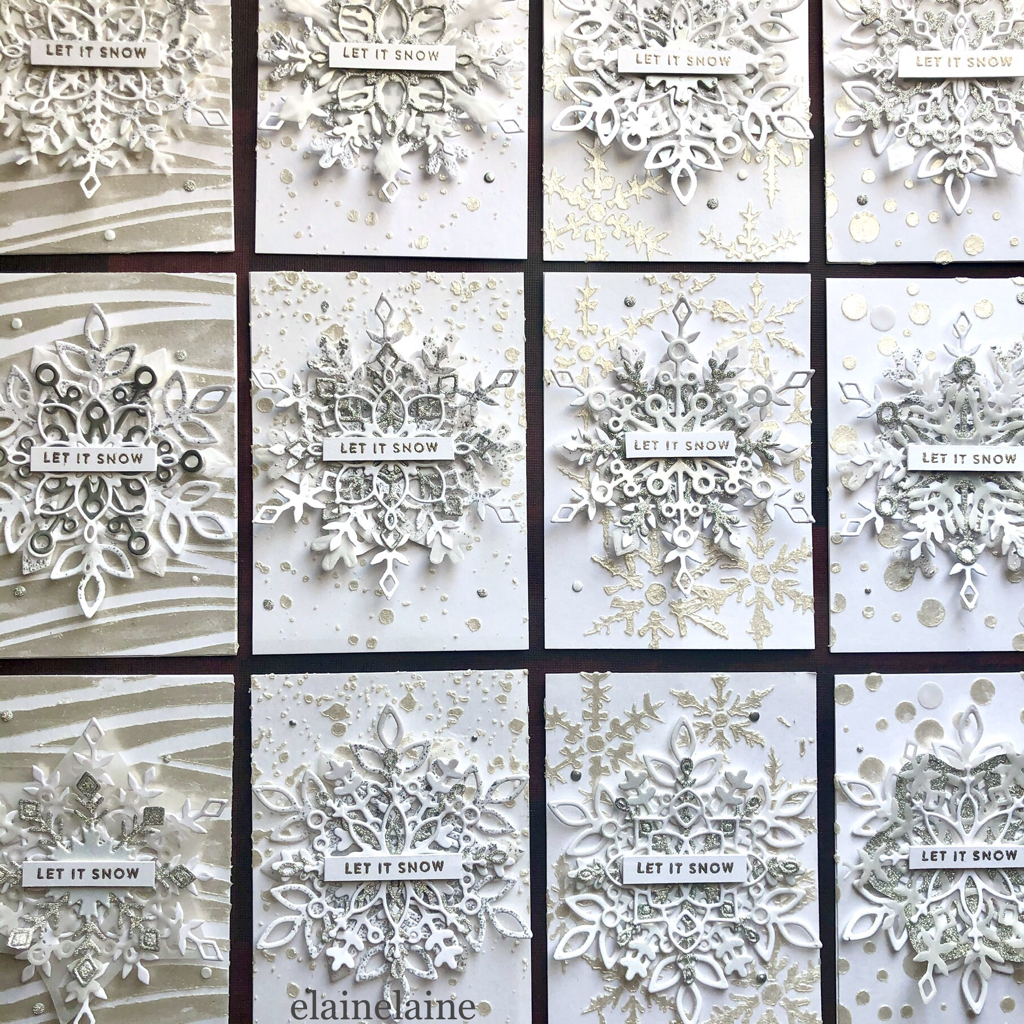
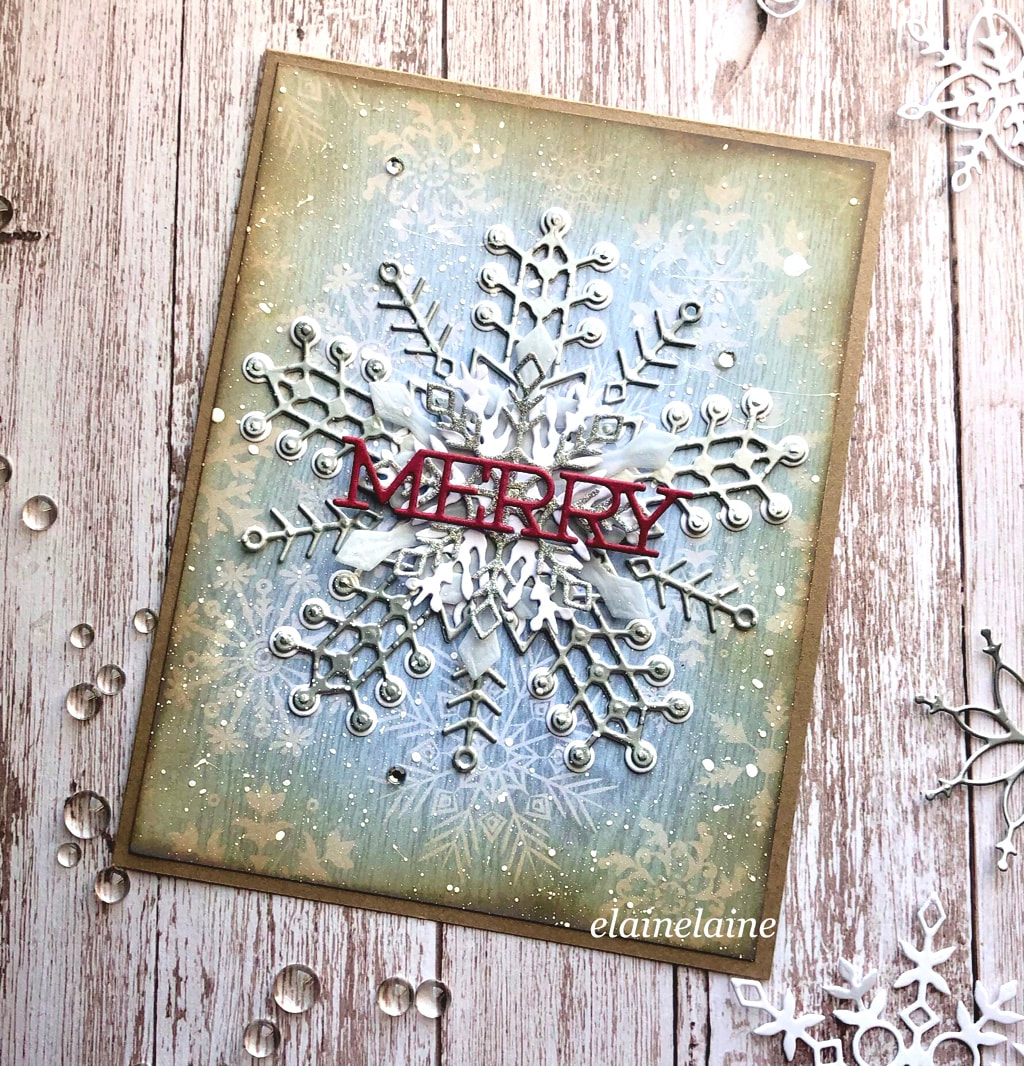
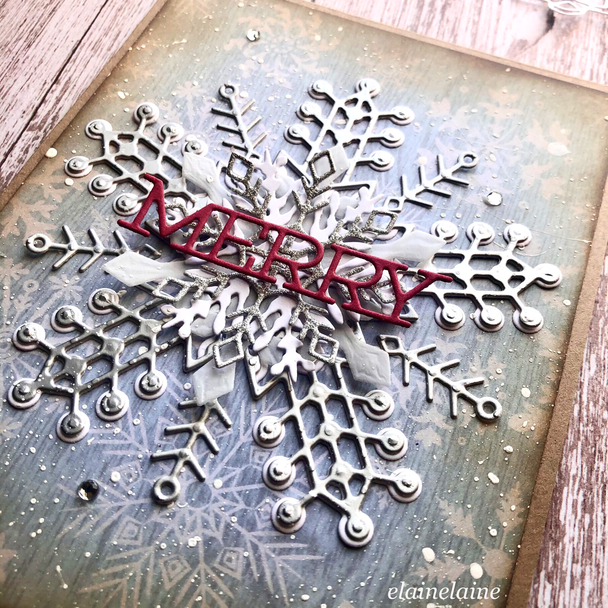
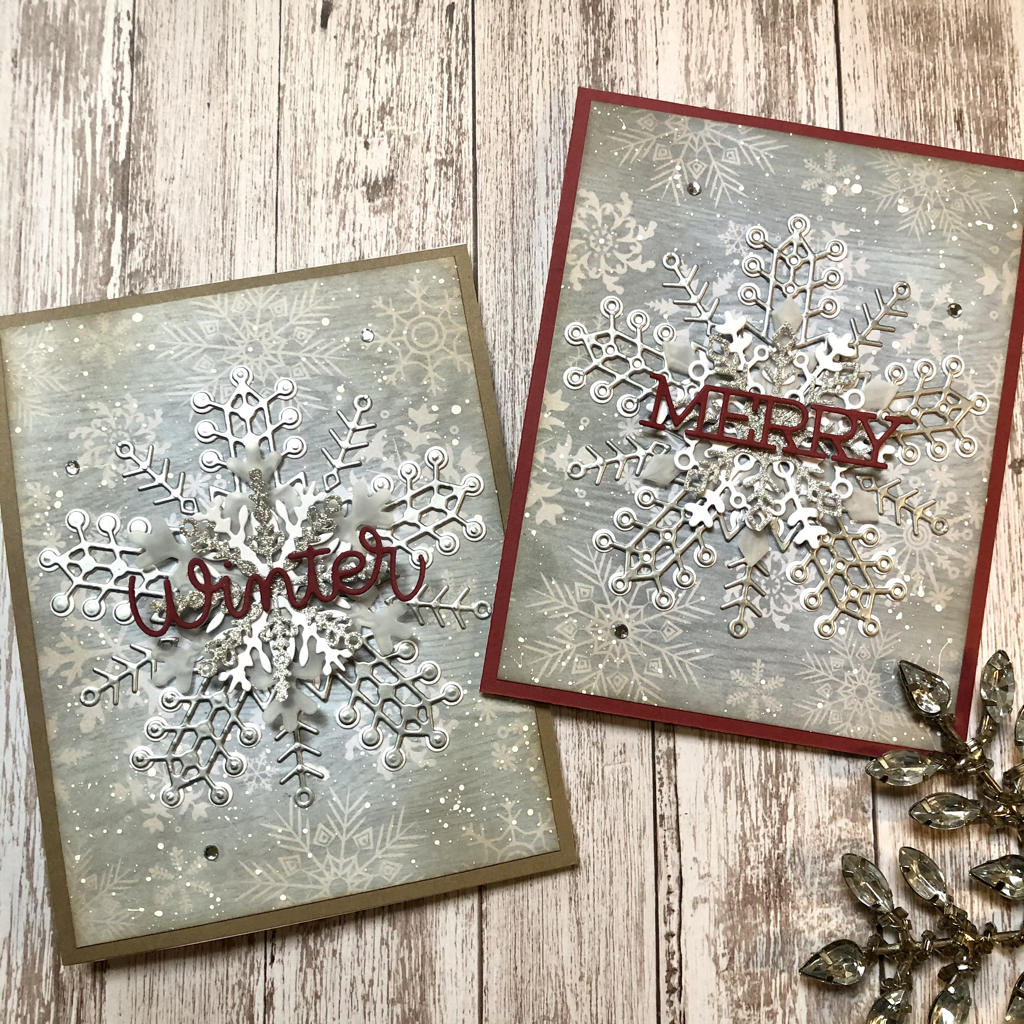
Snowflakes are one of the most magical elements of the holiday season. I have decided to use all the snowflake dies that I own to make a greeting card for this holiday. It sure is fun to make snowflake cards.
Picture
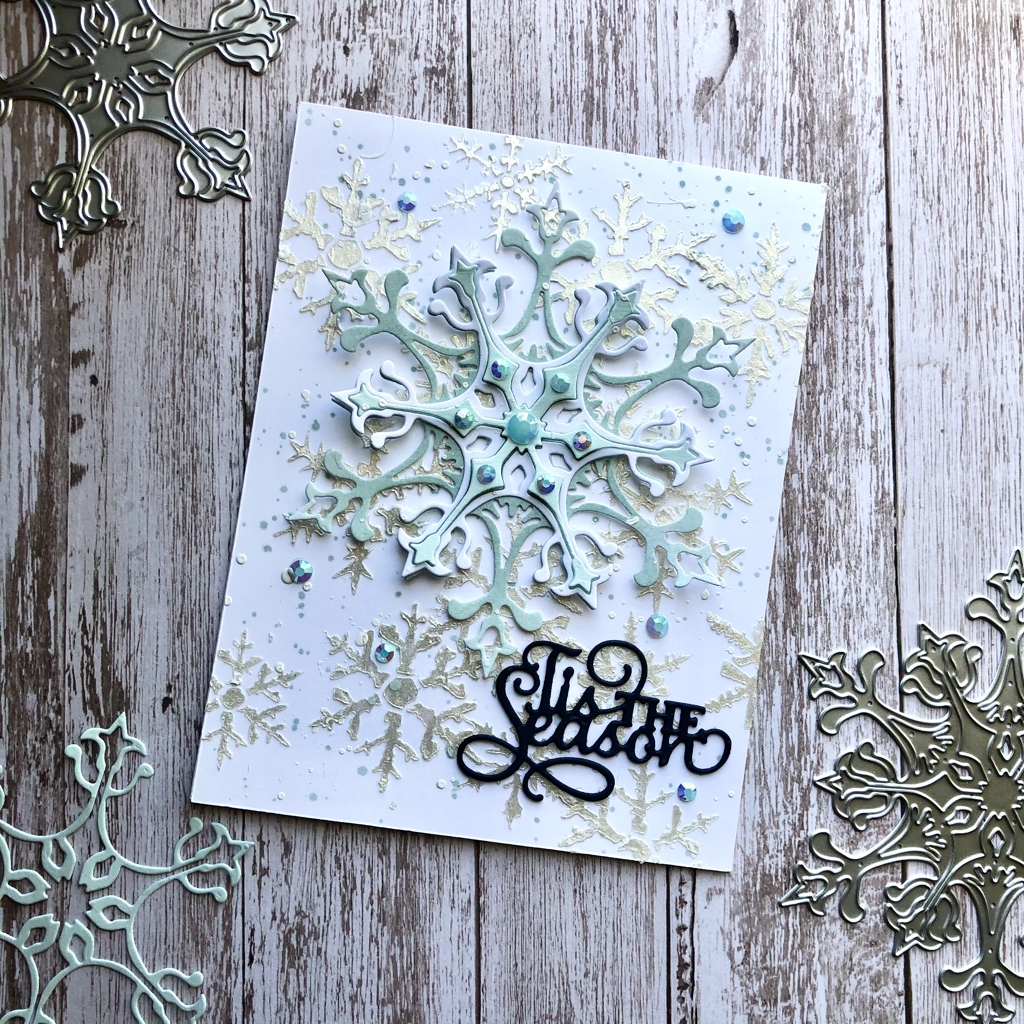
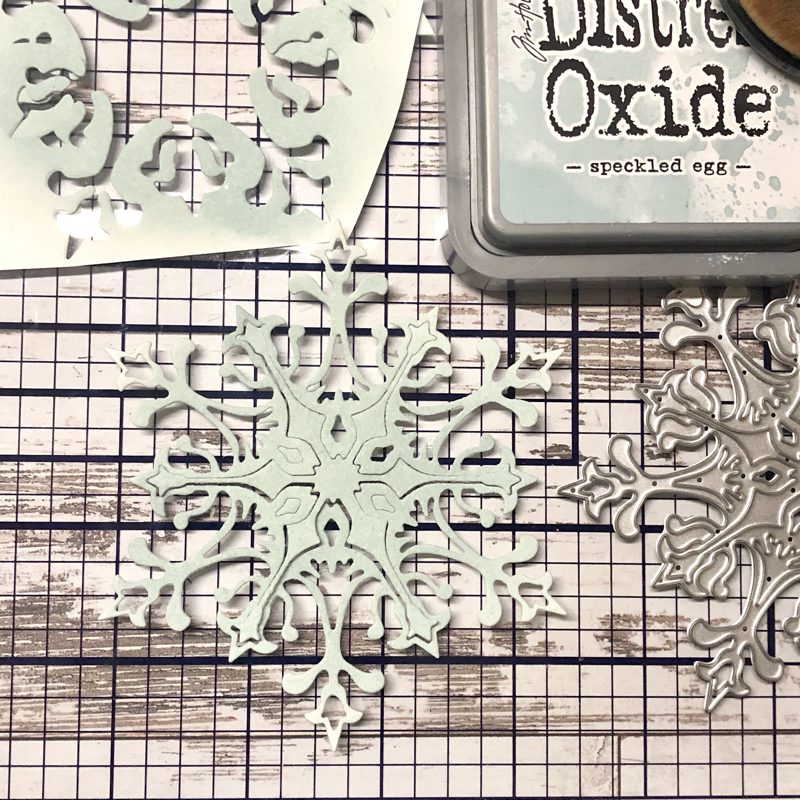
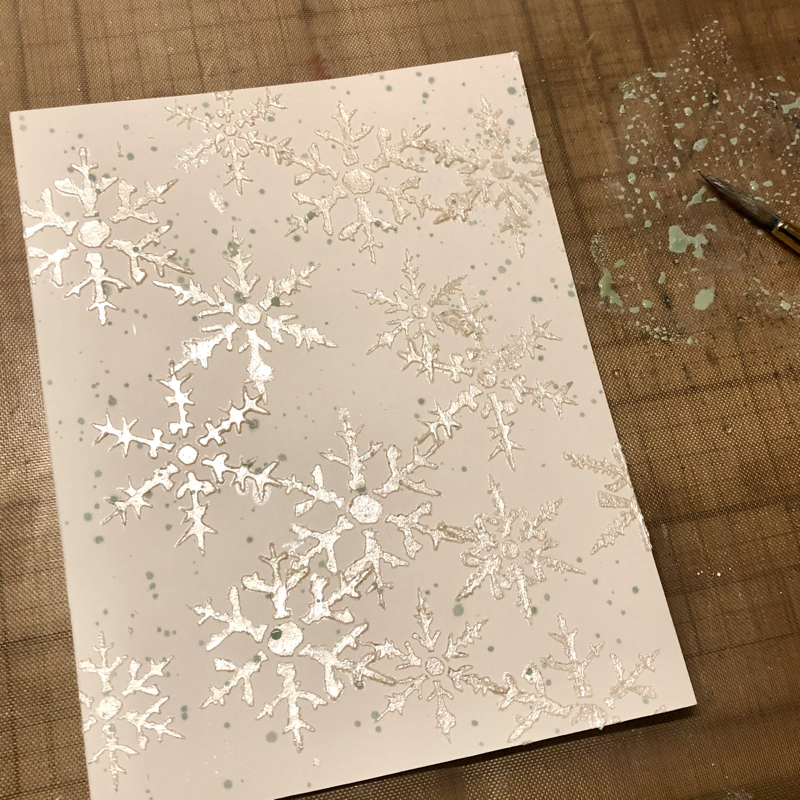
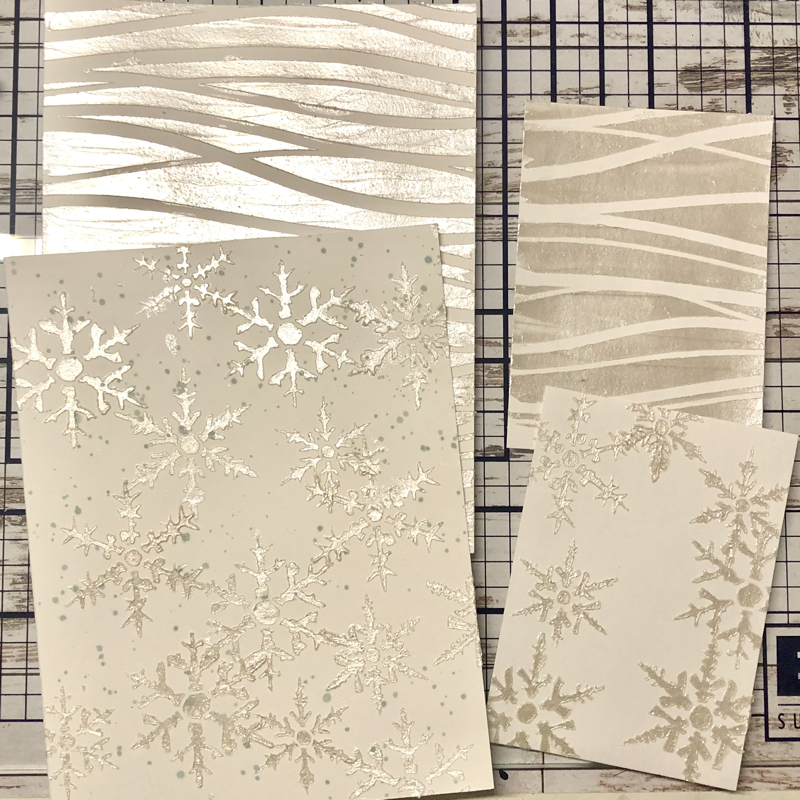
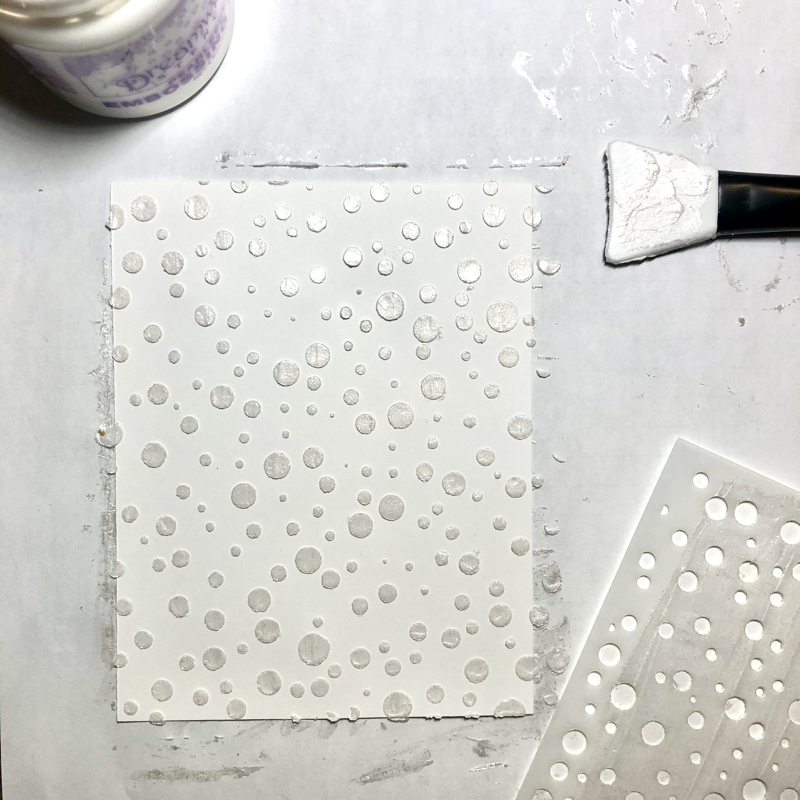
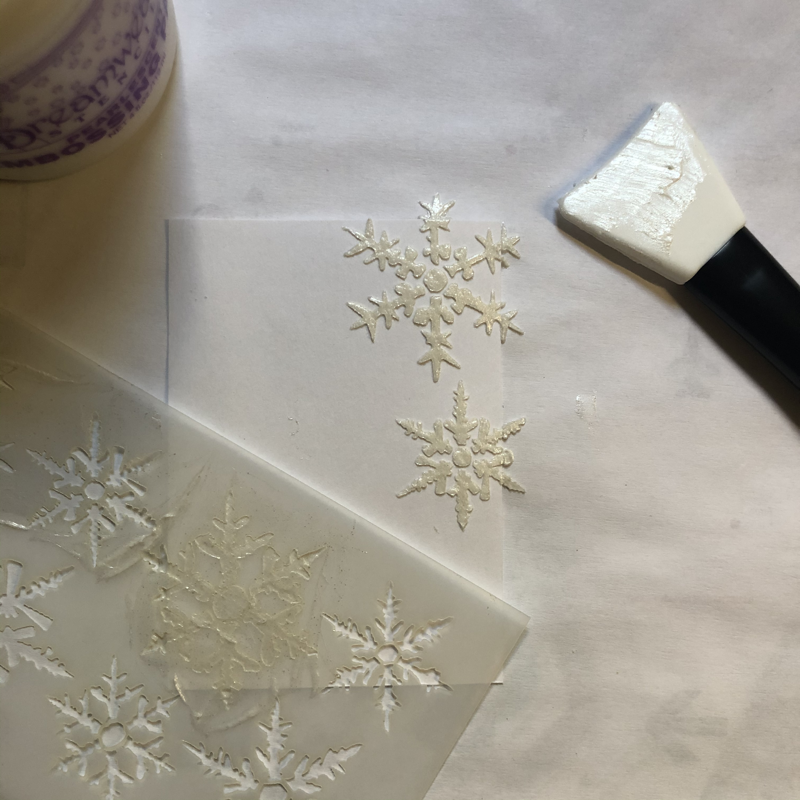
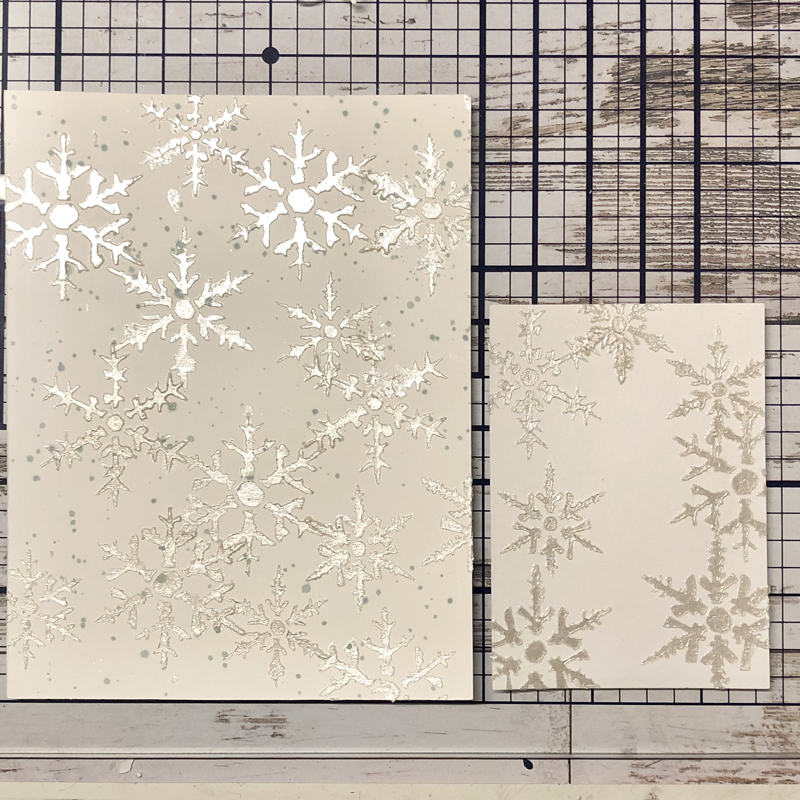
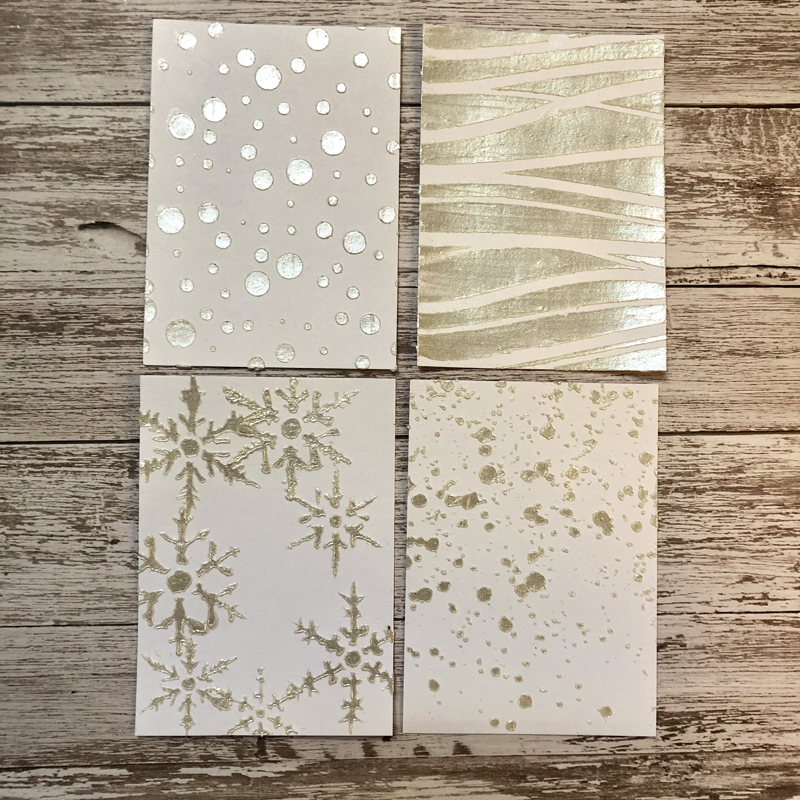
First, using speckled egg distress oxide color to blend out evenly on Neenah solarwhite cardstock and die cut into a large snowflake. Second, I use snowflake stencil and pearlescent embossing paste to create a background. Then, splash some ink on the background using speckled egg distress oxide ink.
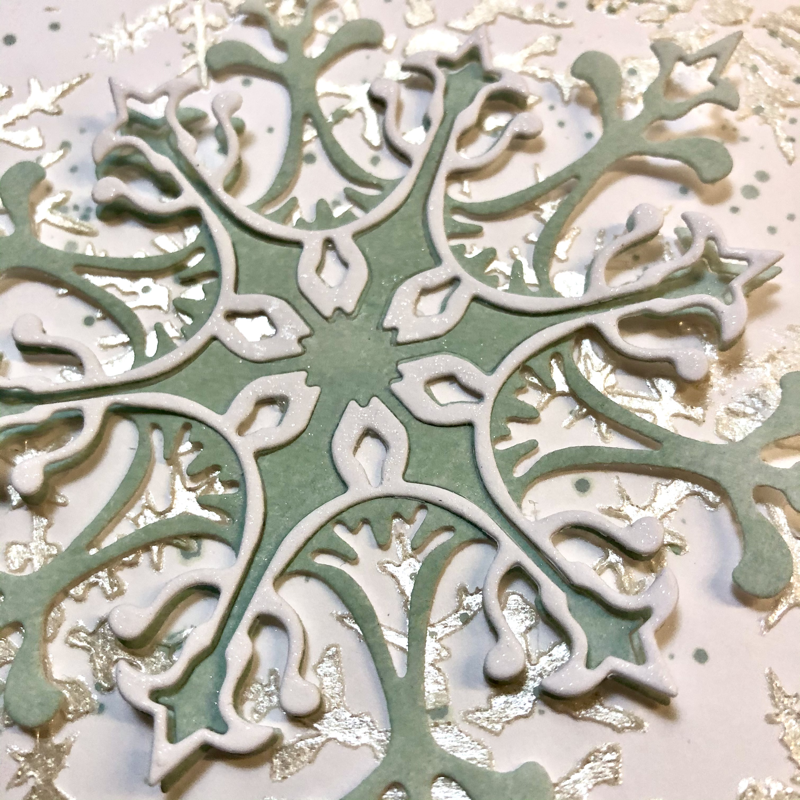
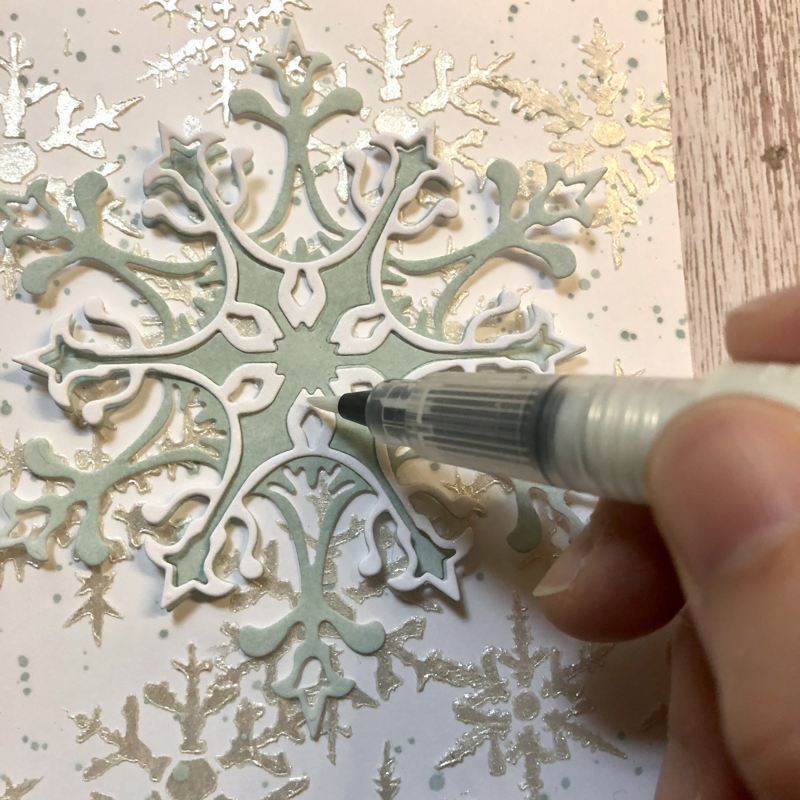
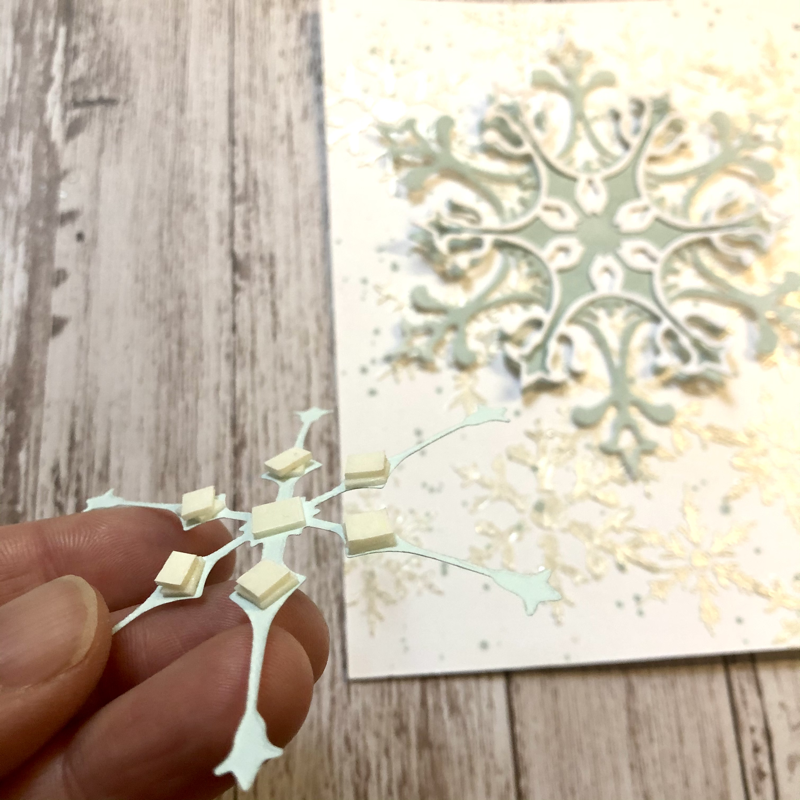
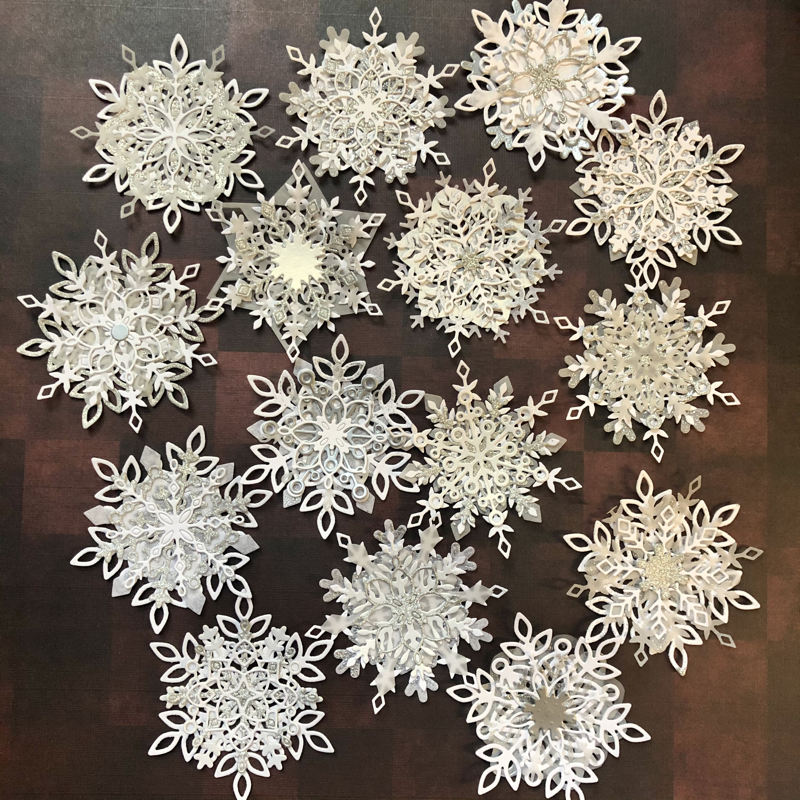
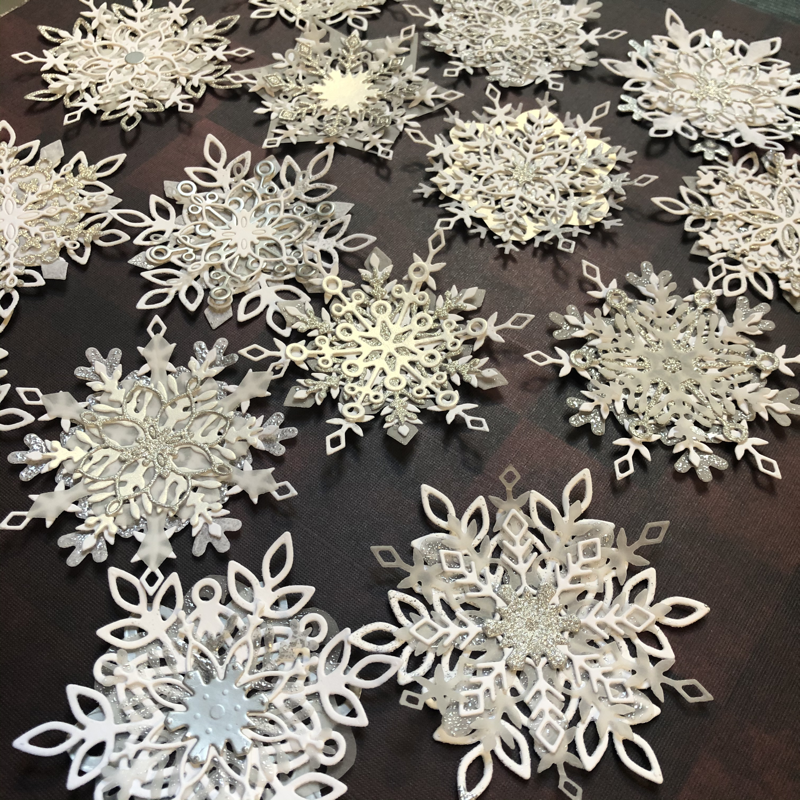
I have decided to add dimension on the snowflake by adding one more layer of snowflake die-cut using white cardstock. I brushed on the Wink of Stella for more bling. And then adding two layers of foam adhesive to the center piece of the snowflake to add even higher dimension.
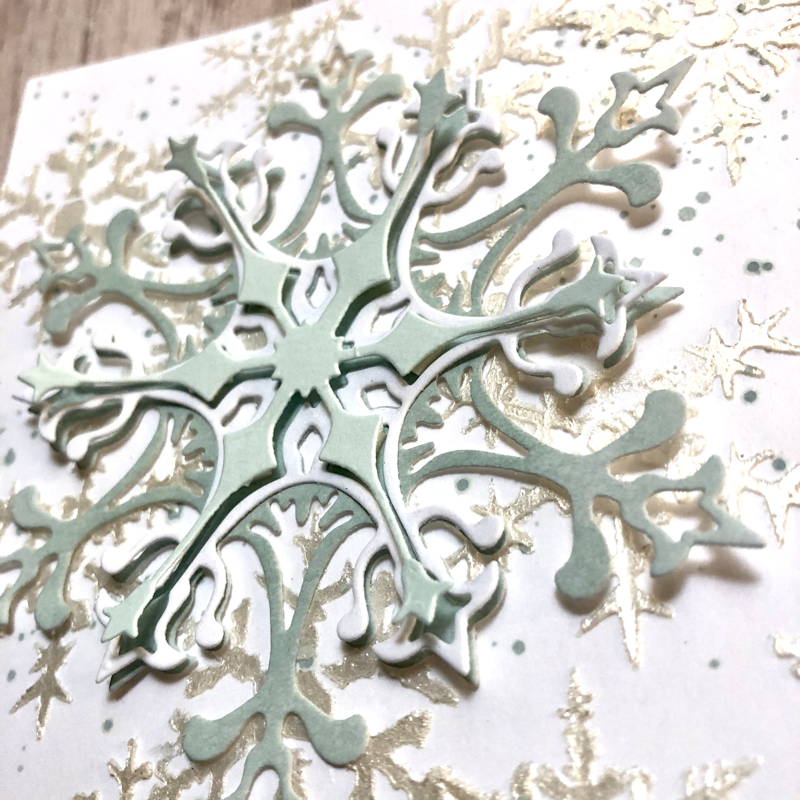
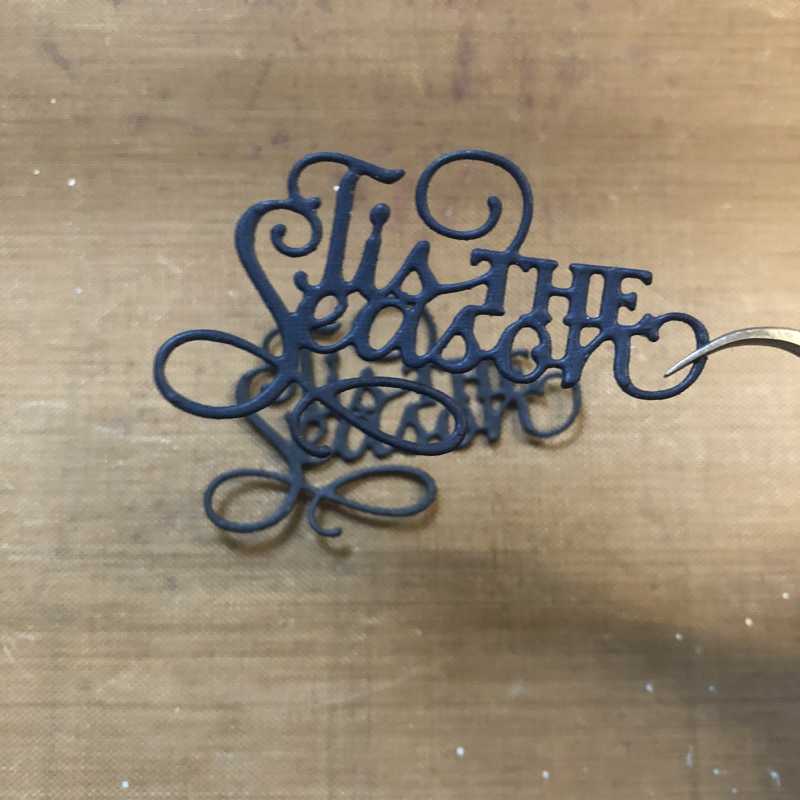
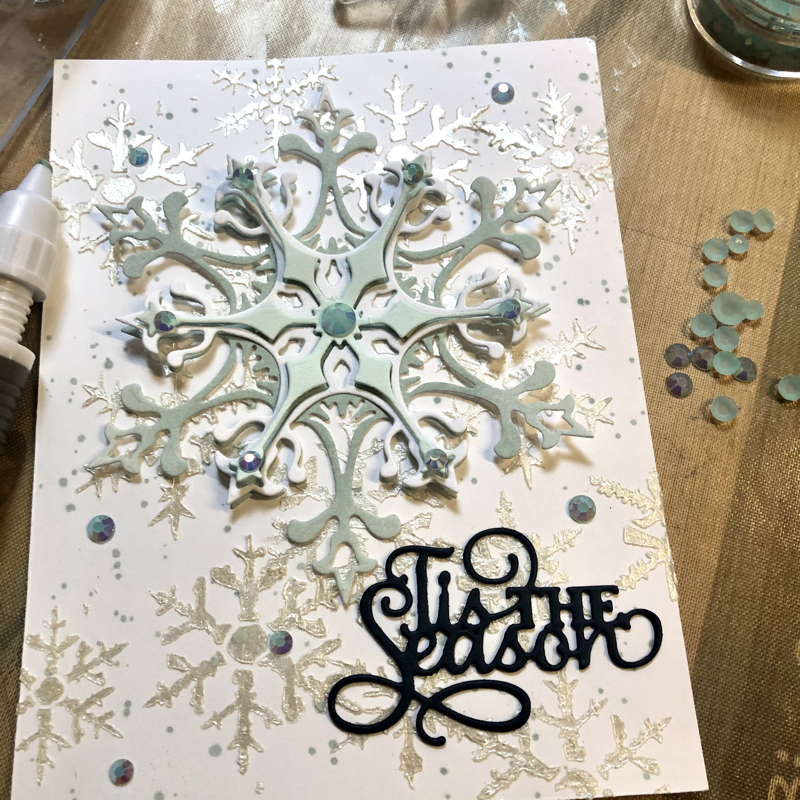
After adding foam adhesive, place the piece at the center of the snowflake. Finally, die-cut sentiment "Tis the season" twice and glue them together to add more depth and finish off with light blue jewel on both the snowflake and the background. 
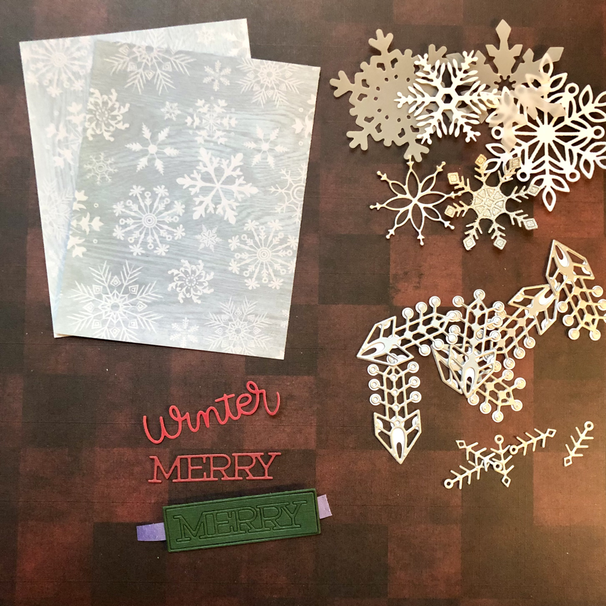
Picture
Supplies:
Sizzix thinlits die set- Stunning Snowflake 664749
Creative Expressions Craft dies- Tis The Season CEDME019
Stamper Anonymous Tim Holtz Collection Mini Layered Stencil #18 MST018
Dreamweaver Pearlescent Embossing Paste
Pinkfresh Studio Jewel essential PF014ES
Thank you for visiting~
0 Comments

Announcement from elainelaine store

11/24/2020

0 Comments

 
Our store will be undergoing maintenance from 11/25/2020 to 11/28/2020. Apologies for any inconvenience caused, thank you for your patience and for being a loyal customer – we’ll be up and running soon! The order will be then proceed accordingly.
Picture
0 Comments

Let it snow ATC

11/16/2020

0 Comments

 
Picture
這次ATC的題材是white on white相當特別的題目,一直以來都非常喜歡white on white, tone on tone的卡片。一看到題目馬上想到雪花,曾經有一次去玩雪,結果遇上了大風暴,整片山都是白茫茫的一片,很懷念那時暴風雪吹襲之後,陽光照射在雪地上的美景,用雪花片做white on white ATC應該很棒,但又怕做不完考慮很久還是不想錯過這個機會。就 craft away 吧!
這次的準備功夫不少,為了要展現一層一層雪花的立體感,裁切了不少大大小小的雪花片,雪花片除了使用白色卡紙還使用的銀色卡紙丶亮片卡紙丶描圖紙以及雲紋水晶紙。多出來的還可以留著做聖誕卡片。
將大大小小的雪花疊在一起,大概疊個四層或五層,儘量每一層使用不同的材質,而且每一片雪花的形狀都不太一樣,決定好之後就可以上膠了。
雪花片準備好之後,再來是準備背景的襯紙。這是使用了型版以及珠光浮雕膏。沒想到買了三年多的浮雕膏還是相當不錯,一點乾掉的跡象都沒有,不過用完之後一定要把蓋子蓋好才能保存久一點。
這次用了四種型版,也順便多做幾張大張的,方便日後使用,畢竟開蓋子的次數會增加浮雕膏變乾的機會
再來就是在背後註記這次的ATC,找到了數字和字母的章,剛好編排第29次ATC的題目,加上找到一個小的雪花章完成了這次ATC的註記。最後就是組合啦!
這些是部分的大合照!
Picture
Picture
Picture
謝謝觀賞~
Supplies:
Pinkfresh Studio Die- Layered Snowflakes  PFSA2820
​Altenew  Layered Snowflakes Die ALT2708
Simon Says Stamp sssd111308 Eliza Snowflake
​Simon Says Stamp sssd112038 Marie Snowflake
Stamper Anonymous Tim Holtz Collection Mini Layered Stencil #18 MST018
Stamper Anonymous Tim Holtz Collection Layered Stencil Speckles THS021
Altenew Stencil Tiny Bubbles ALT1632
Simon Says Stamp ssst121357 Waves Stencil
Dreamweaver Pearlescent Embossing Paste


0 Comments

Dual Hexagon card #3

11/12/2020

0 Comments

 
This is another set of cards using Pinkfresh Studio Simply Hexagons die. This time I have used both the hexagon stamp and die set. These will be for charity as well.
Picture
I used distress oxide ink to blend the hexagon pieces. On the pictures, I typed the color of the ink pad that I used. After blending, I heat embossed the flower and sentiment, which spelled out sending hugs. After that, I put foam adhesive on the back of each hexagon and assembled them on a white cardstock using the cutout of the hexagon die frame as a guide. Then remove the frame once all the hexagon pieces have been glued on.
Picture
Picture
Supplies:
Pinkfresh Studio Simply hexagons die PFSA2320
Pinkfresh Studio Cling Rubber Background Stamp Set A2 Pop-Out Hexagons PFCR1320
Thank you for visiting~
0 Comments

Hexagon Sending Hugs card #2

11/9/2020

0 Comments

 
I did something very different for this card. All the hexagon pieces are from the advertisement that I collected over the year. Some of the hexagons were pieces that I stamped imperfectly and was going to go to the trash bin. But since it is small enough, I was able to repurpose it. I am glad it turned out to be great.
Picture
These are the papers that are ready for upcycle.
After cutting them out, I put all the pieces in place one layer at a time. Sandwich between the acrylic block. The benefit of doing a sandwich is that you're able to reduce the chance of pieces moving around. Moving one layer without moving everything else all together will be easier if you make a sandwich. Once I decided on the look, I started to adhesive from the bottom layer and stuck it on white cardstock. After that, move on to the middle layer, then upper layer with foam tape and heat embossed sentiment. In the last minute, I decided to add velum paper leaves to add more depth. Then the card is complete.
Supplies:
Pinkfresh Studio Simply hexagons die PFSA2320
Pinkfresh Studio Cling Rubber Background Stamp Set A2 Pop-Out Hexagons PFCR1320
Random ephemera
Thank you for visiting~
0 Comments

Dual Hexagon Thank You Card

11/6/2020

0 Comments

 
This is a pair of thank you cards that I made for charity. With so much going on in the world, we have so much to thank for. 
Picture
I always wanted to make cards using either hexagon stamp or die. Finally I got a stamp and die set from Pinkfresh Studio. For these two cards, I used just the hexagon die and saved the stamp set for some other time.  For the preparation, I have made some background choices using embossing folder and sentiment  stripe for the card. In addition, I have die-cut some flowers that I plan to use on the card. I have not decided to use which one yet. 
Picture
Once I have everything ready, all I need is to die cut the floral cardstock with hexagon die and start the assembly.  Here are the final look for the cards.
Picture
Picture
Supplies:
​Pinkfresh Studio Simply hexagons die PFSA2320
Alexandra Renke Blubber die
Alexandra Renke Poppy Flowers die ARFL002
Birch Press Design CL8151 You are awesome clear stamp set
Simon Says Stamp SSS101782 You got this clear stamp set
Thank you for visiting~
0 Comments

Merry and Bright Holiday card

11/3/2020

0 Comments

 
Snowflake is magical. It is always a joy to use snowflake dies on Christmas card.
Picture
This is quite a straight forward card making process. First choose a snowflake scene cardstock and blend the edges with blending tool using vintage photo, and walnut stain distress oxide ink. Then die cut the large snowflake with silver cardstock, and smaller snowflakes with silver glitter, white and velum paper. After that, die cut the word Merry with red cardstock. Last but not least, assemble all the elements then splash some acrylic white paint to complete the look.
Picture
Picture
Picture
Supplies:
Pinkfresh Studio Layered snowflakes dies
Spellbinders November 2019 small die of the month Kaleidoscope snowflake
Simon Says Stamp Merry frame dies
Thank you for visiting~
0 Comments

    Author

    Elaine Lin
    San Francisco USA

    Picture
    elainelaine.com

    Archives

    November 2022
    December 2021
    November 2021
    October 2021
    May 2021
    January 2021
    December 2020
    November 2020
    October 2020
    July 2020
    June 2020
    May 2020
    April 2020
    March 2020
    February 2020
    December 2019
    November 2019
    October 2019
    September 2019
    August 2019
    July 2019
    May 2019
    April 2019
    March 2019
    February 2019
    January 2019
    December 2018
    November 2018
    May 2017
    March 2017
    February 2017
    January 2017
    December 2016
    November 2016
    October 2016
    April 2016
    March 2016
    February 2016
    December 2015
    November 2015
    October 2015
    September 2015
    April 2015
    March 2015
    February 2015
    January 2015
    December 2014

    RSS Feed

    Categories

    All
    12 Tags Of 2015
    Announcement
    Artist Trading Card/Coin
    Art Journaling
    Birthday Card
    Cards
    CHA 2015
    Challenges
    Chinese Lunar New Year
    Christmas
    Papercrafting
    Tags
    Thank You Card

    Picture
    Picture
    Simon Says Stamp Monday Challenge Blog
    Simon Says Stamp Wednesday Challenge Blog
    Picture
    Picture
    Picture
    Picture
    Picture
    Picture
    Picture
    Picture
    Instagram
    Picture

elainelaine.com@gmail.com